How to Embed StreamAlive Interactions Into Your Favorite Apps?
Written By Donkin Lyngdoh
Last updated About 1 month ago
Perhaps you just discovered StreamAlive while looking for ways to boost audience engagement, or maybe you're already familiar with our unique chat-powered interactivity.
Did you know that you don't need to switch tabs or force your audience to scan QR codes to use StreamAlive?
You can embed your live interactions directly into any platform, website, or presentation tool that supports Web Embeds or iFrames (like Gamma, Notion, Miro, WordPress, and more).
This guide will show you how to grab your universal interaction link and drop it into any platform to transform a static page into a live, breathing conversation.
What is a StreamAlive Embed?
StreamAlive is an audience engagement platform that tracks the live chat of your meeting and streaming platforms (Zoom, Microsoft Teams, YouTube, etc.) and transforms it into real-time visuals like word clouds, polls, and maps.
By using our universal interaction links, you can place these visuals directly inside your existing workspace. Your audience doesn't need to open a separate link; they just type in the meeting chat, and the magic happens live on your embedded screen.
Step-by-Step: How to Embed a StreamAlive Interaction
Follow these universal steps to add StreamAlive to any platform that supports embeds:
1. Copy Your Universal Interaction Link
Log in to your StreamAlive account (app.streamalive.com) and open your presentation.
If you haven't created a presentation yet, click here to learn how.
Look at the left-hand panel where your slides and interactions are listed.
Right-click on the specific interaction you want to use (e.g., a Word Cloud or Power Poll) and click "Copy interaction link."

2. Paste the Link Into Your Target App
Now that you have the link copied to your clipboard, navigate to the tool or platform you are using to present or host your content.
For Presentation Tools (like Gamma): Add a new card, choose the Webpage Embed block, search for or select the embed option, and paste your link.
For a more detailed guide, click here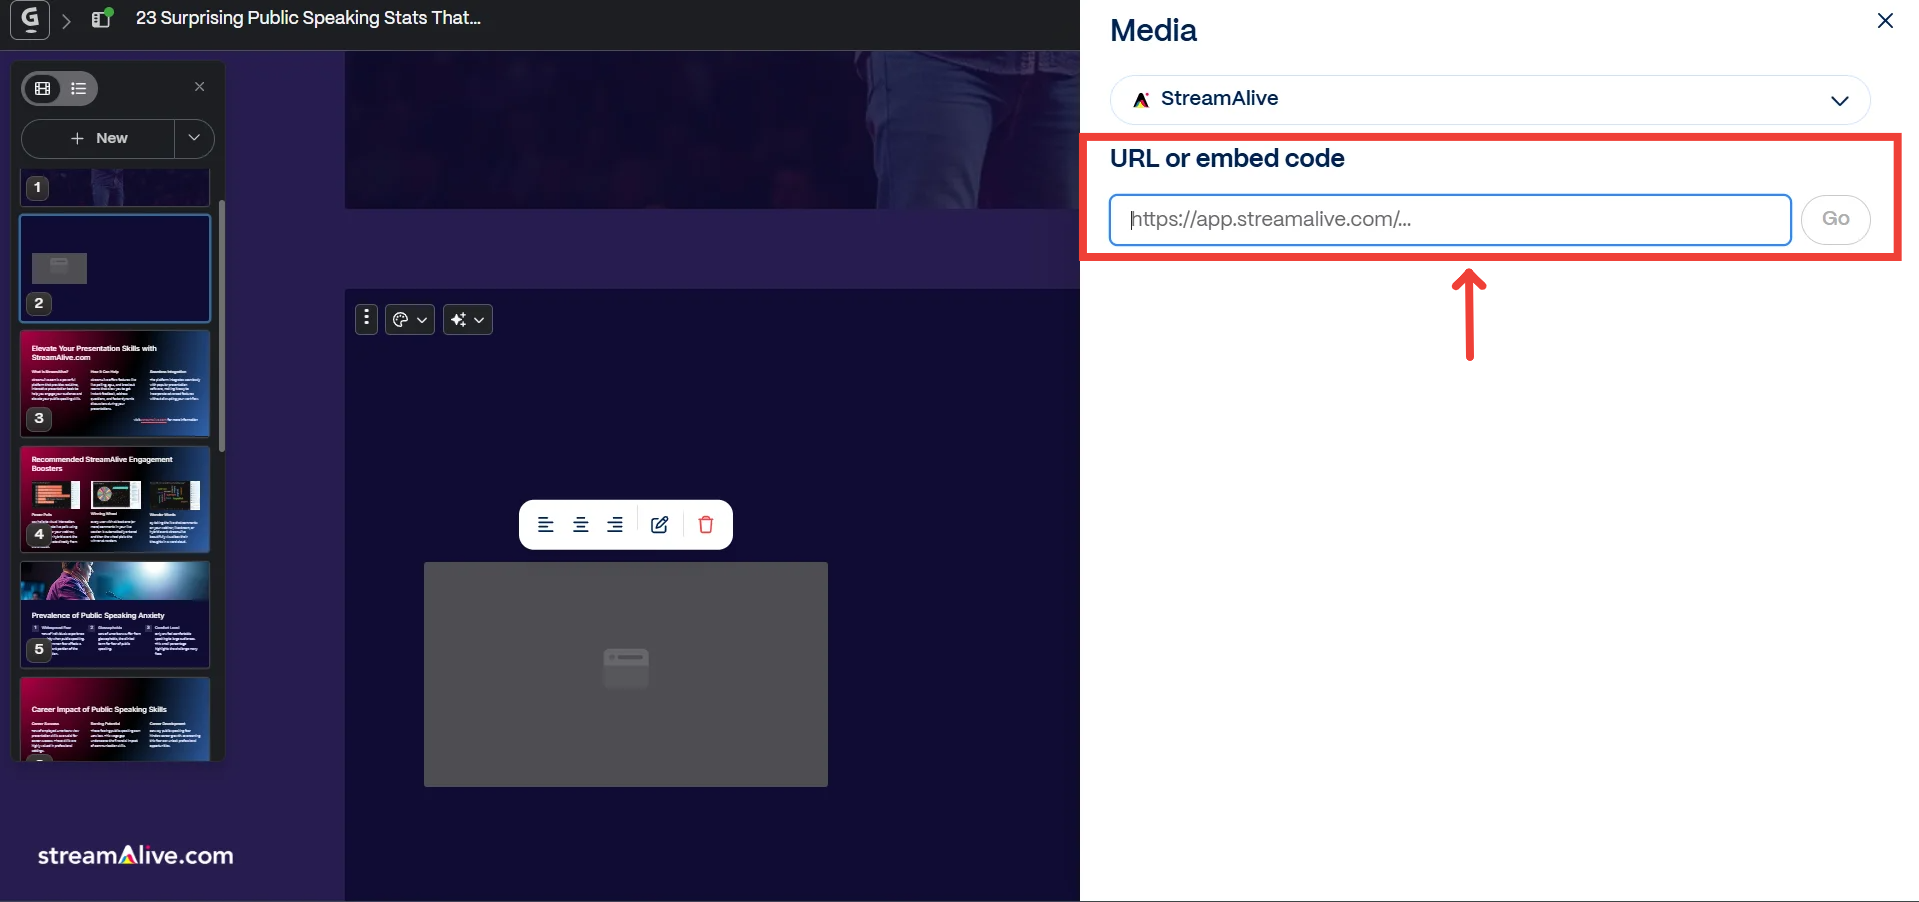
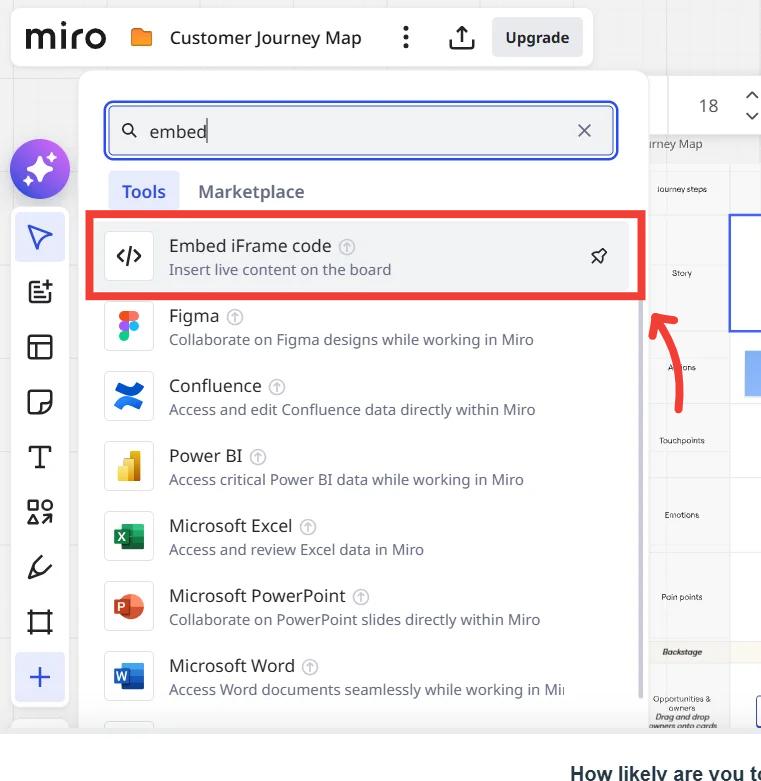
For Workspaces (like Notion or Miro): Type /embed or select the "Embed" widget from your toolbar, paste the StreamAlive link, and press Enter.
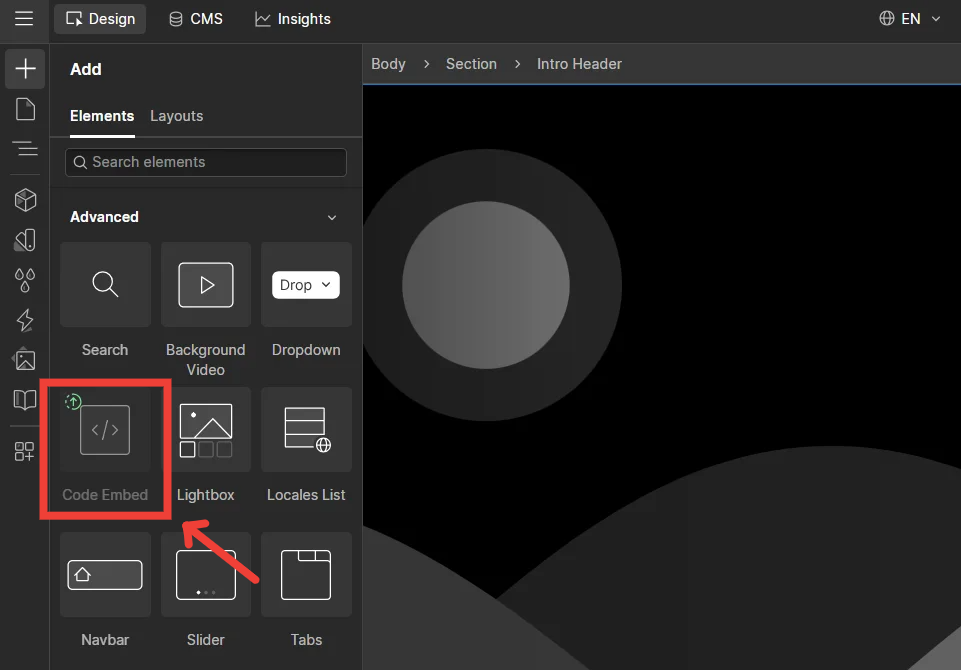
For Websites & Blogs (like WordPress or Webflow): Use a custom HTML or iFrame block, and paste the URL as the source link.
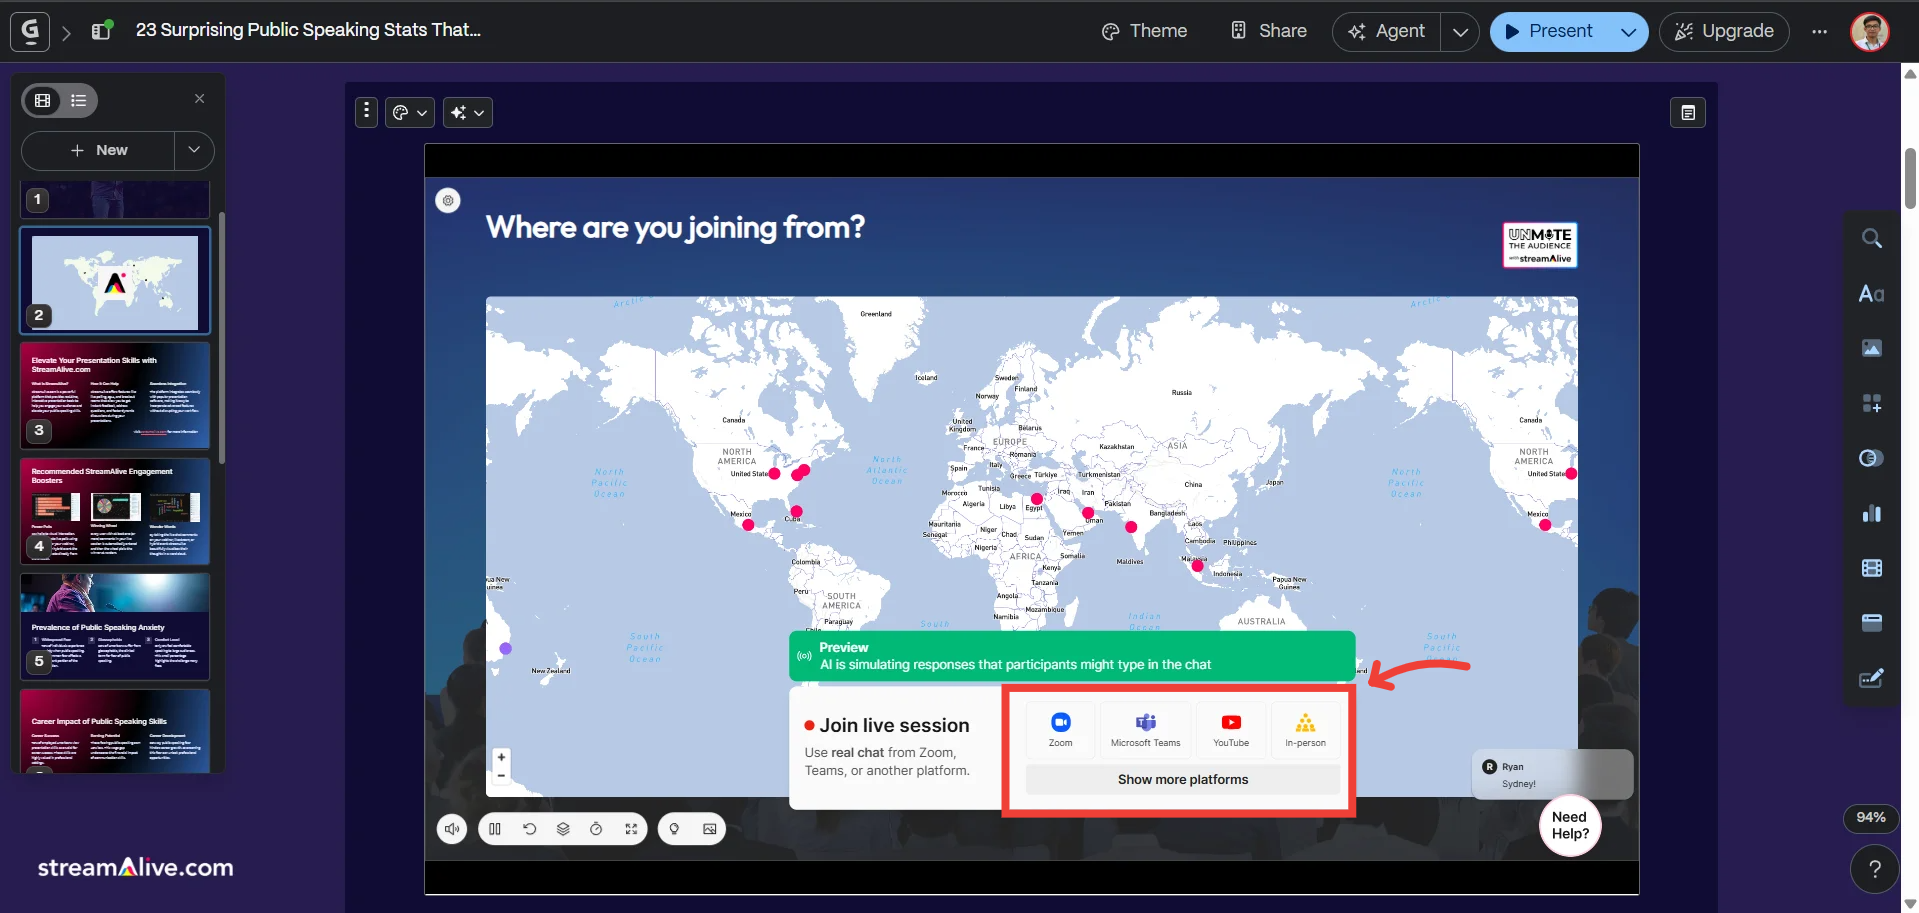
Once you hit enter or save, your live interaction will appear right on the page—complete with a live preview powered by StreamAlive's AI. Repeat this process to add as many interactions as your presentation or webpage needs!
Going Live: Connecting to Your Audience
Once your page or deck is ready, and it is time to present to a live audience, follow these steps to connect the chat data:
Choose Your Platform: Click on the embedded StreamAlive interaction on your screen and select the platform you are hosting your event on (Zoom, Teams, YouTube, etc.).
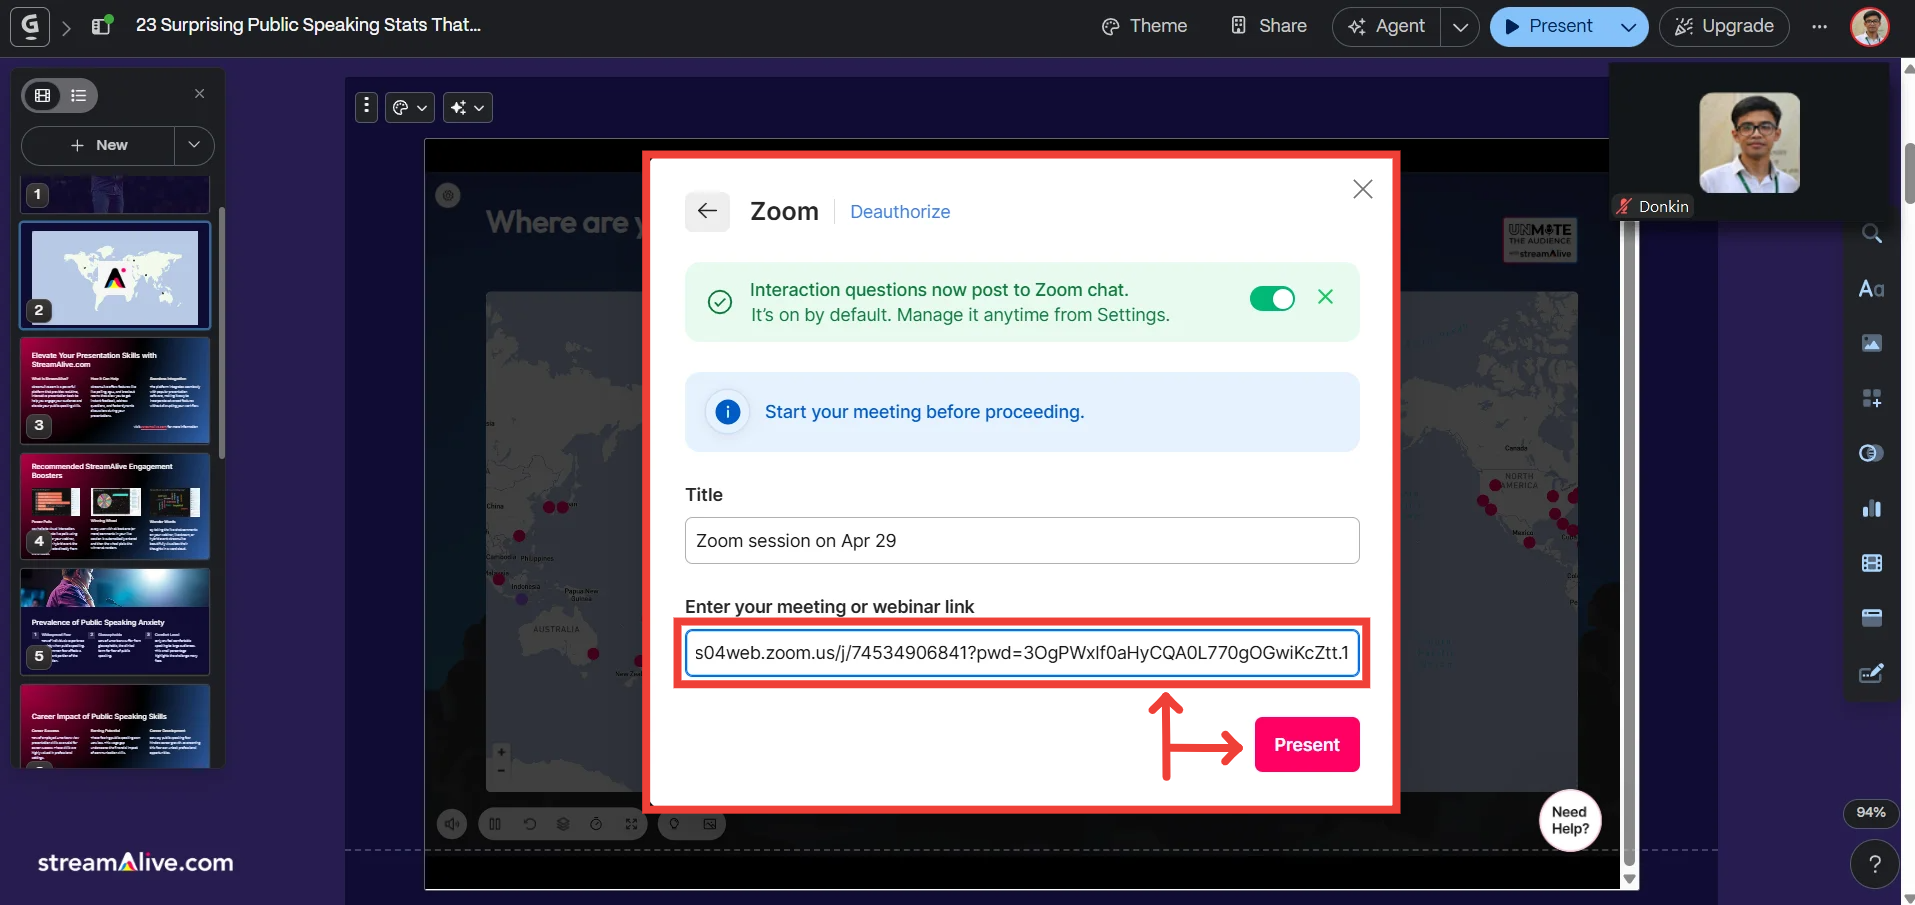
Link the Session: Enter your live meeting or live stream link into the dedicated space so StreamAlive can "read" the chat. (For more in-depth connection guides, click here).
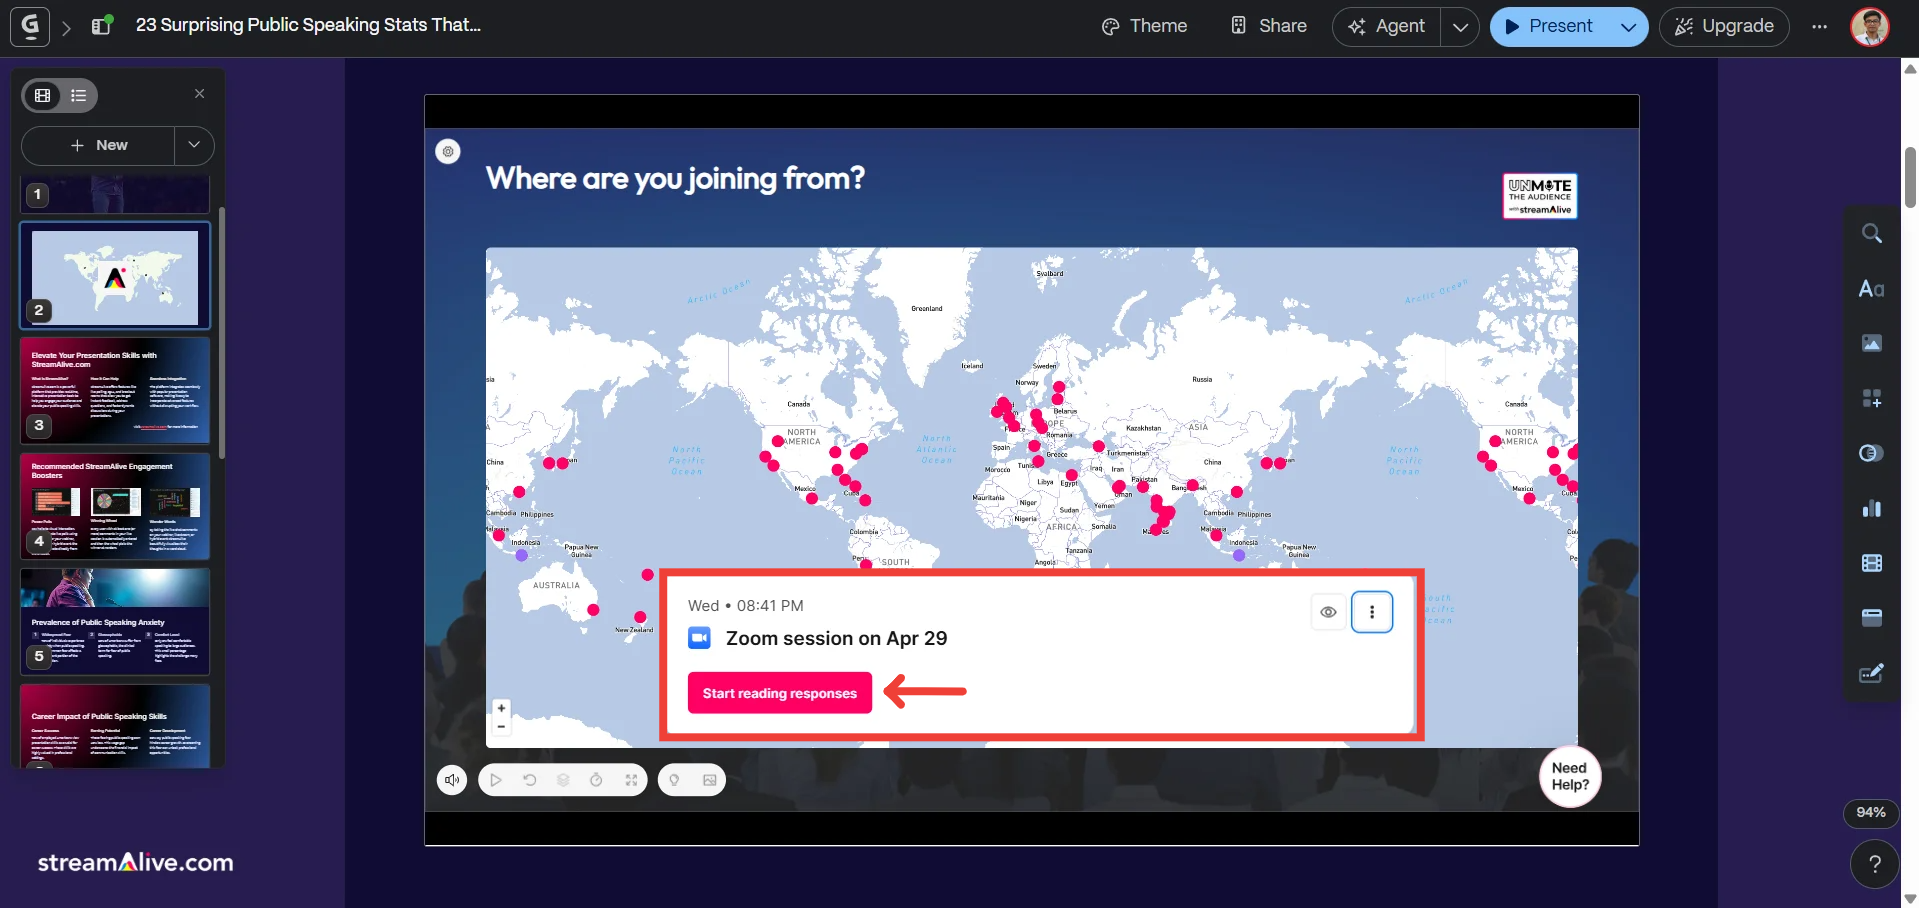
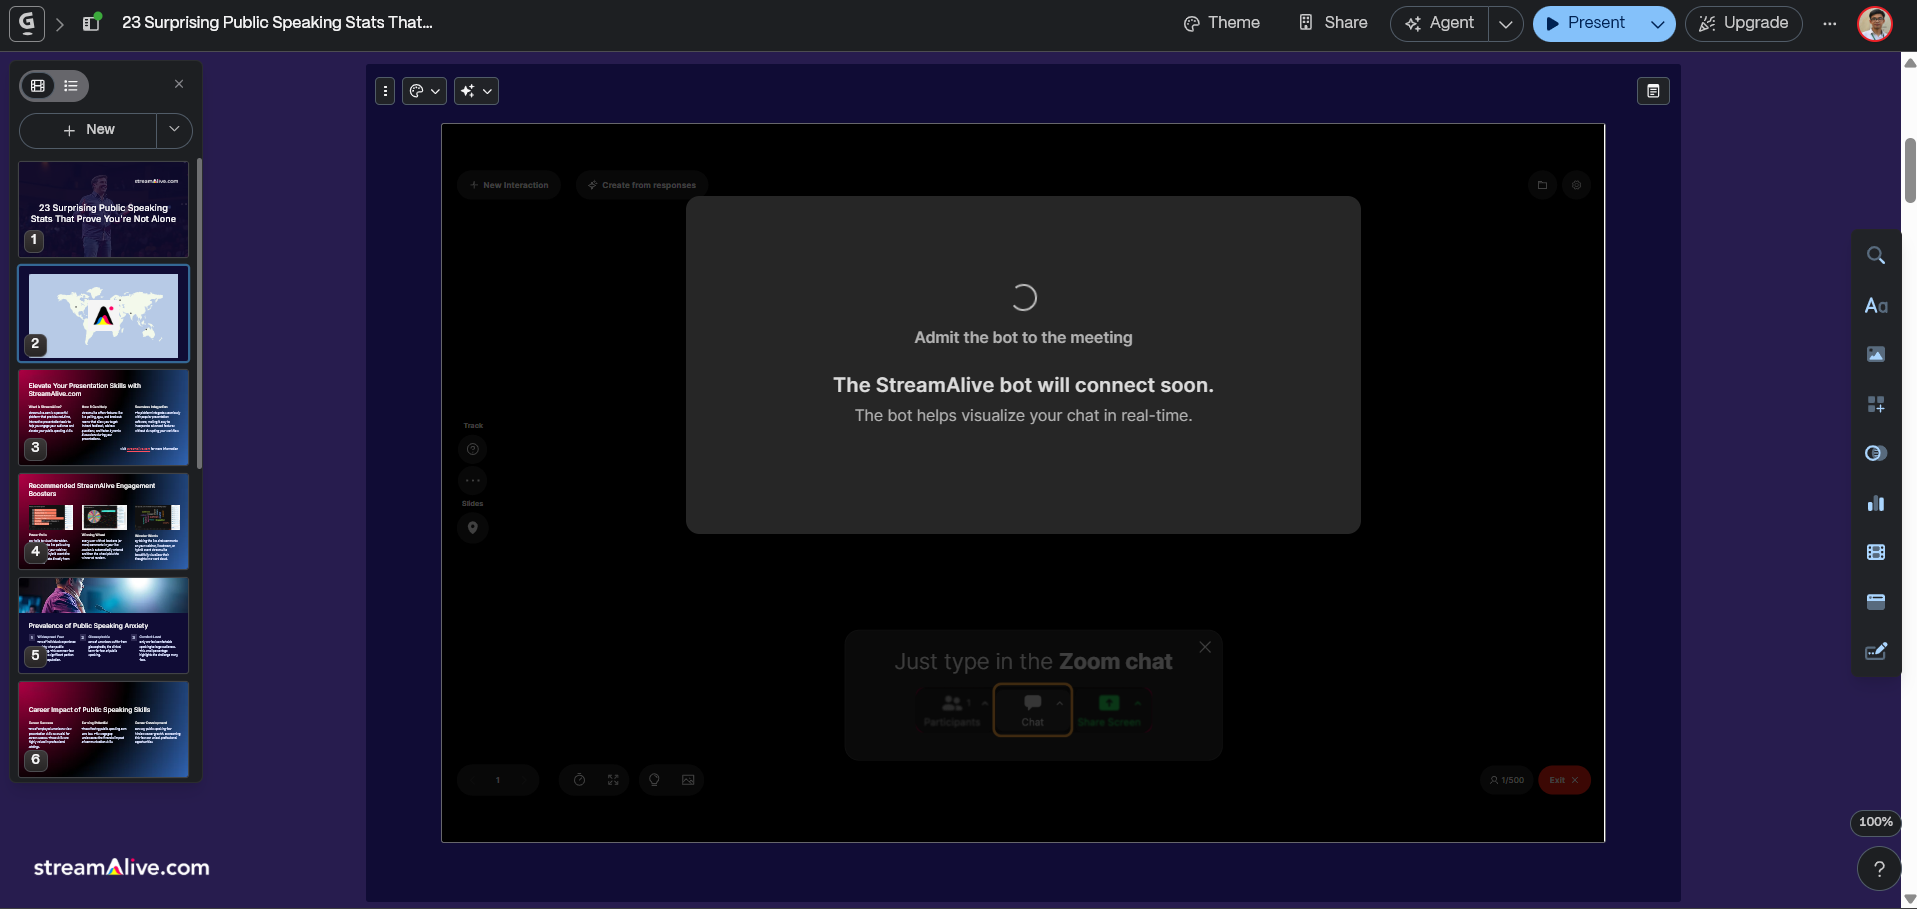
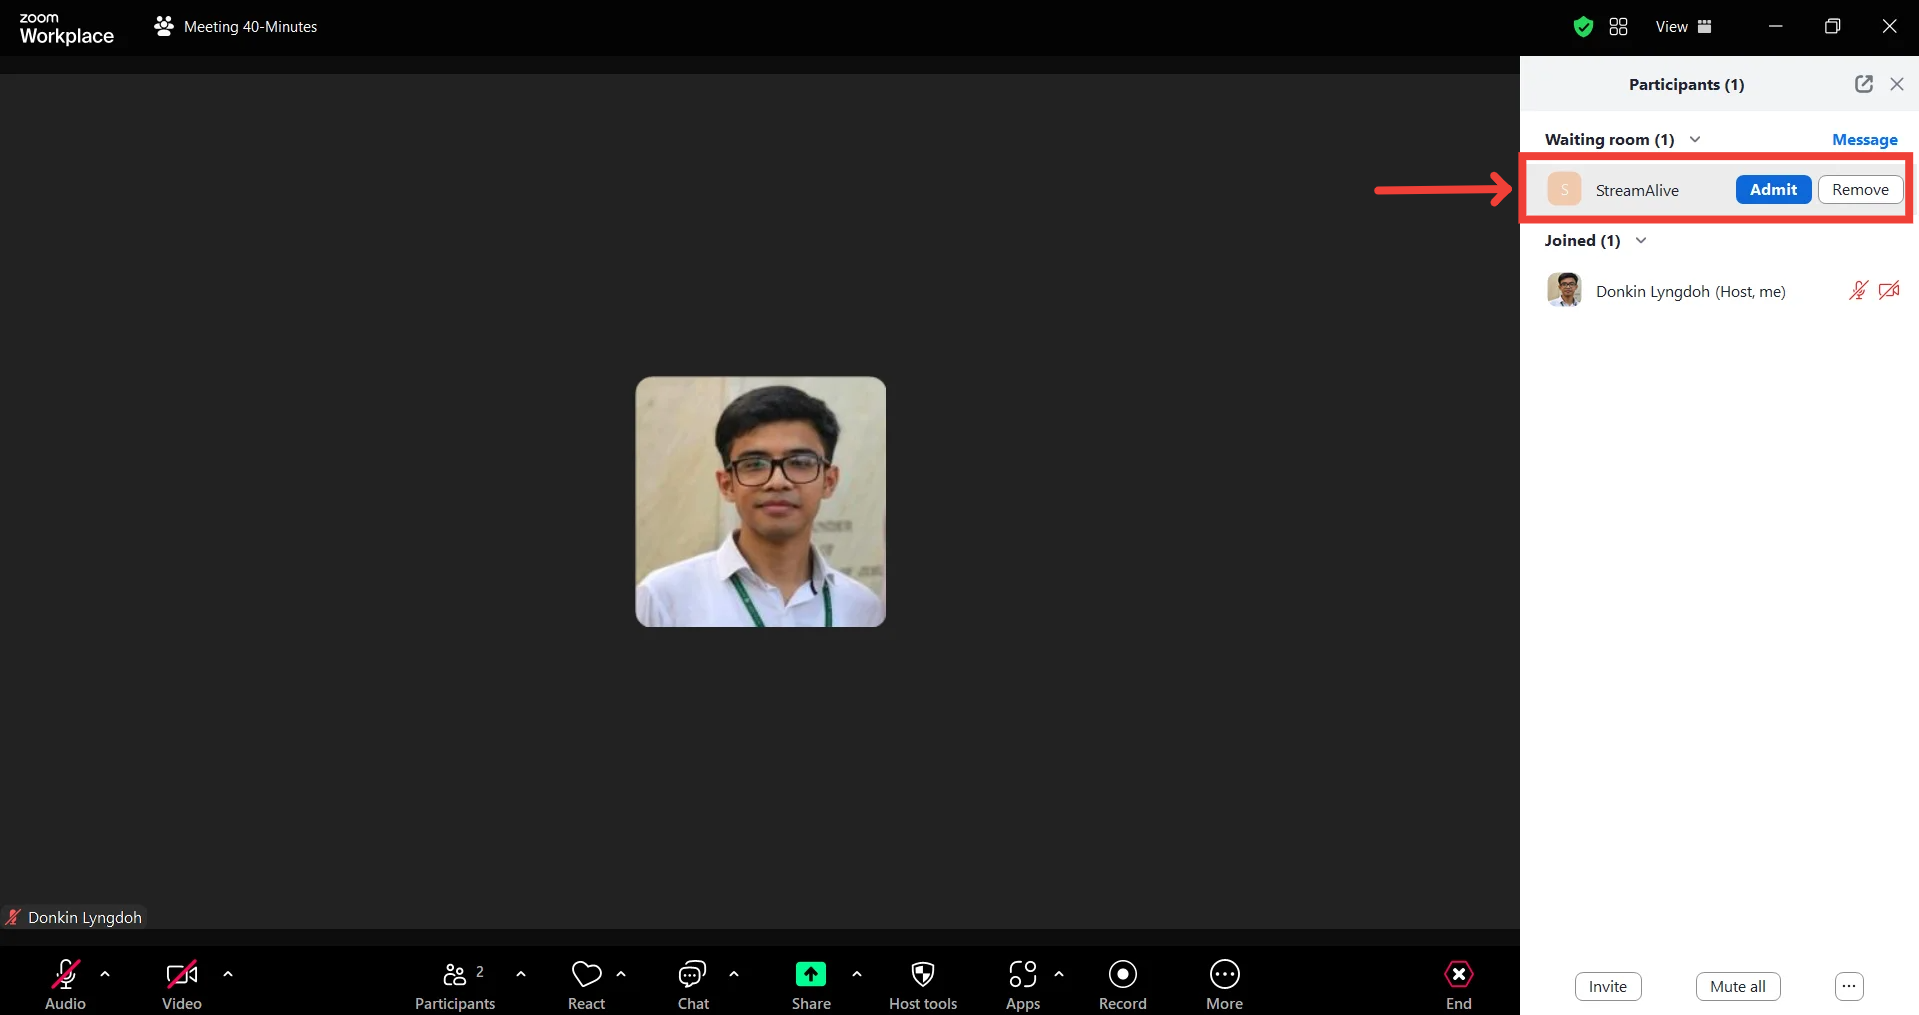
Admit the Bot: If required by your platform, admit the StreamAlive bot into your meeting session.
Start Presenting: Share your screen just as you normally would. Ask your audience to type their responses directly into the platform's chat.
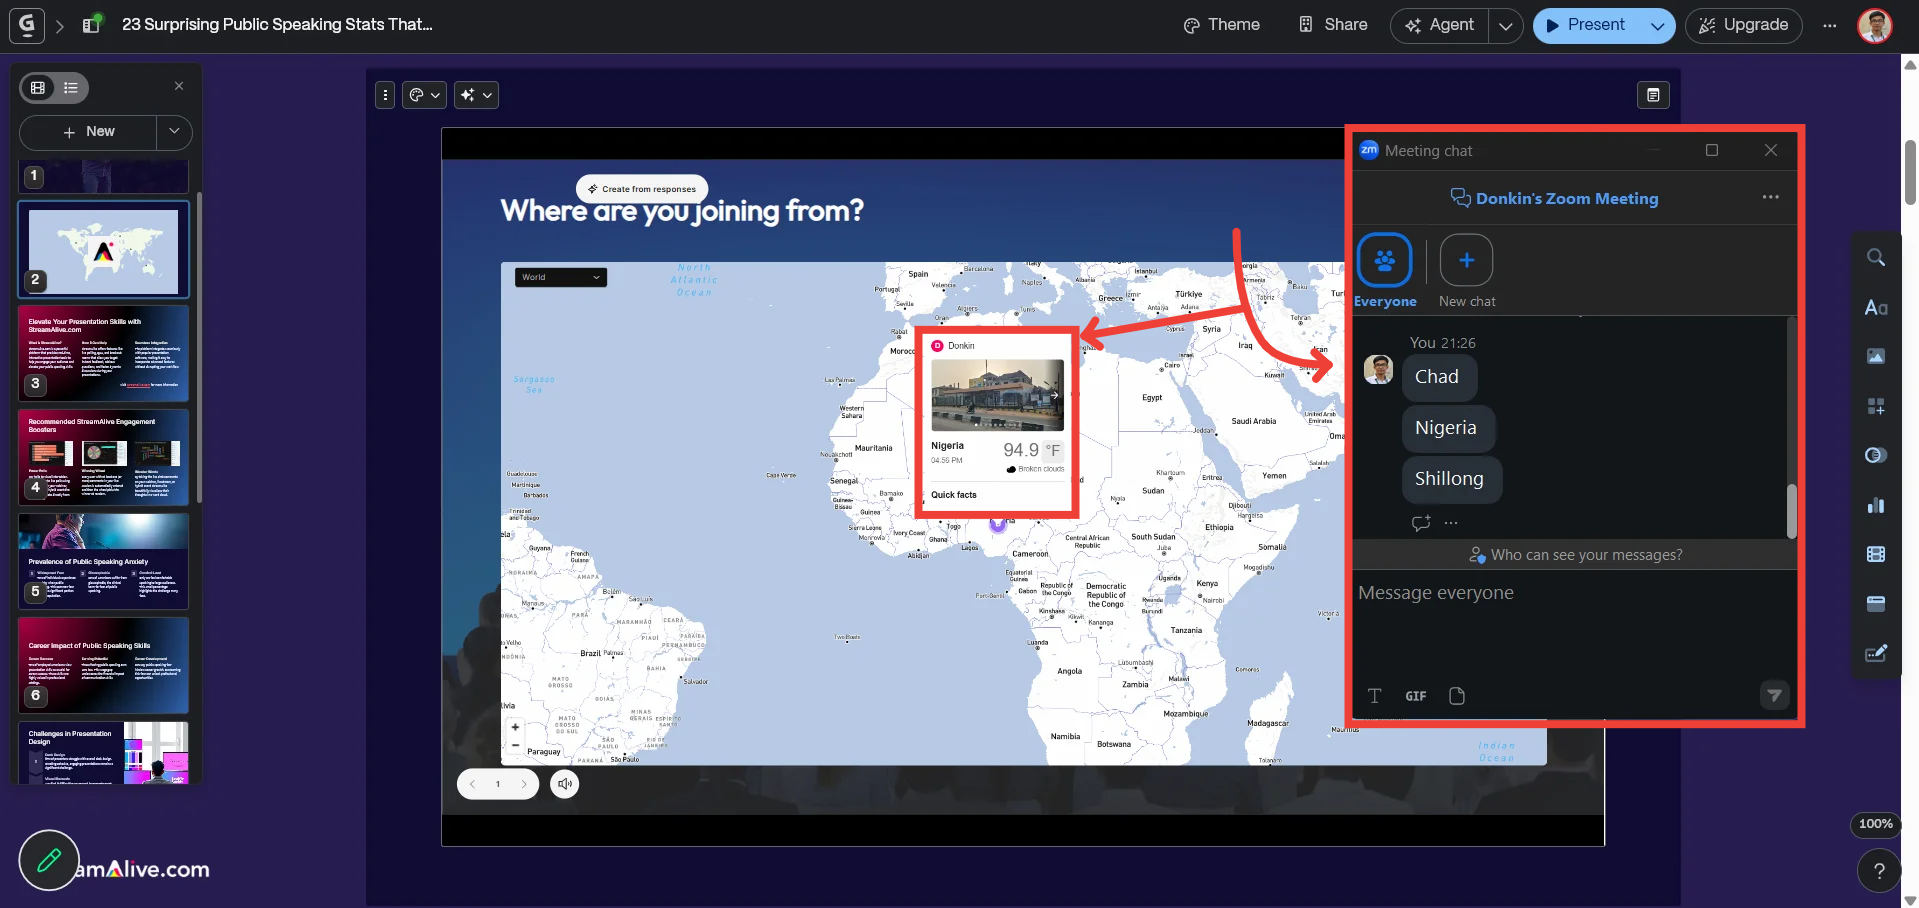
The embedded StreamAlive window will automatically read those chat responses and turn them into stunning, real-time visuals right inside your workspace.
💡 Pro-Tip: Because StreamAlive relies entirely on the live chat, your audience never has to leave your presentation window to participate. They type in the chat, and the embed updates automatically. It’s the ultimate way to keep eyes exactly where you want them!