Connecting to a Zoom Webinar via StreamAlive's App for Zoom
Written By Team Streamalive
Last updated 4 months ago
If you’d like to connect to a regular Zoom meeting using StreamAlive's App for Zoom, then please read How to connect to a Zoom Meeting using StreamAlive's App for Zoom.
Connecting to your Zoom webinar can be achieved in two ways:
Through the Zoom App
In this article, we’ll explain the second point, which is through the StreamAlive app for Zoom. However, here’s the documentation if you’d like to explore using the StreamAlive web app.
The StreamAlive bot connects to your session and picks up your audience's comments. StreamAlive then turns them into the visual interactions on your screen.
Important things to note:
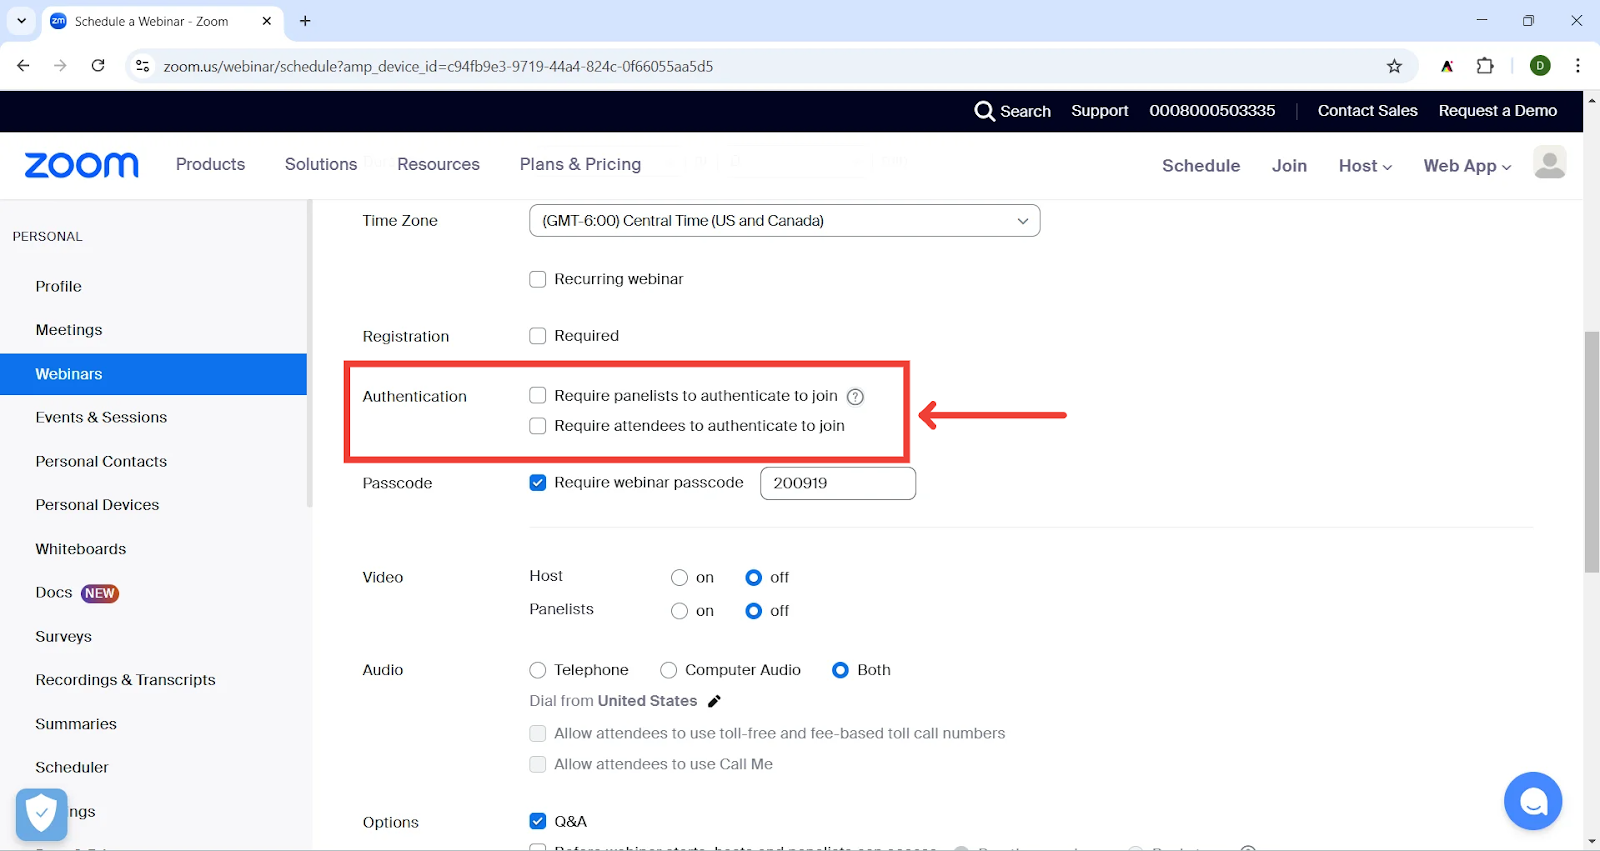
To connect to a webinar, you will need to use a panelist link for StreamAlive to access the session. If you’re not sure where to find the panelist link, refer to the article - How do I find the Zoom Meeting link/Webinar Panelist link?
If attendee authentication is enabled for your webinar, the StreamAlive bot will not be able to join. Make sure this option is disabled when creating your Webinar.
Now that we’ve covered the prerequisites for connecting to a Zoom webinar, let’s dive into the process.
In this guide, we’re assuming that you are ready to start your webinar. If you’re still testing out StreamAlive, we recommend creating a separate webinar event in Zoom so you can try it out first.
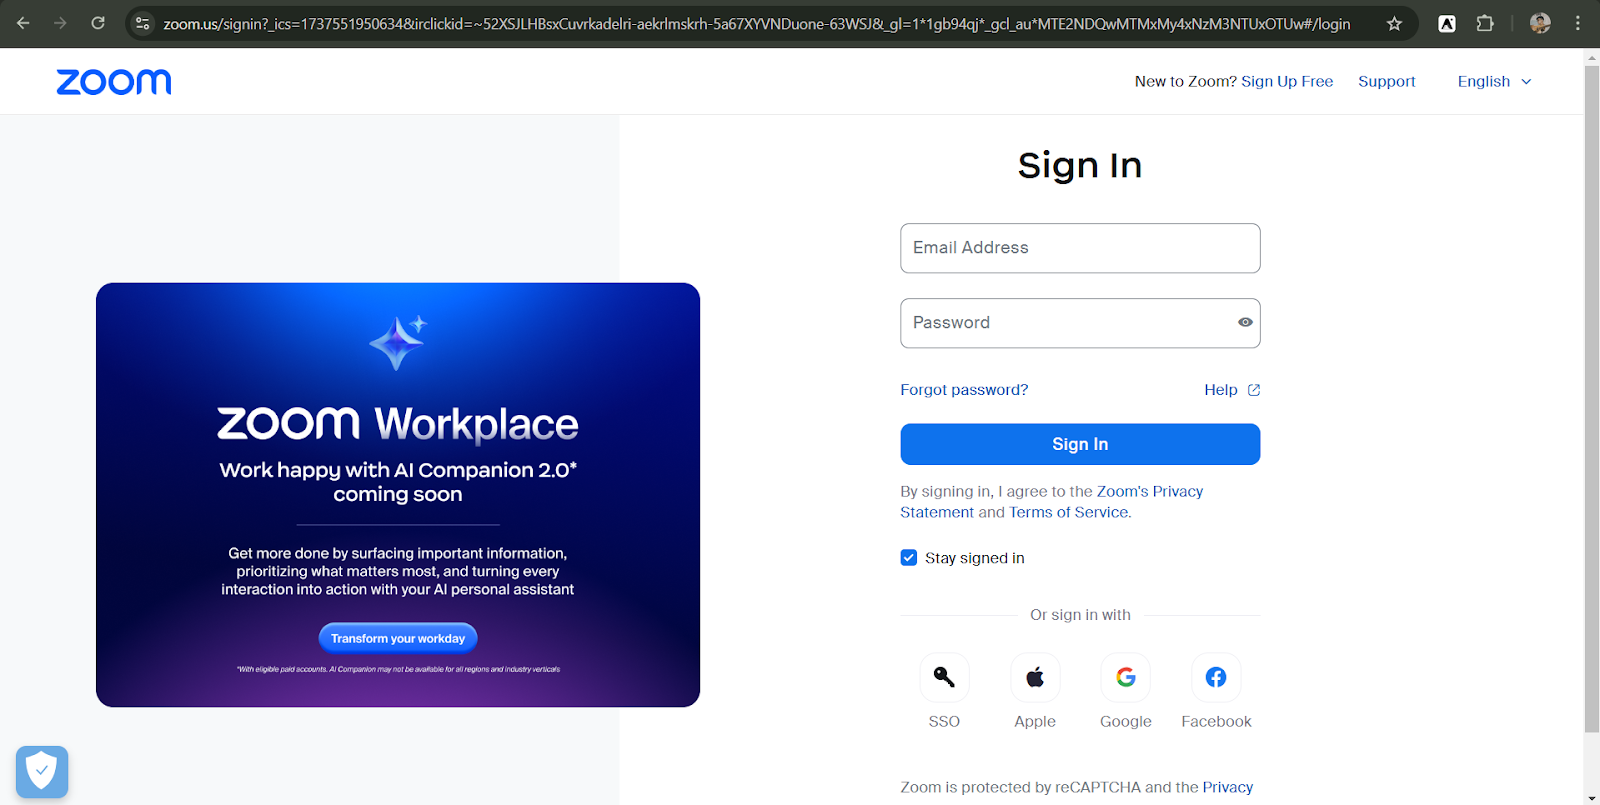
Go to zoom.us/signin
Fill in your login details and click on Sign in
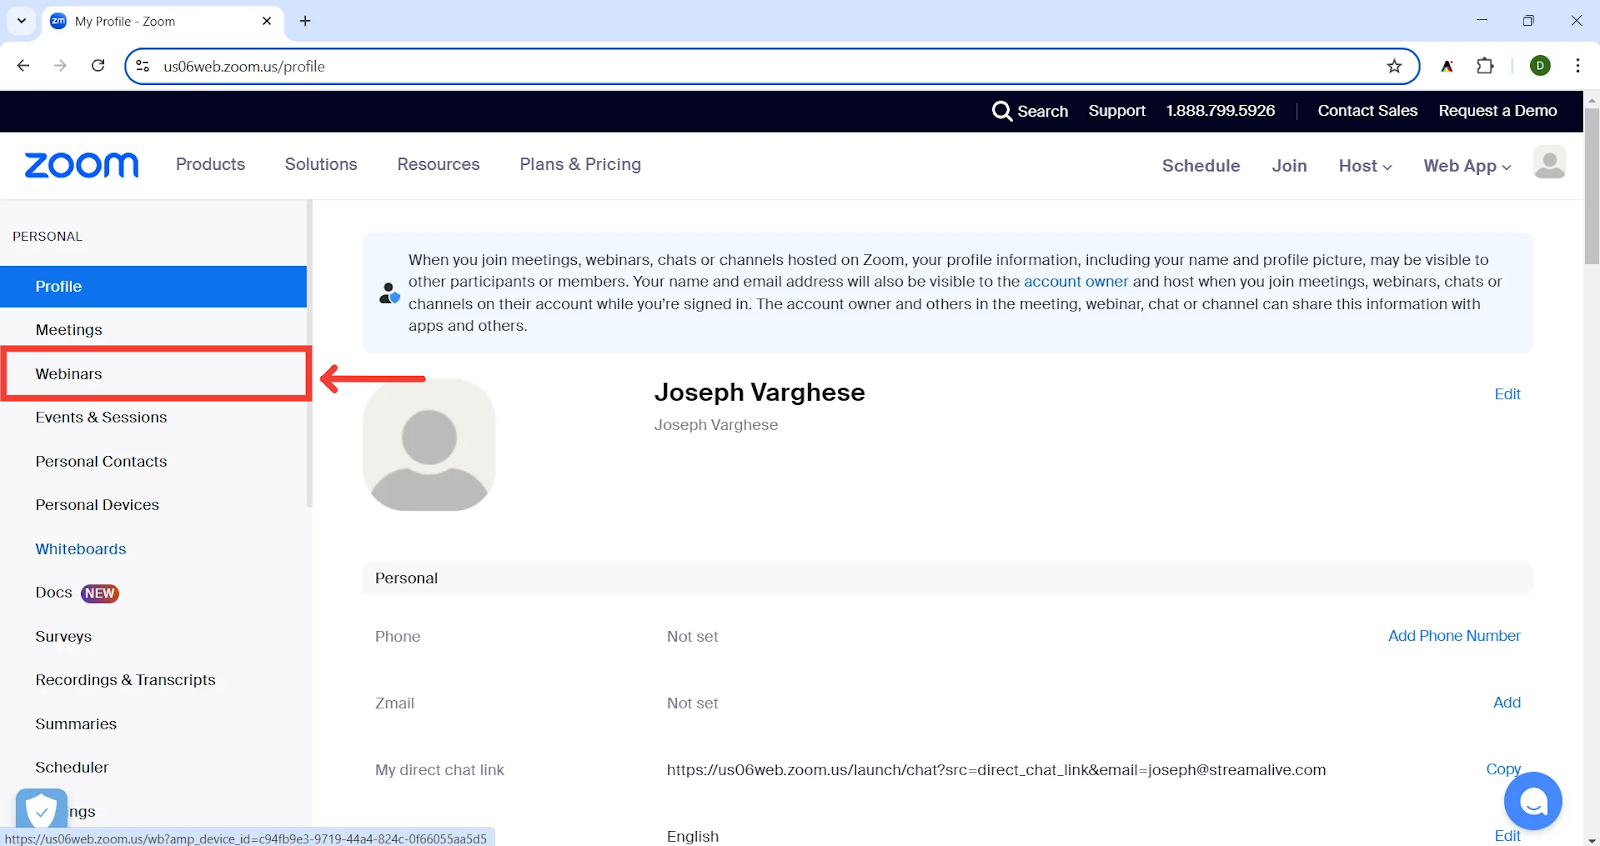
Go to the Webinar tab
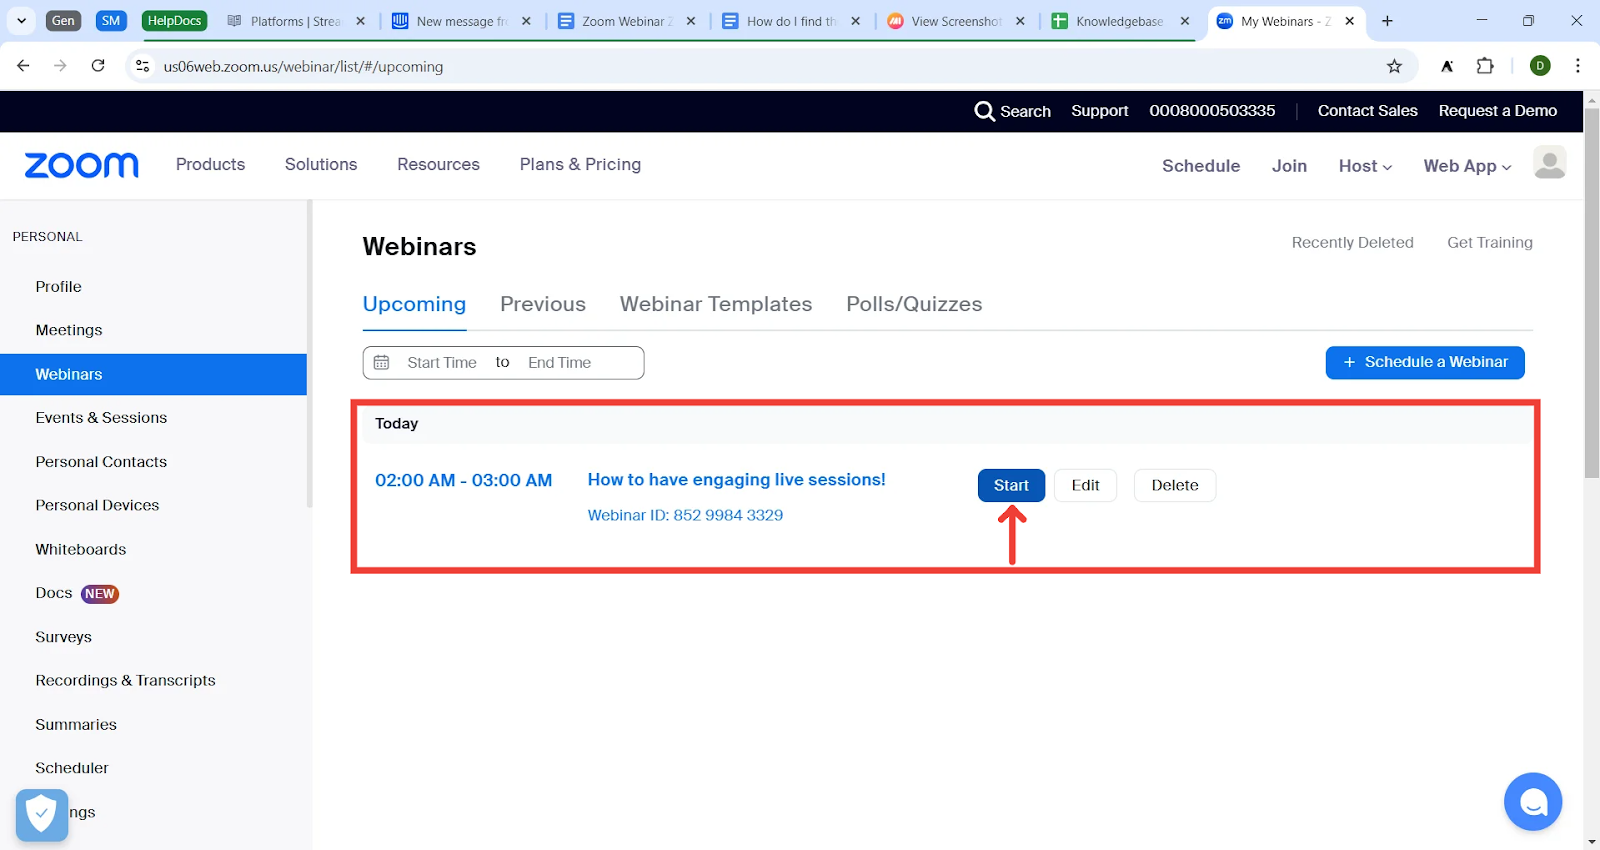
Find your upcoming webinar and click on Start. This opens up the Zoom desktop client on your computer.
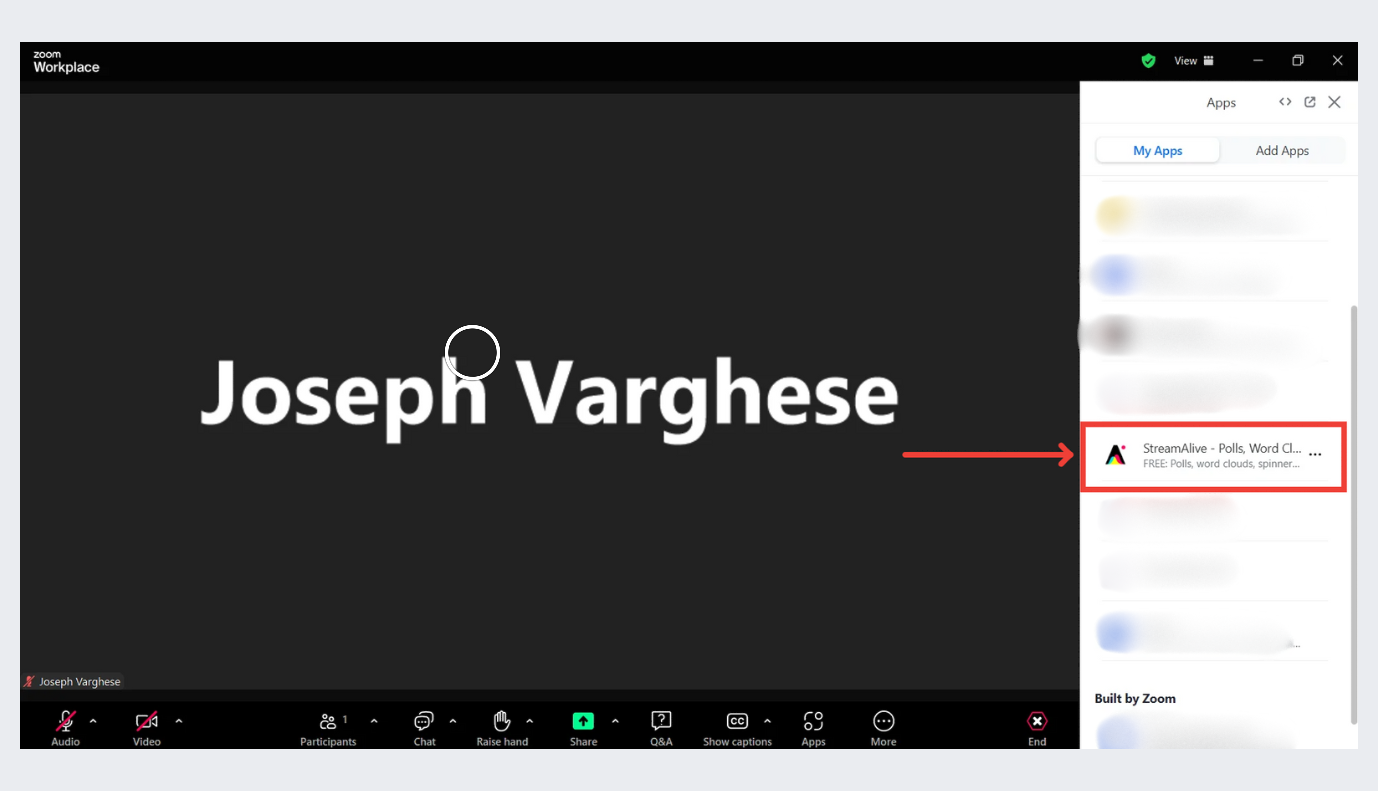
In the Zoom desktop client, go to the Apps screen by clicking on the Apps icon in the menu at the bottom of the screen.
If you do not already have the StreamAlive App added, read our help documentation on adding and removing the Zoom App.
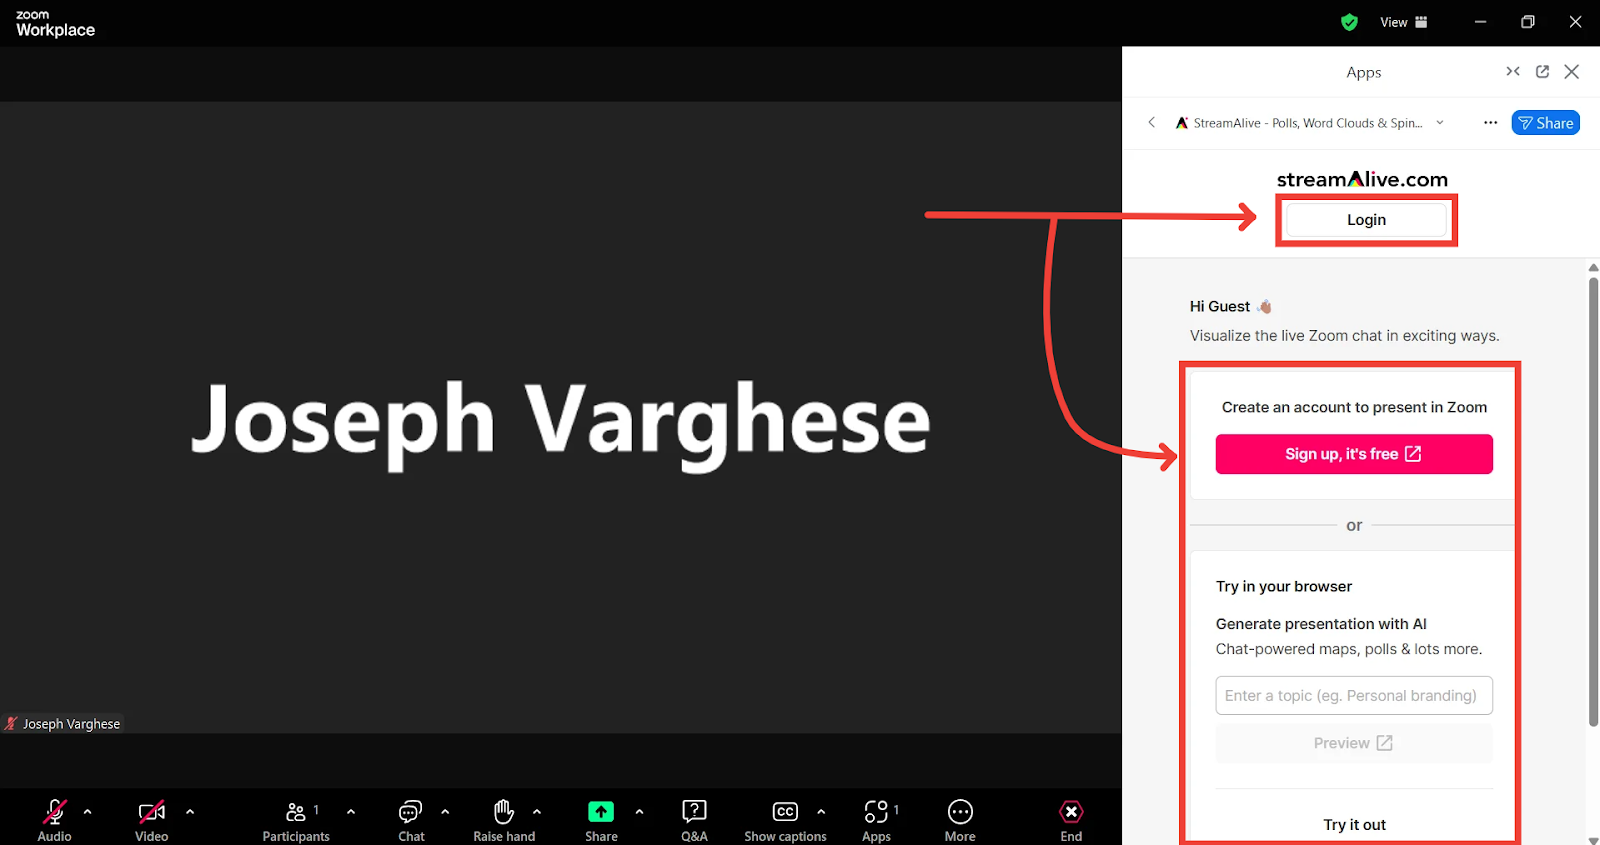
Log in with your StreamAlive account.
If you don't have an account yet, use the Sign-up, it's free option.
You can also use the interaction generator below the sign-up option to see a preview of what StreamAlive can do. It's as simple as entering a topic and clicking on Preview
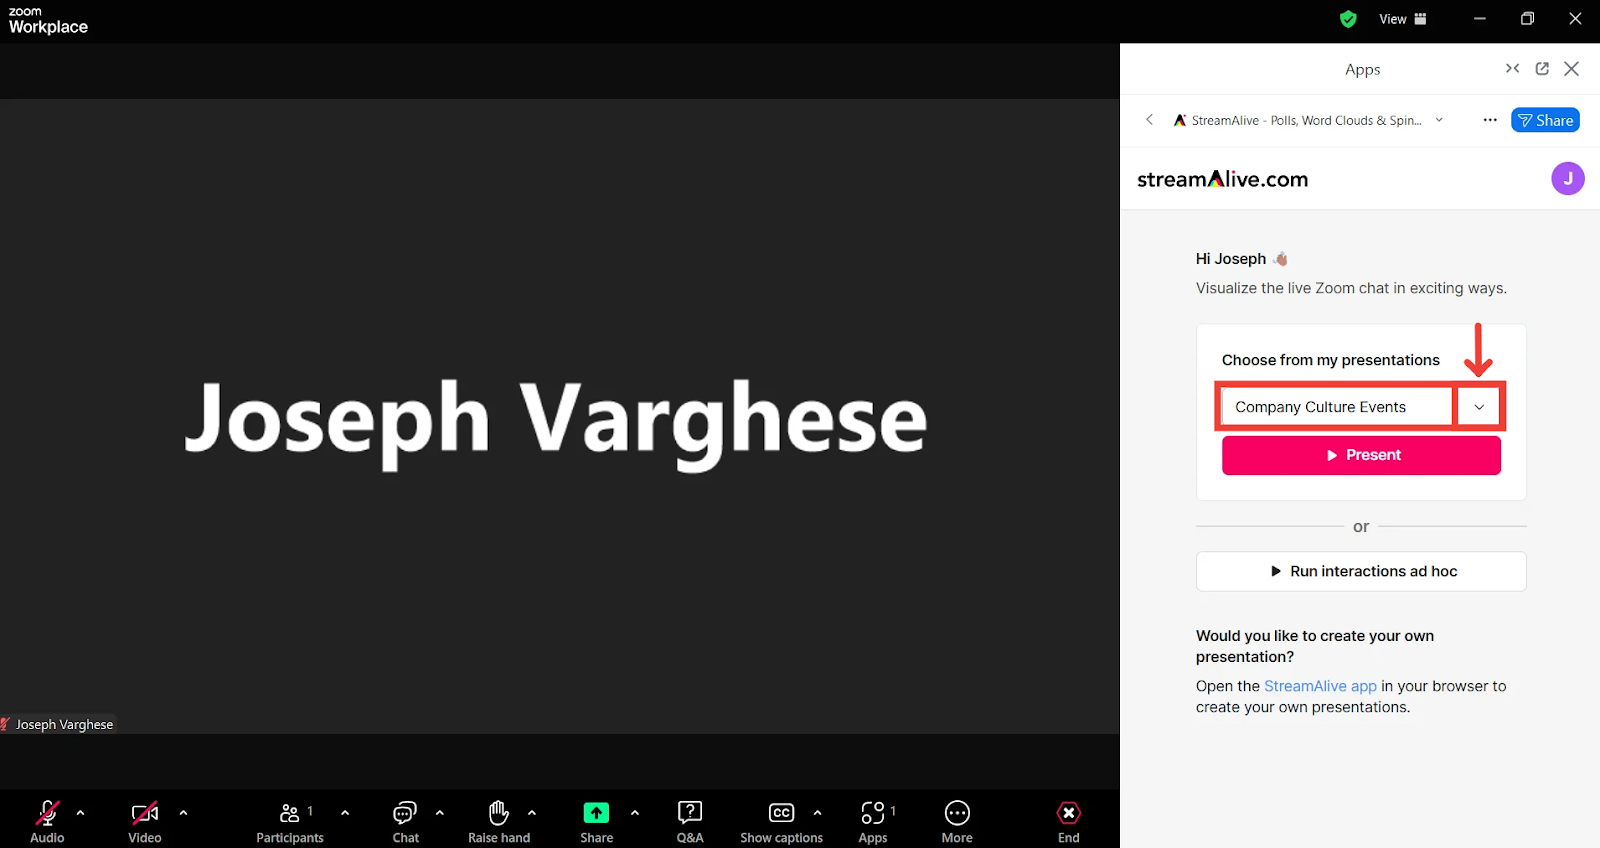
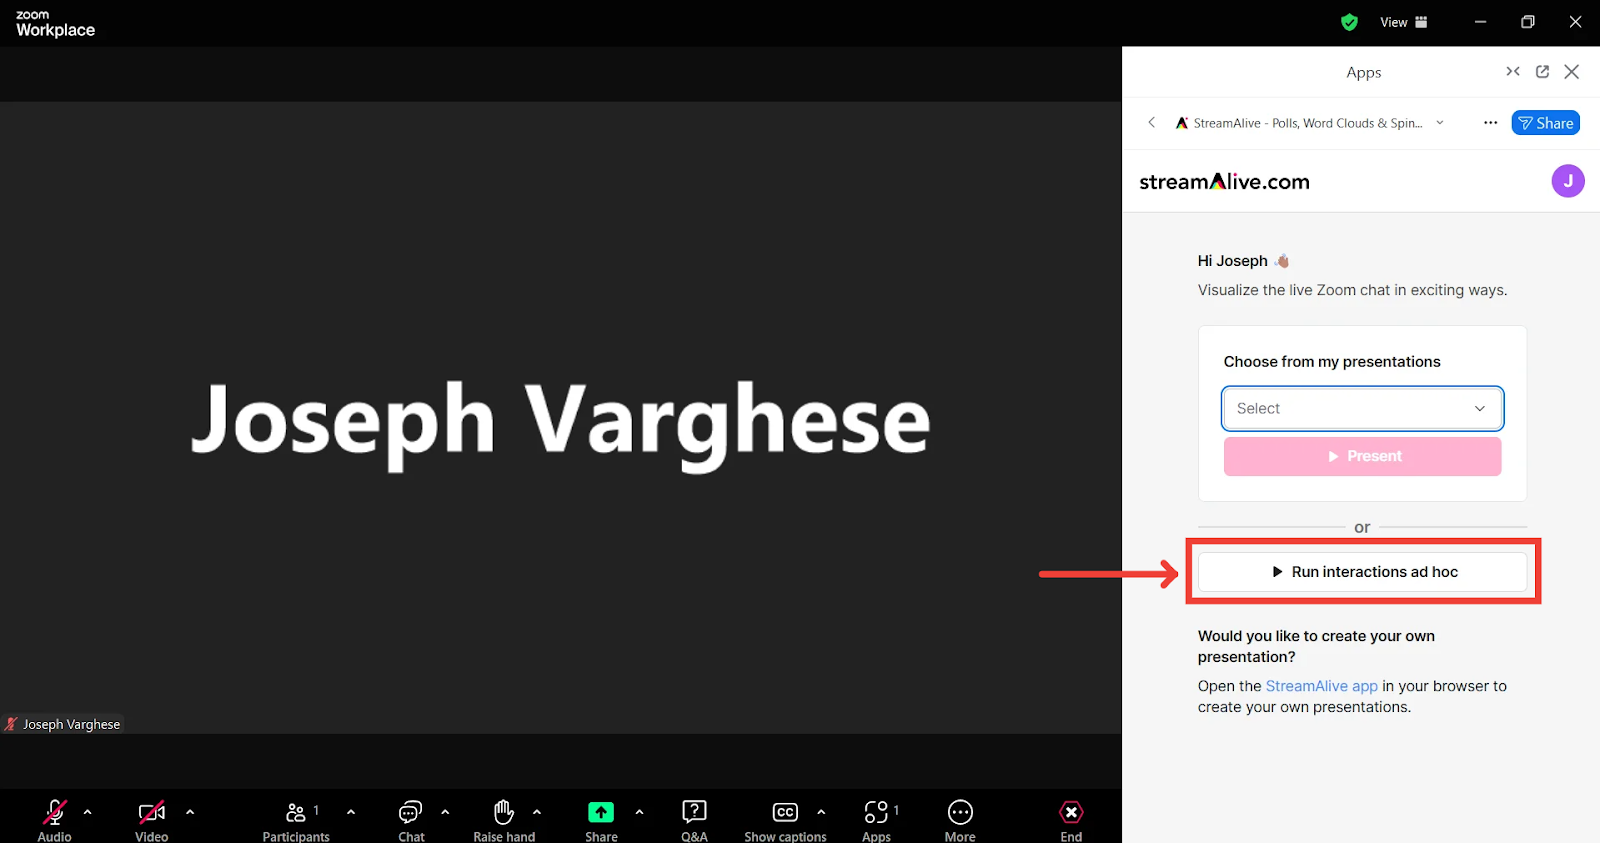
Once you're logged in, you can choose to use one of your existing presentations (if any) or you can continue without one by running quick/ad hoc interactions for your meeting.
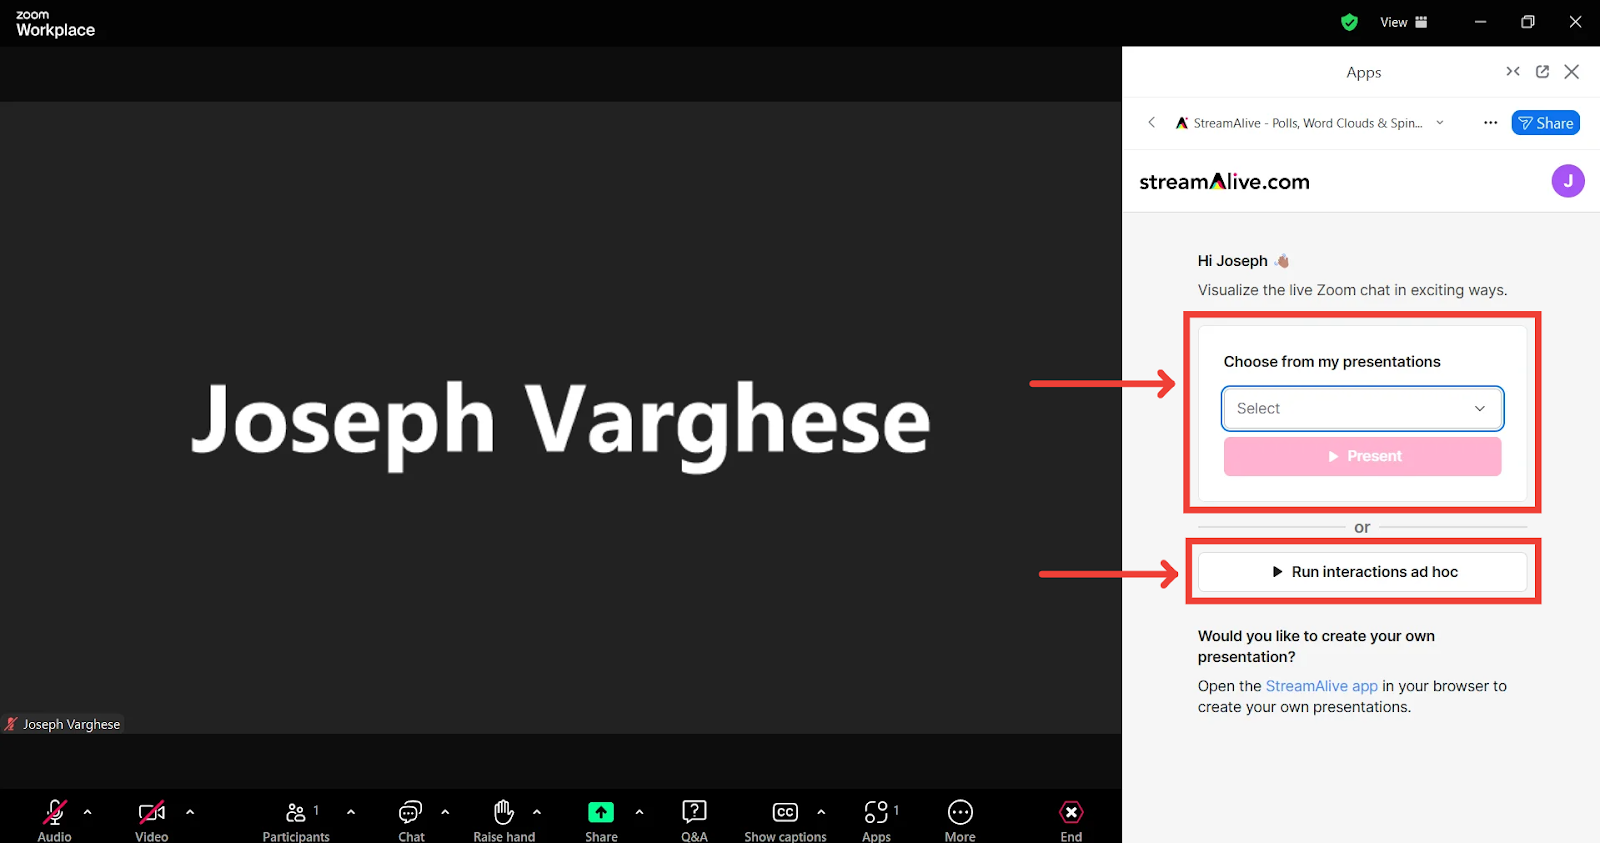
If you choose to use an existing presentation:
Choose one of your created presentations by clicking on the drop-down menu, and then click on Present to continue
StreamAlive's Go Live Presentation screen will open in the app window
This is the window that you need to share with your audience so they can see the interactions. Learn more about how to use the Go Live presentation screen.
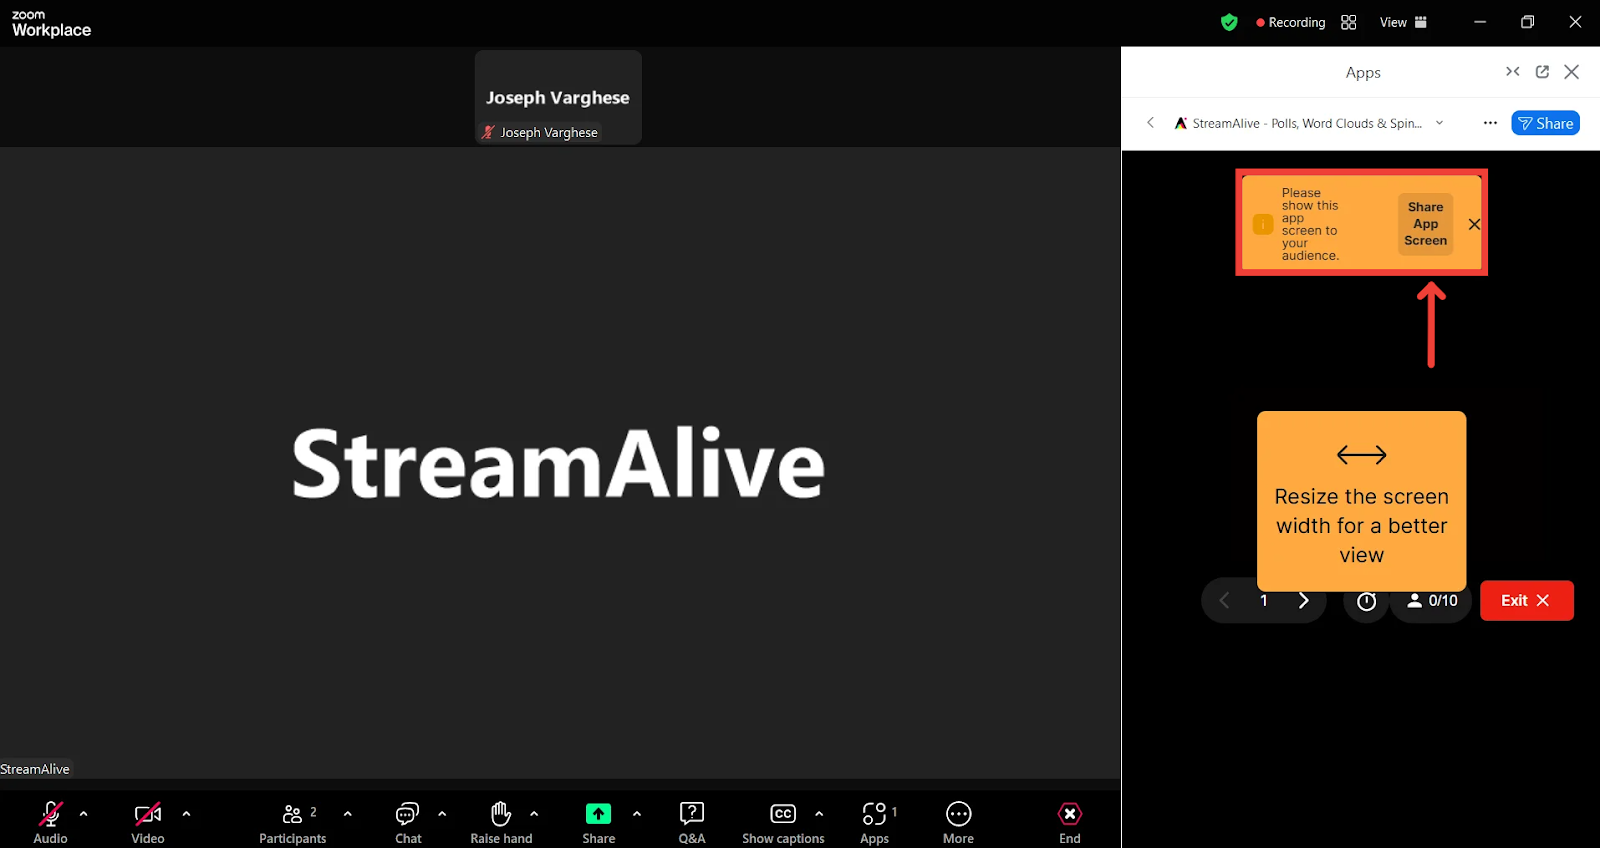
At the top of this app window, a pop-up will appear asking you to share your presentation screen with your audience.
Click on the Share App Screen button to start presenting the visual interactions to your audience. This will make the window pop out, resizing it automatically. However, if you’d like to check/change your presentation before sharing the screen, you will have to manually drag the border to resize the width of the screen
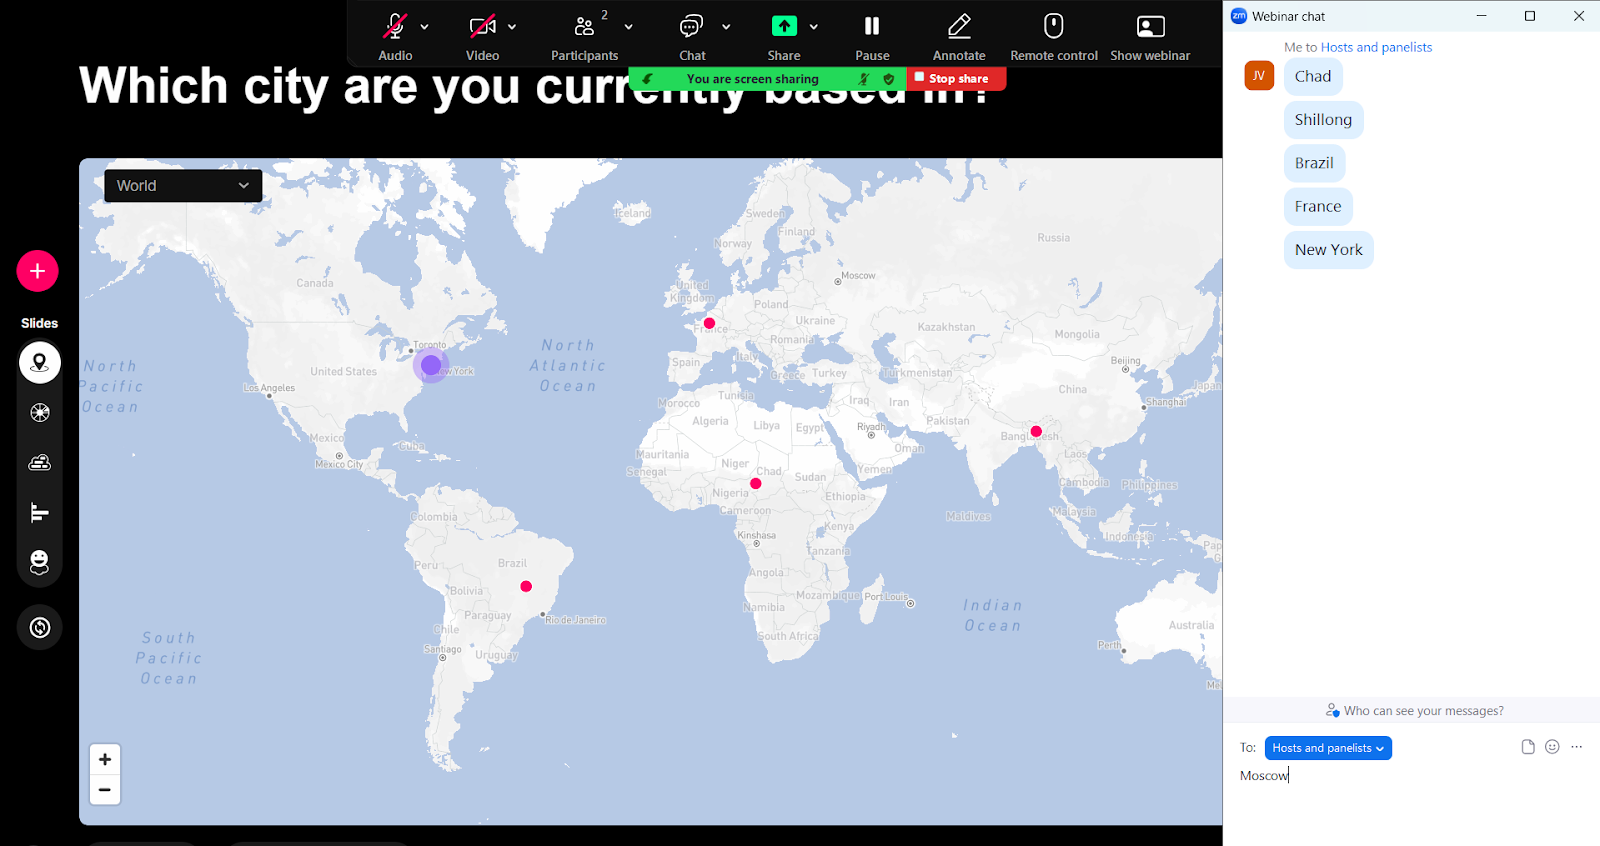
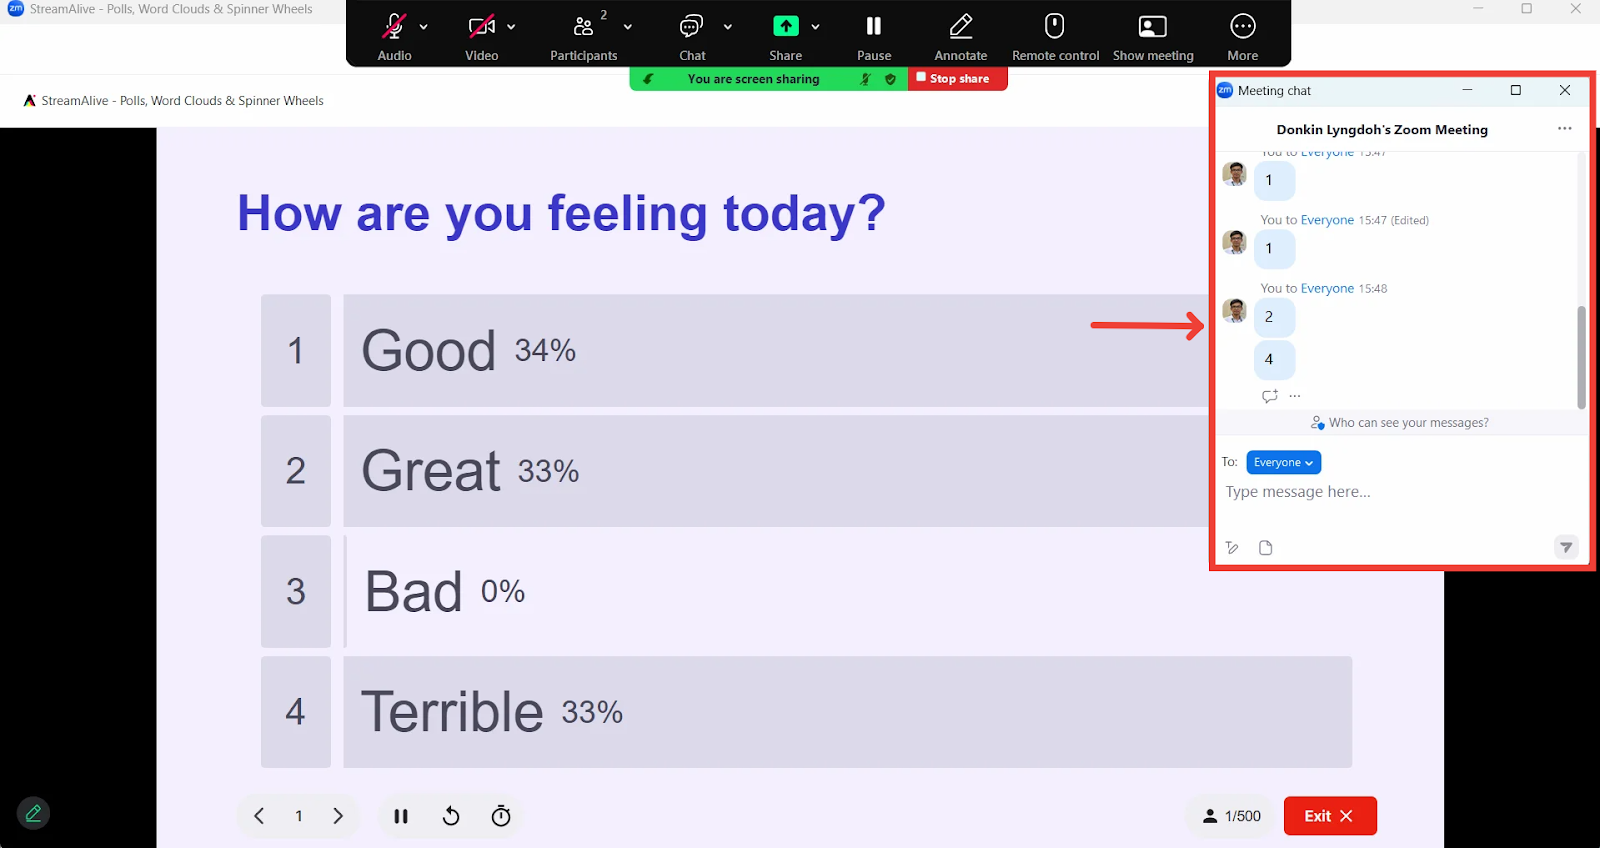
When your interaction is shown on the screen, ask your audience to start typing in responses in the chat.
If you want to run ad-hoc interactions:
If you don’t want to plan your interactions in advance you can always run an interaction ‘on the fly’. To do this, click on Run interactions ad hoc
The StreamAlive screen will appear with the available interactions.
Click on the Pop out feature to focus on the StreamAlive screen.
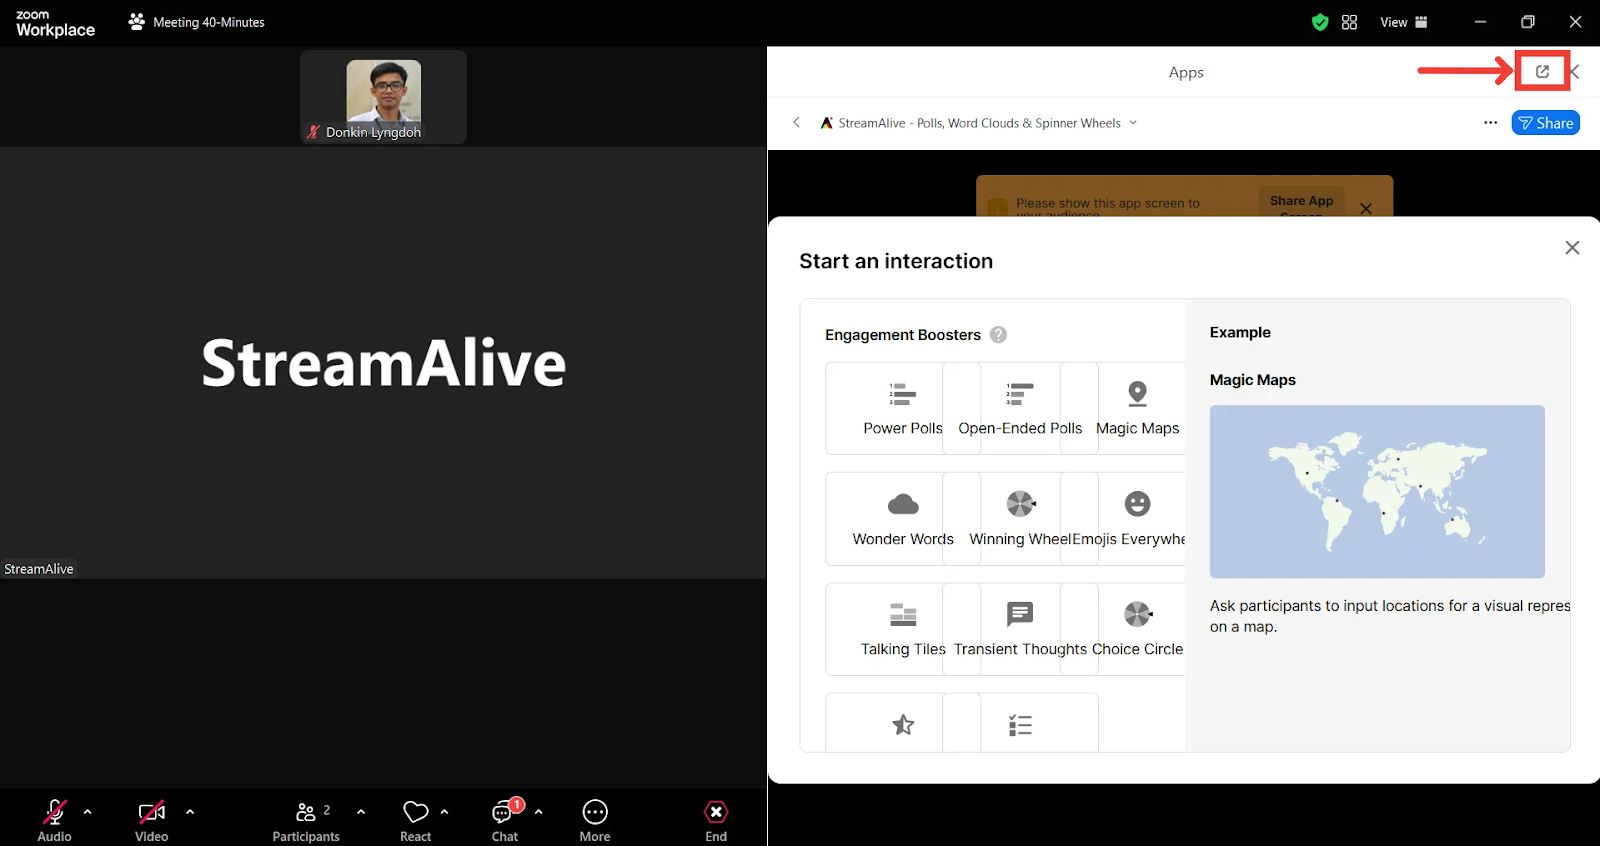
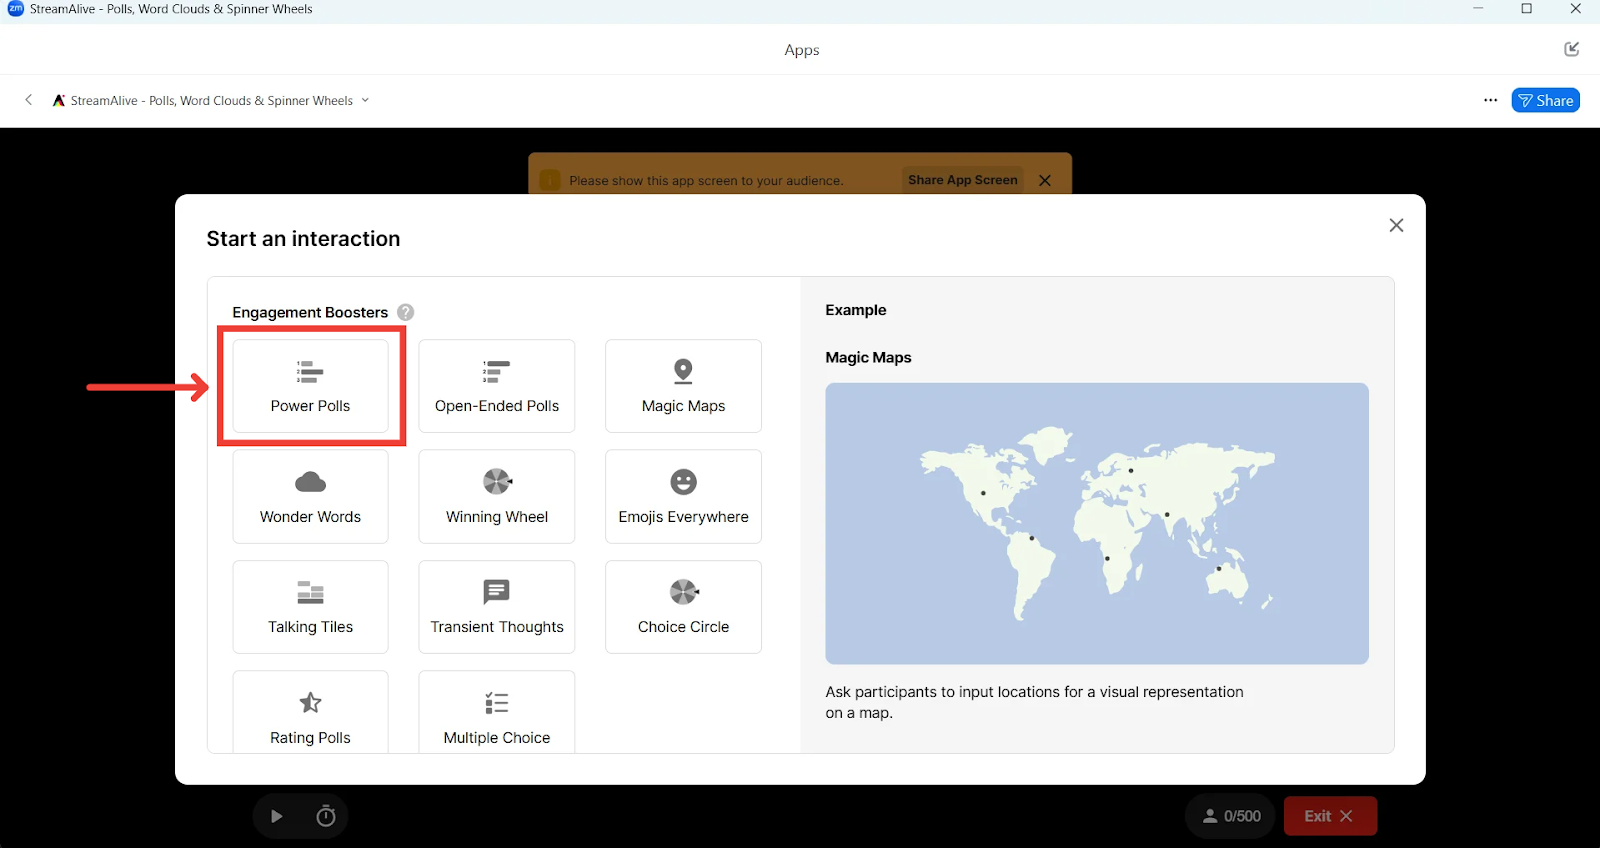
Choose an interaction you want to run for your meeting.
For this tutorial, we will be creating a Power Poll.
Edit and customize your interaction.
Content Tab
Generate with AI: This feature is another version of our Create with AI tool that allows you to make use of our AI to generate the interaction's heading/options.
The difference between the two is that the Create with AI feature is only available in the Presentation Editor when creating a presentation and helps to create multiple interactions in one go. However, the Generate with AI tool only creates suggestions for a single interaction but works similarly.
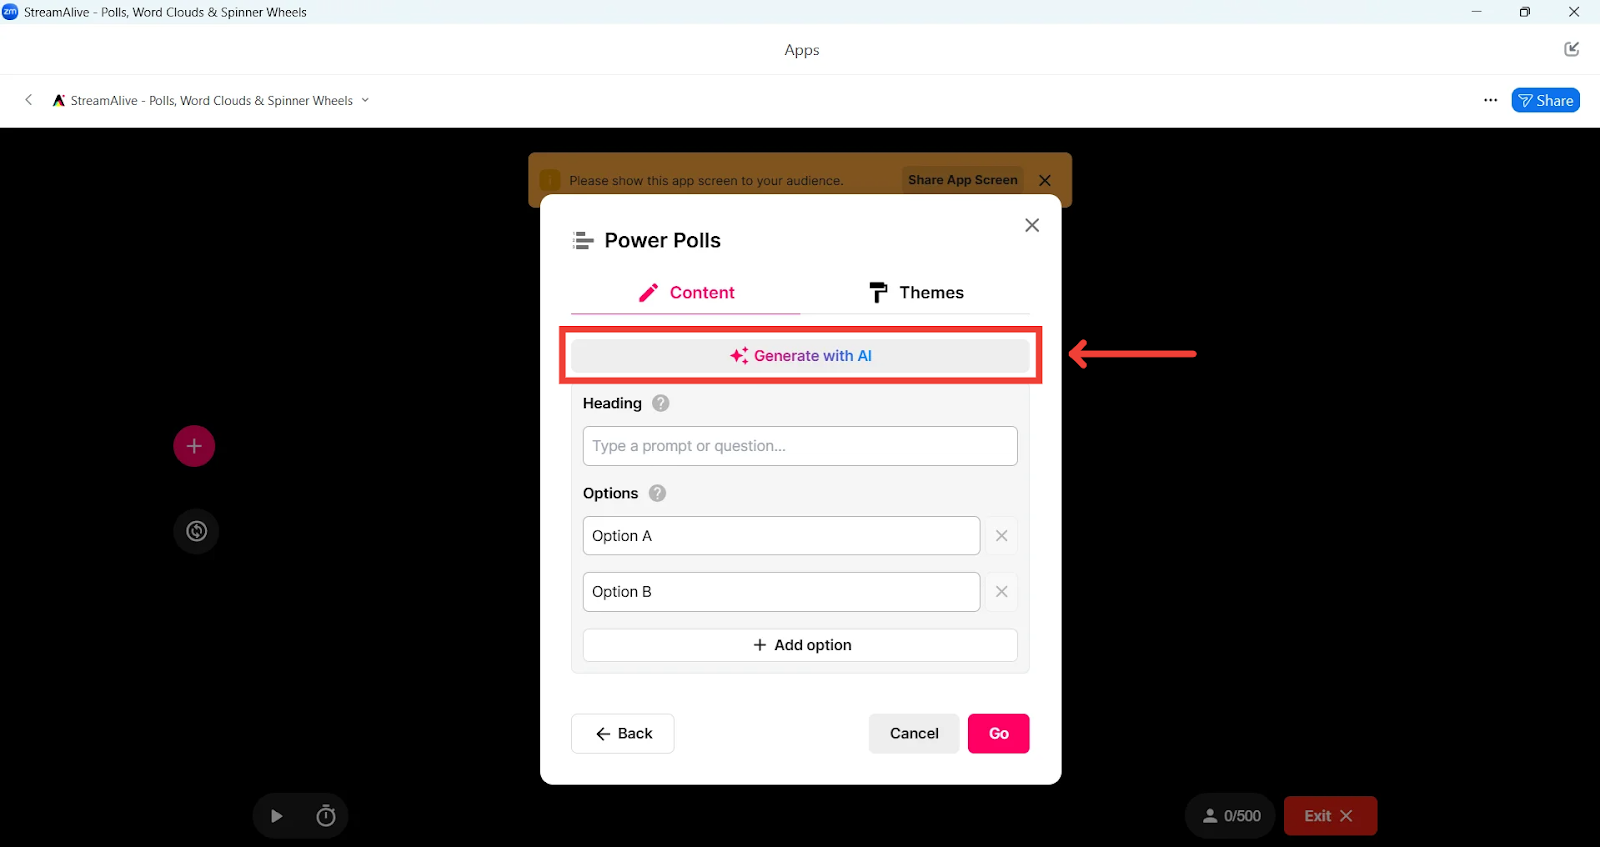
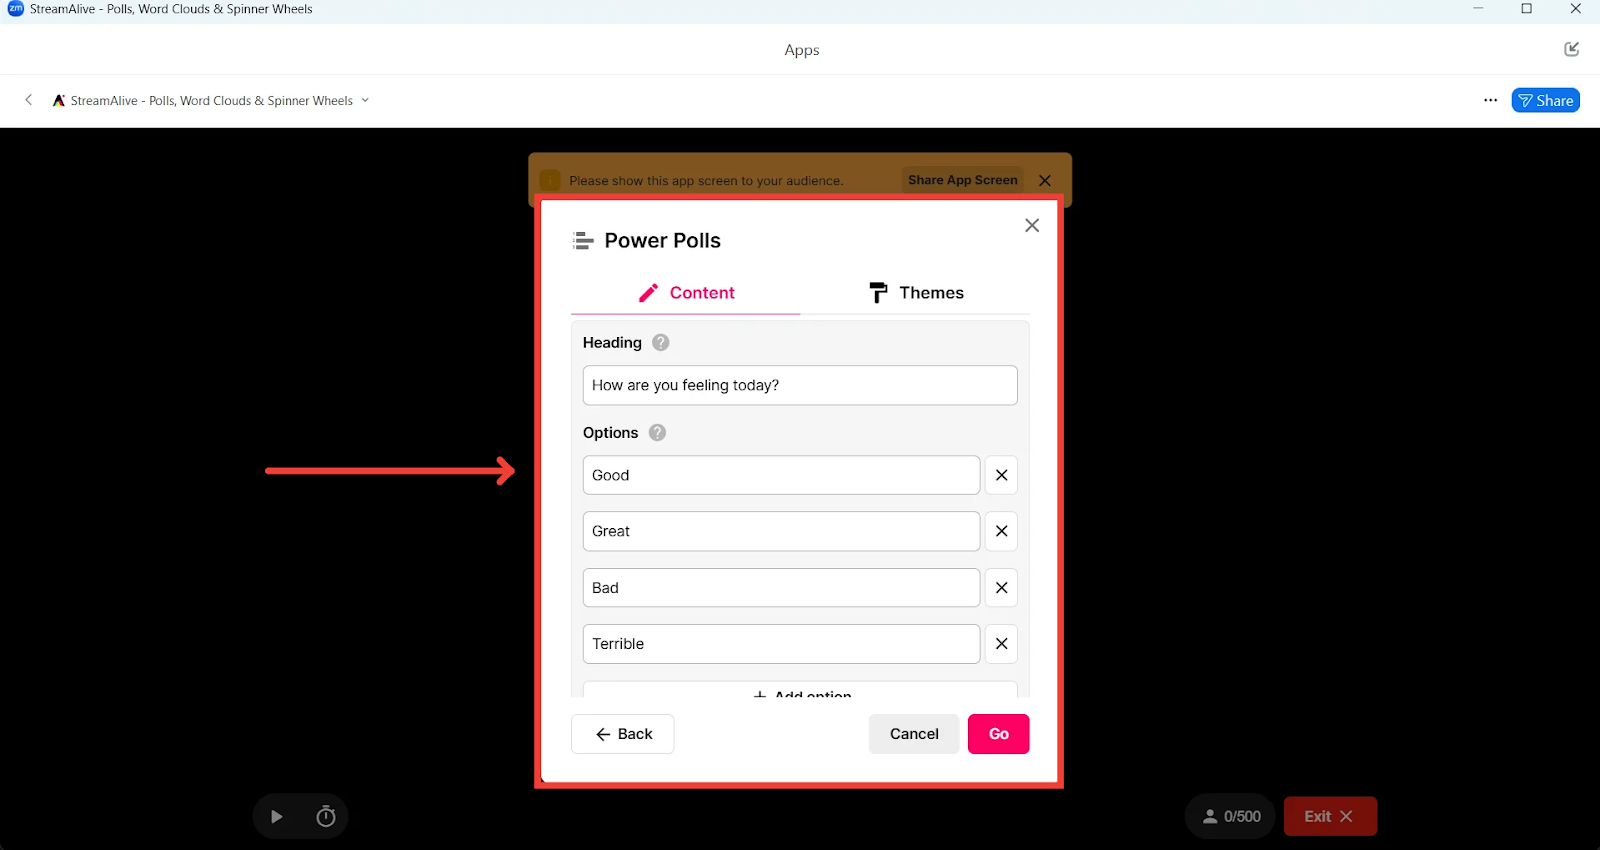
Heading/Options: Here is where you can enter the question/heading and options for your interaction.
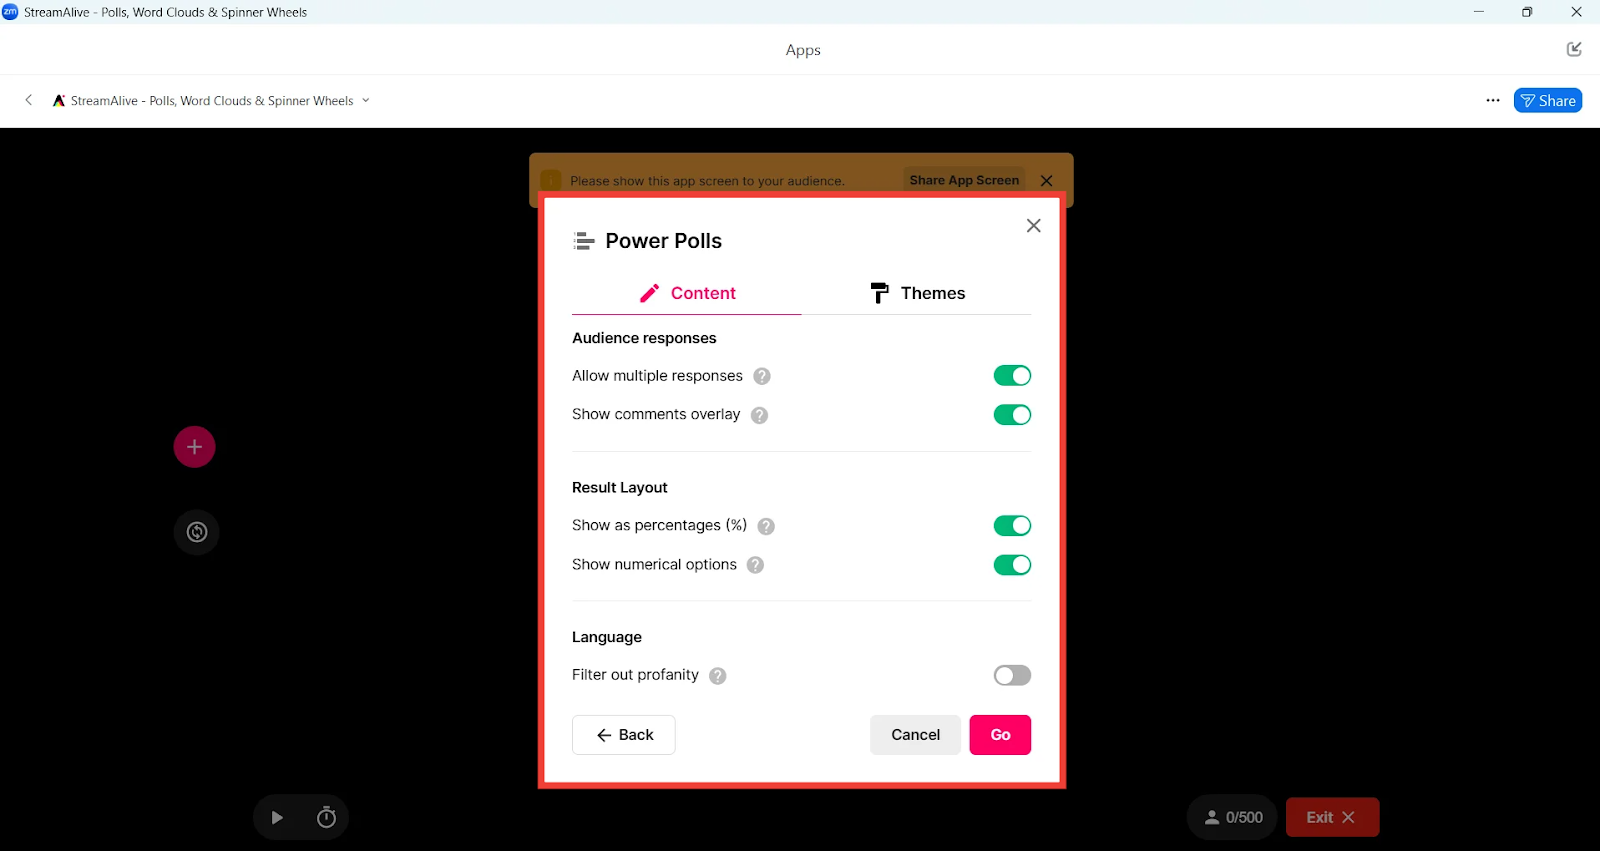
Interaction Settings: Scroll down and configure the settings for your interaction.
Themes Tab: The Themes tab allows you to set a color scheme or design for how your slide will look.
From classic to scenic themes, scroll through the available options and choose what fits your presentation
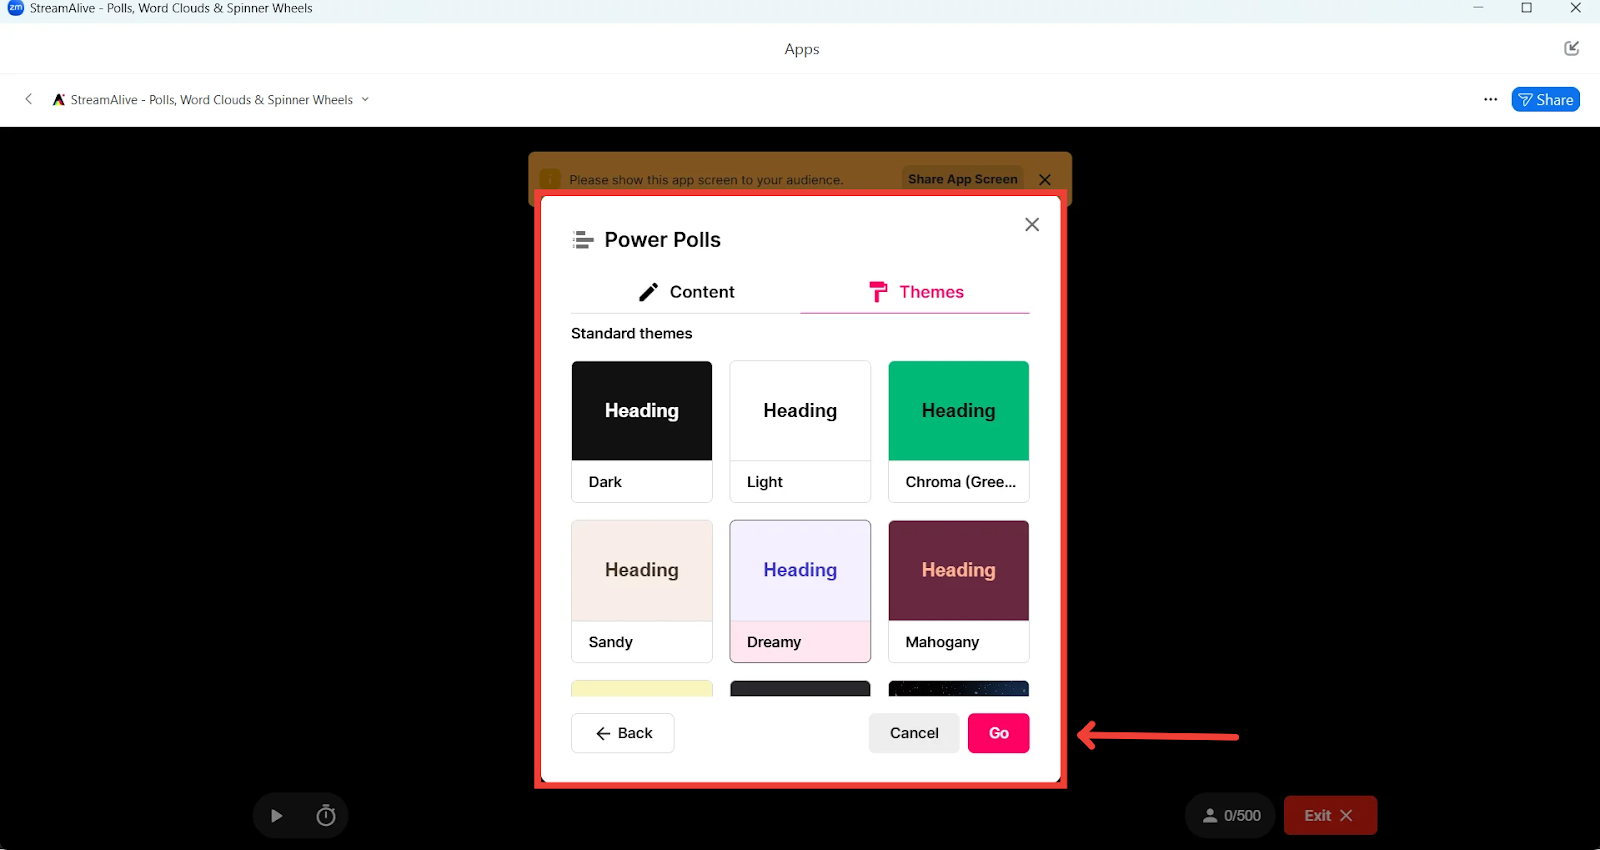
Click on Go when read
Once the interaction has loaded, click on Share App Screen to share your screen with your audience
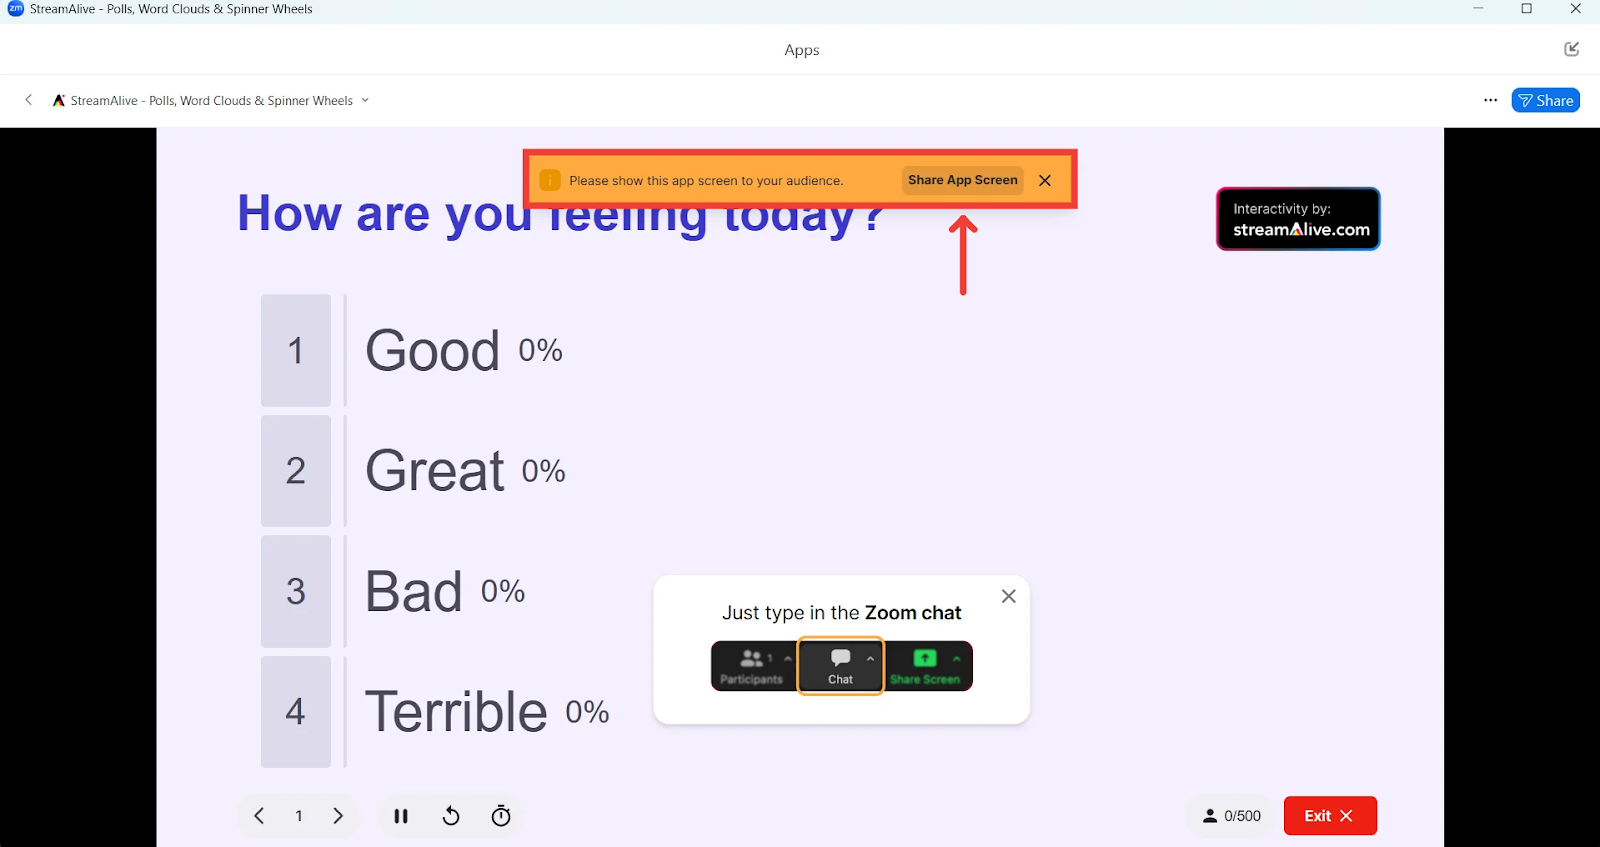
Ask your audience to start typing in answers in the chat
With that, you've successfully connected StreamAlive to a Zoom webinar using the StreamAlive app for Zoom.
To learn about how the interactions work, check out our articles by clicking here.