Creating and Using Wonder Words
Written By Team Streamalive
Last updated 15 days ago
Wonder Words dynamically creates an interactive word cloud by collecting audience responses from the chat in real-time. This feature helps to visualize audience thoughts, opinions, or reactions during your session.
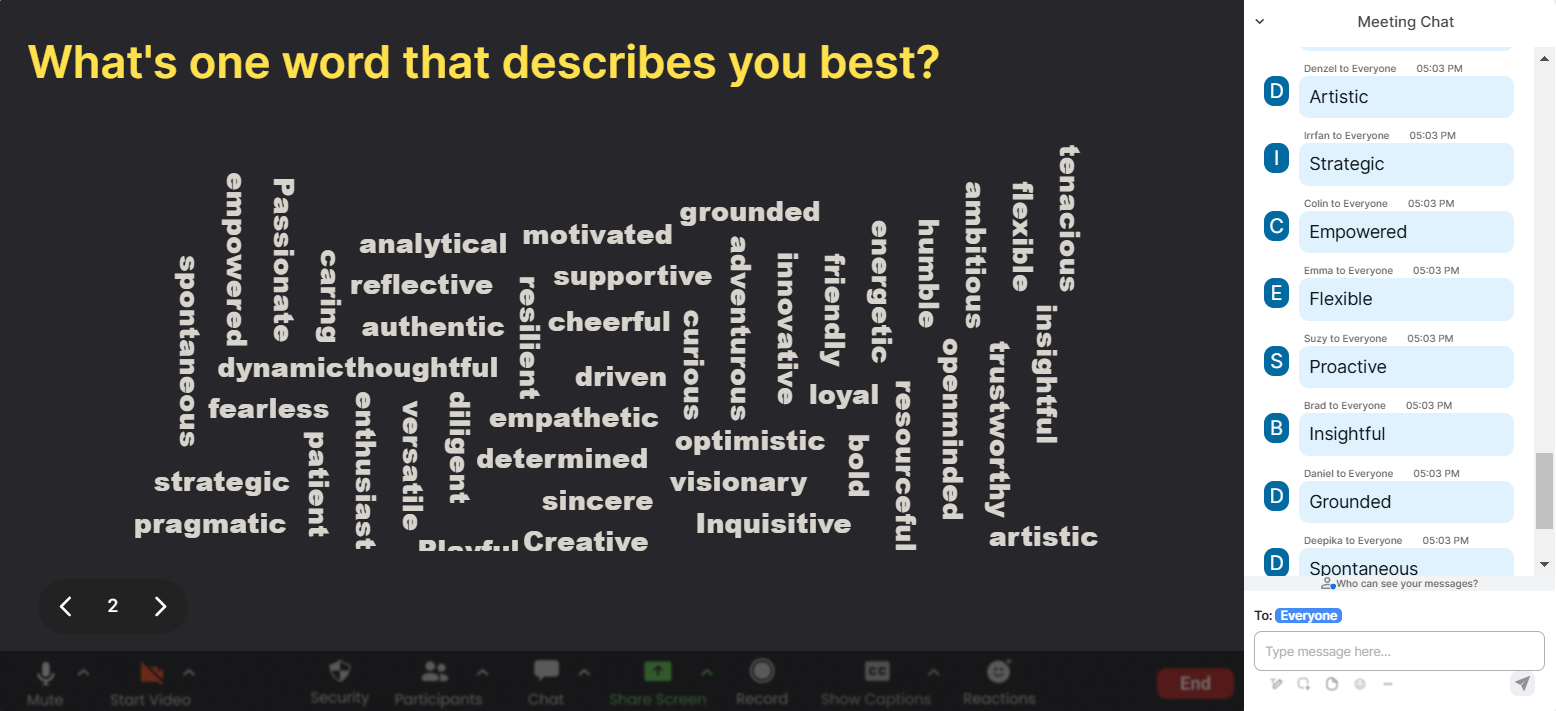
By default, Wonder Words detects and displays words from chat messages as they come in, making it an engaging way to highlight audience participation.
As your session begins, Wonder Words can be used as an icebreaker—for example, asking attendees to describe their mood in one word or summarize their expectations for the session.
In this guide, we’ll explore how to create a Wonder Words interaction, customization options, how to run it, and frequently asked questions.
Frequently Asked Questions
How Does Wonder Words Collect Responses?
Wonder Words is a chat-powered interaction. This means that the audience simply types in the chat on platforms like Zoom, YouTube, Twitch, and more and StreamAlive visualizes it on your screen which you are sharing with your audience. You need to connect StreamAlive to your live session for the word clouds to work. If a participant sends a message containing multiple words, StreamAlive will select the entire message
For this reason, Wonder Words works best when the answers are kept short. If you want the audience to respond with longer answers, consider the Talking Tiles or Transient Thoughts interaction.
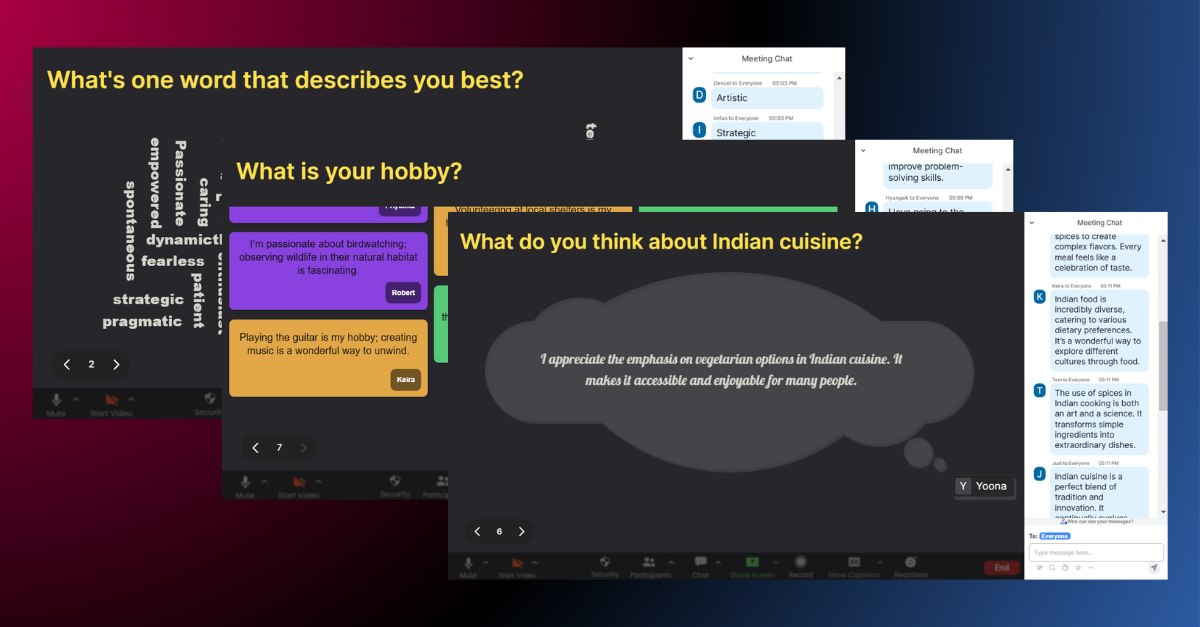
When do users start typing their answers for the word cloud?
The StreamAlive interactions are displayed on the presentation live screen. You need to share this screen during your live session, just like you would share a presentation or a web page. When the Wonder Words interaction is shown on your screen, any comment in the chat is picked up and displayed in the word cloud.
What If Someone Repeats a Word Multiple Times?
If a word is mentioned multiple times, it will grow larger in the word cloud to reflect its popularity.
Can You Customize the Look of the Word Cloud?
Yes, you can change the background, font, and color scheme to match the theme of your session.
What languages does Wonder Words support?
Wonder Words supports any language! The limitation on the number of words shown for each response still applies though. If your audience writes a long sentence in their preferred language, Wonder Words will still pick the first few words.
Creating a Wonder Word
To run Wonder Words during your session, you can choose to:
Add it to your presentation before the session
Create an ad-hoc interaction during the session
Using Quick Interaction Links
Adding Wonder Words to your presentation
Go to My Presentations
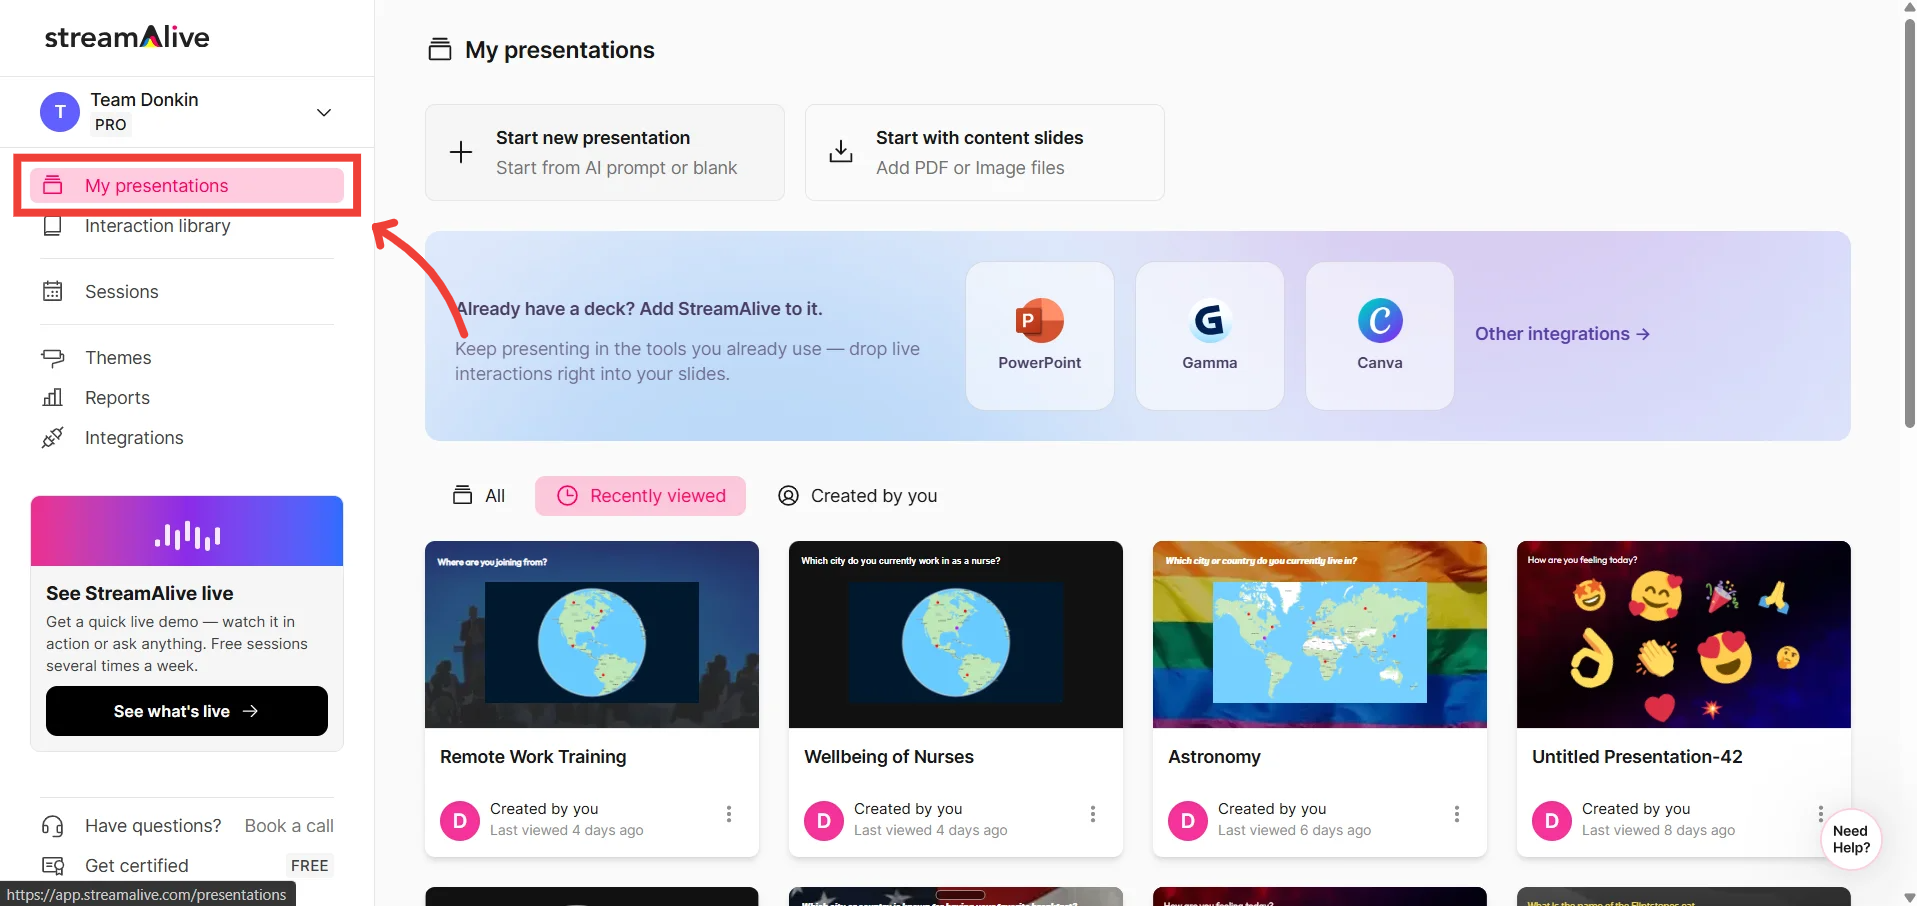
Click on + New Presentation
Or click on one of your existing presentations
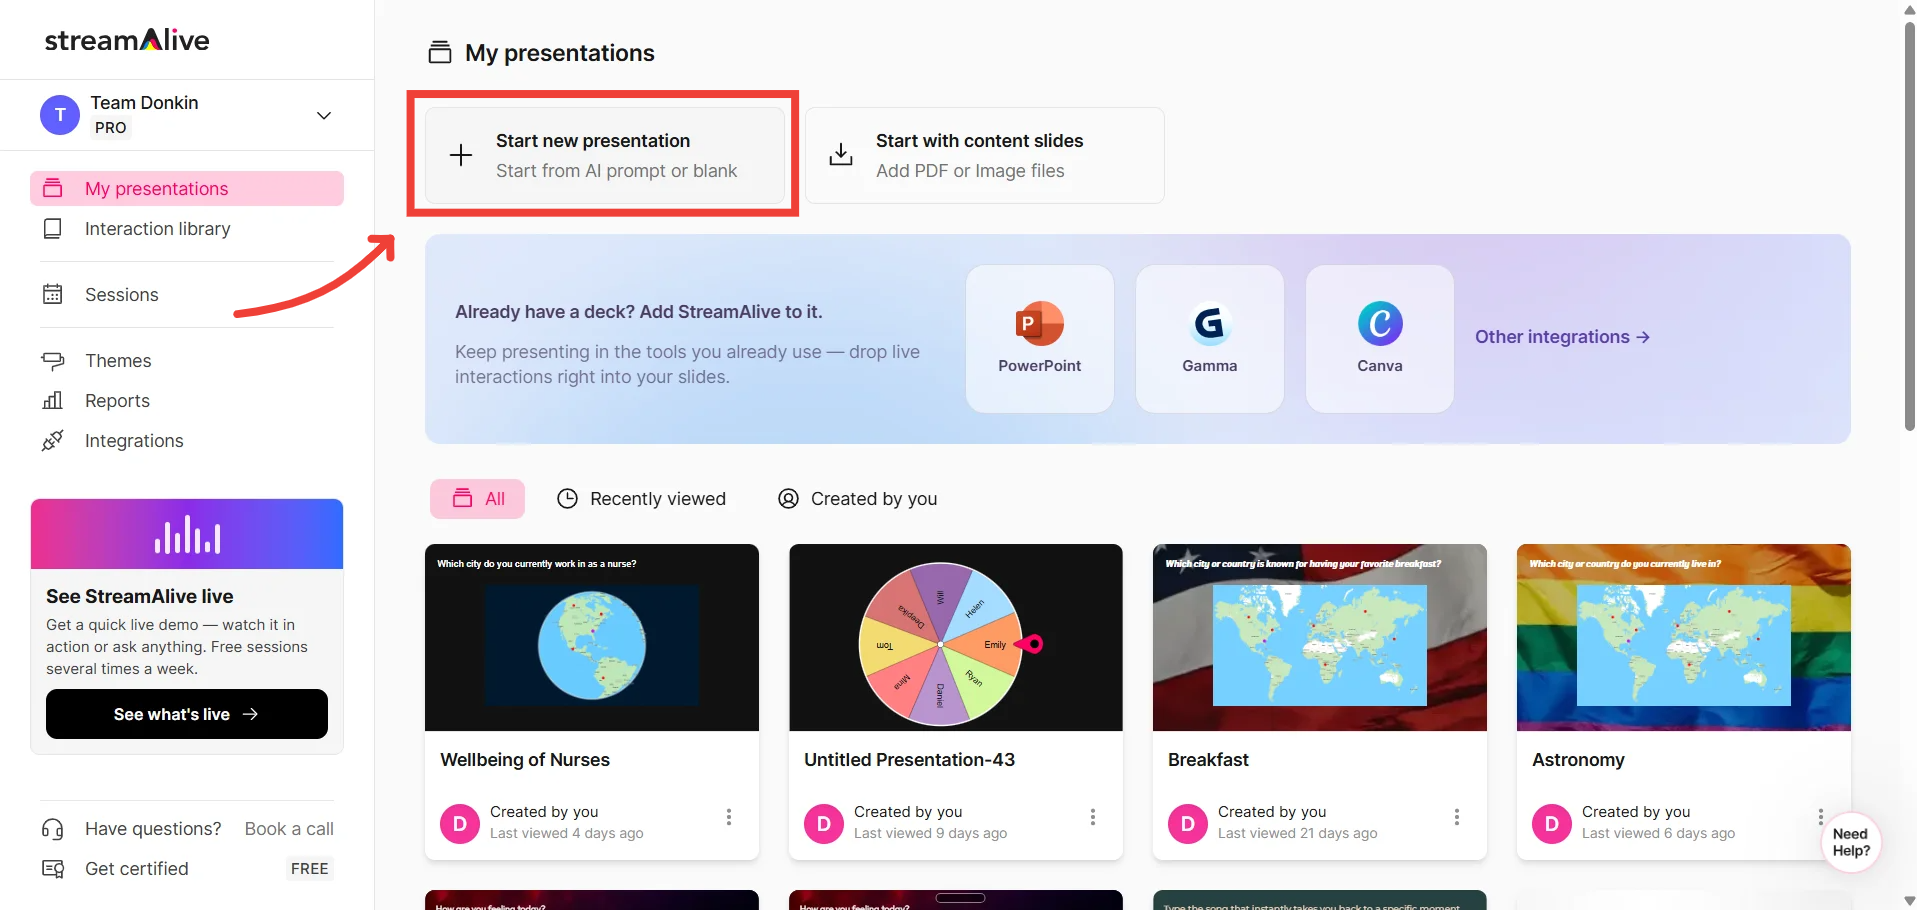
Click on + New Slide
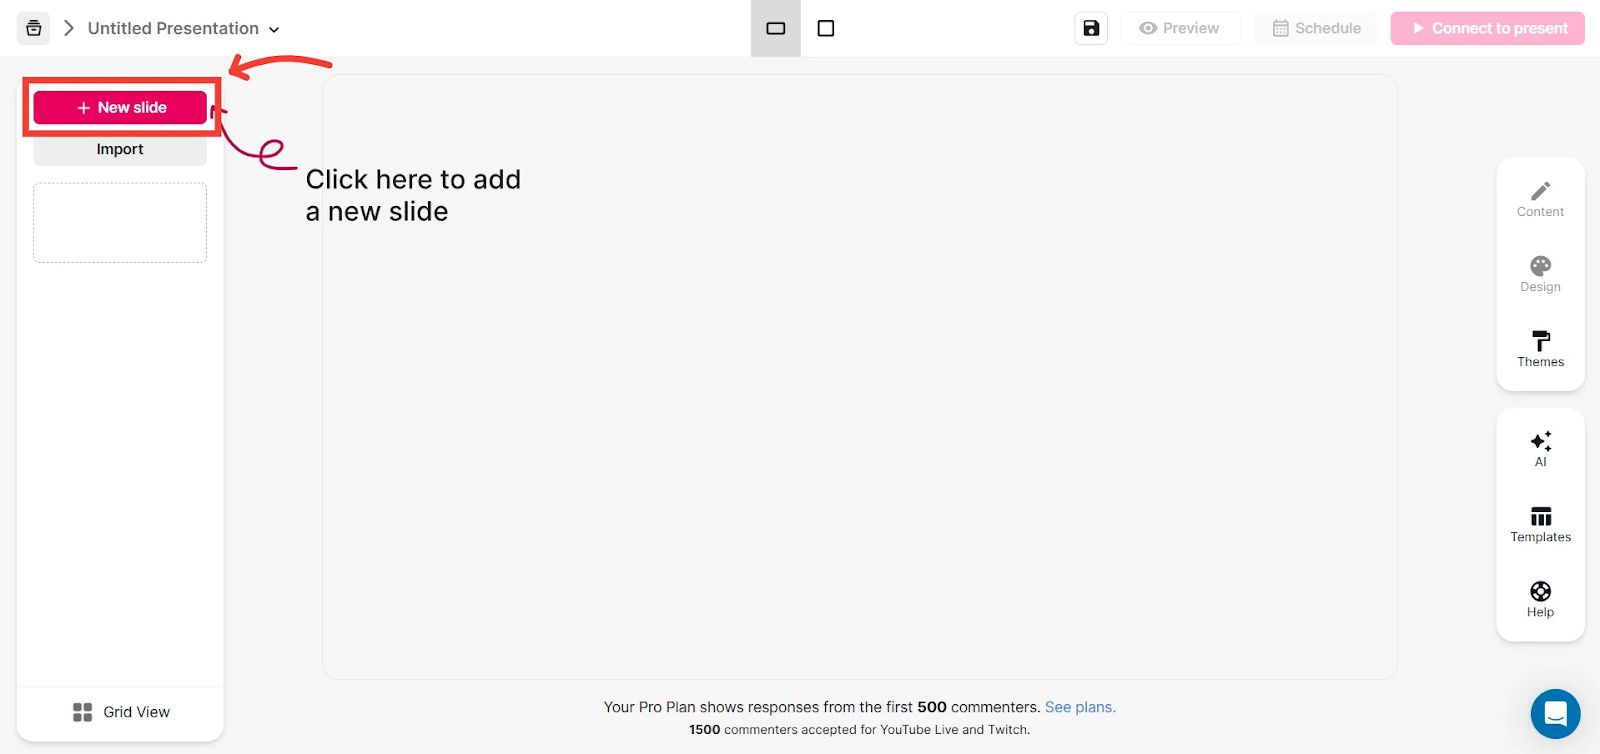
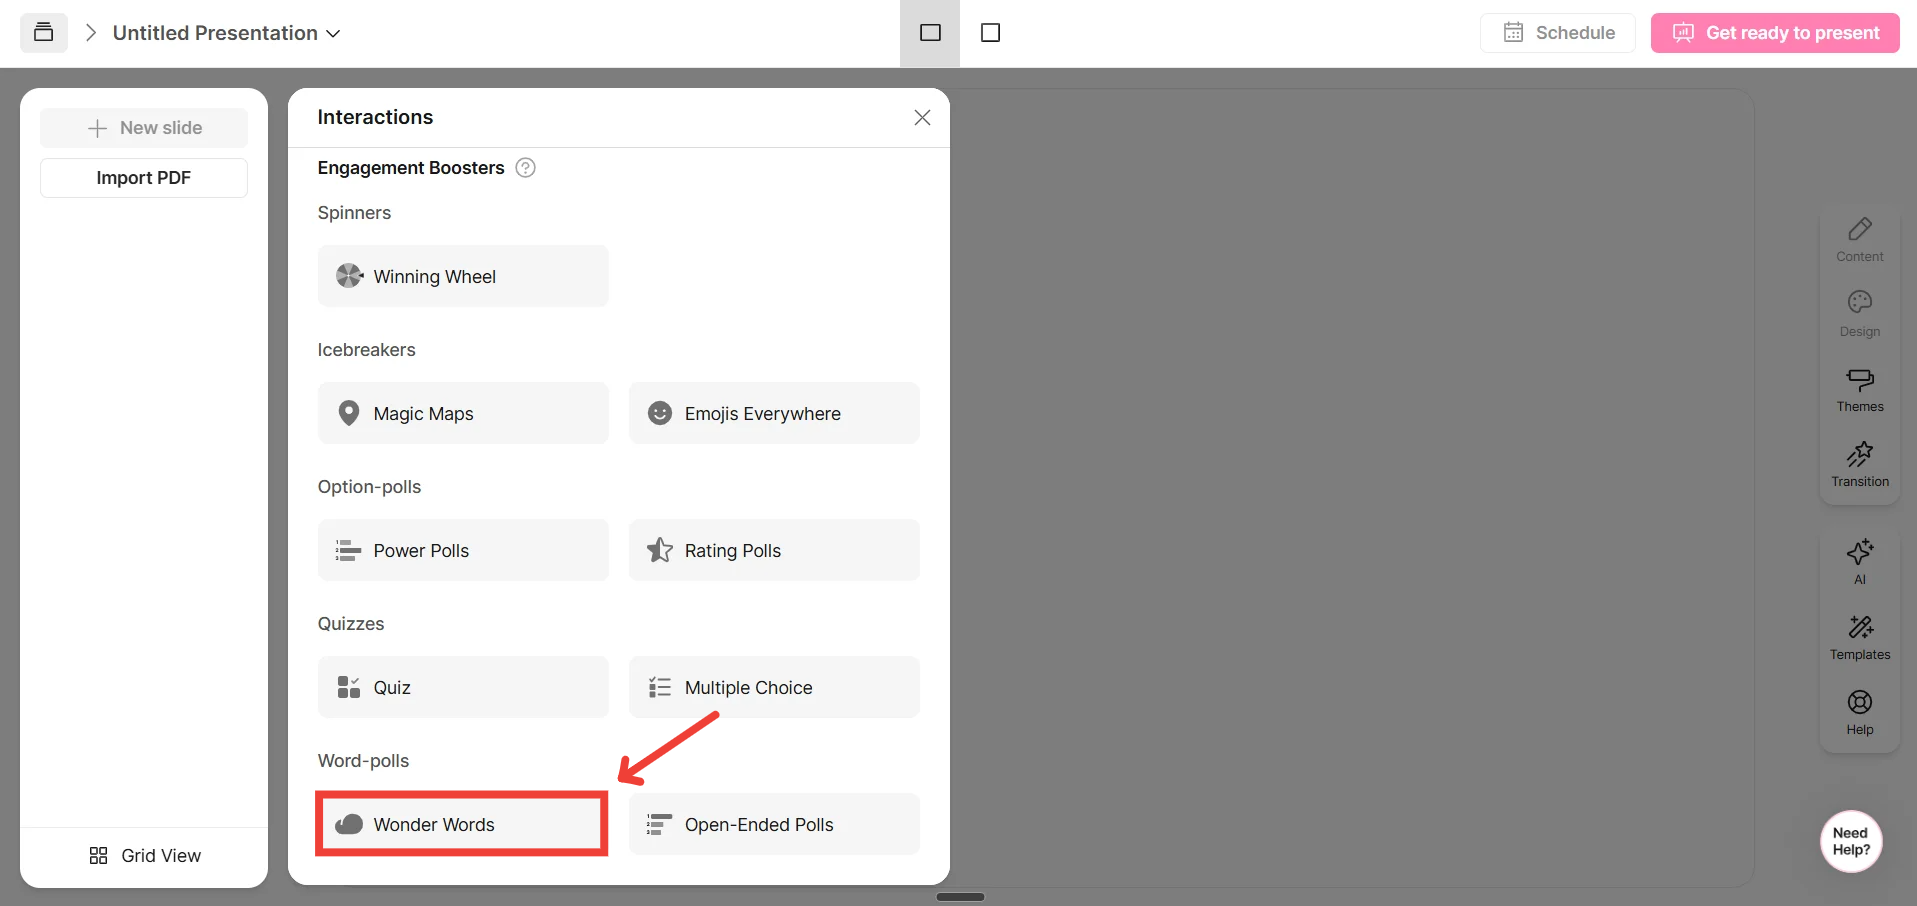
Add Wonder Words
To learn more about how to create a presentation, click here
Once Wonder Words is added, customize the interaction using the tabs on the right-hand side.
Edit the heading and configure its settings in the Content tab.
You can also edit the design of the interactions, like the visualization colors of the word cloud, background color, heading color/font, and so on.
For a more in-depth guide on how to edit your presentation, click here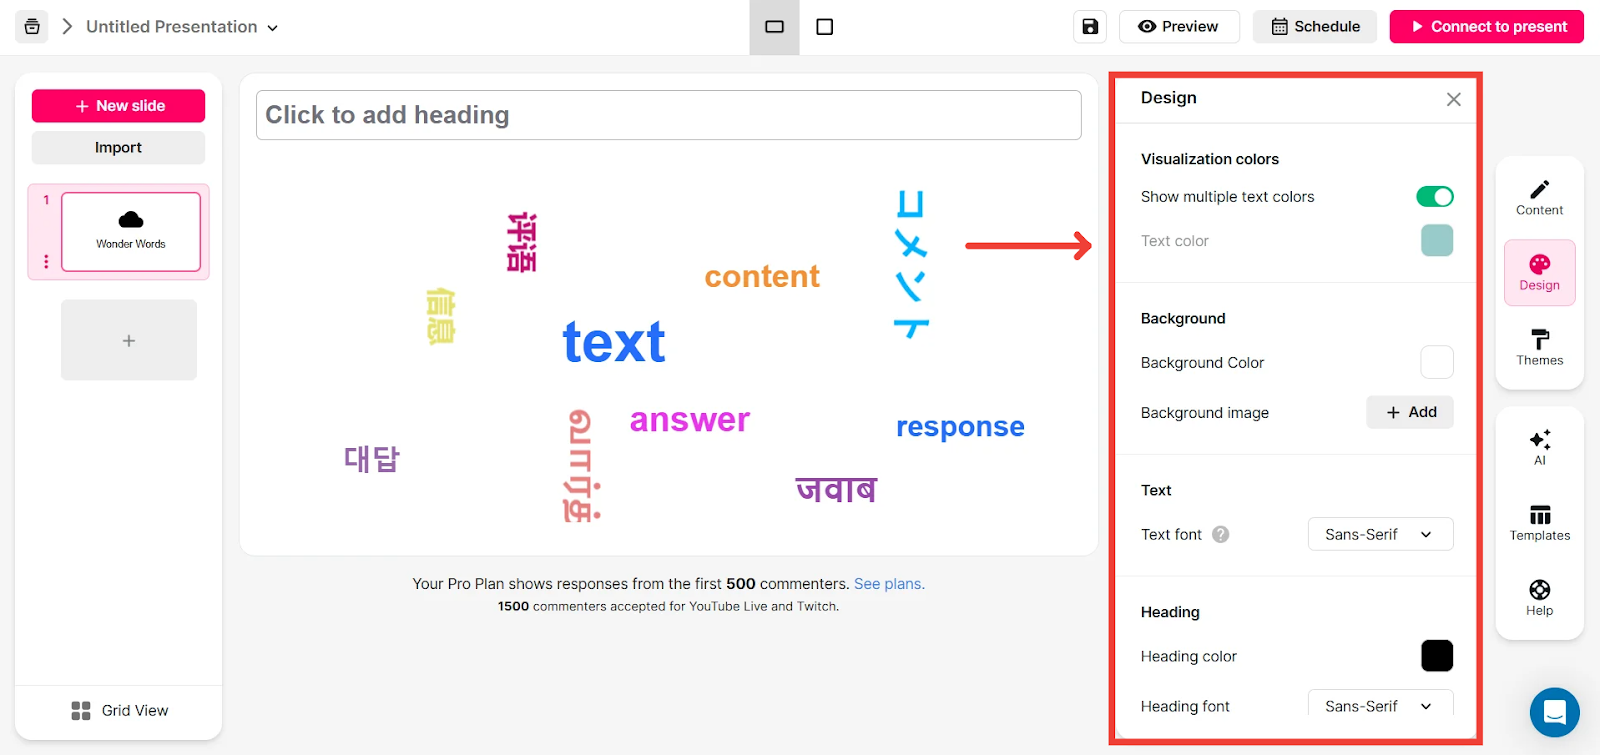
Alternatively, try our pre-designed Themes to completely change the look of your word cloud.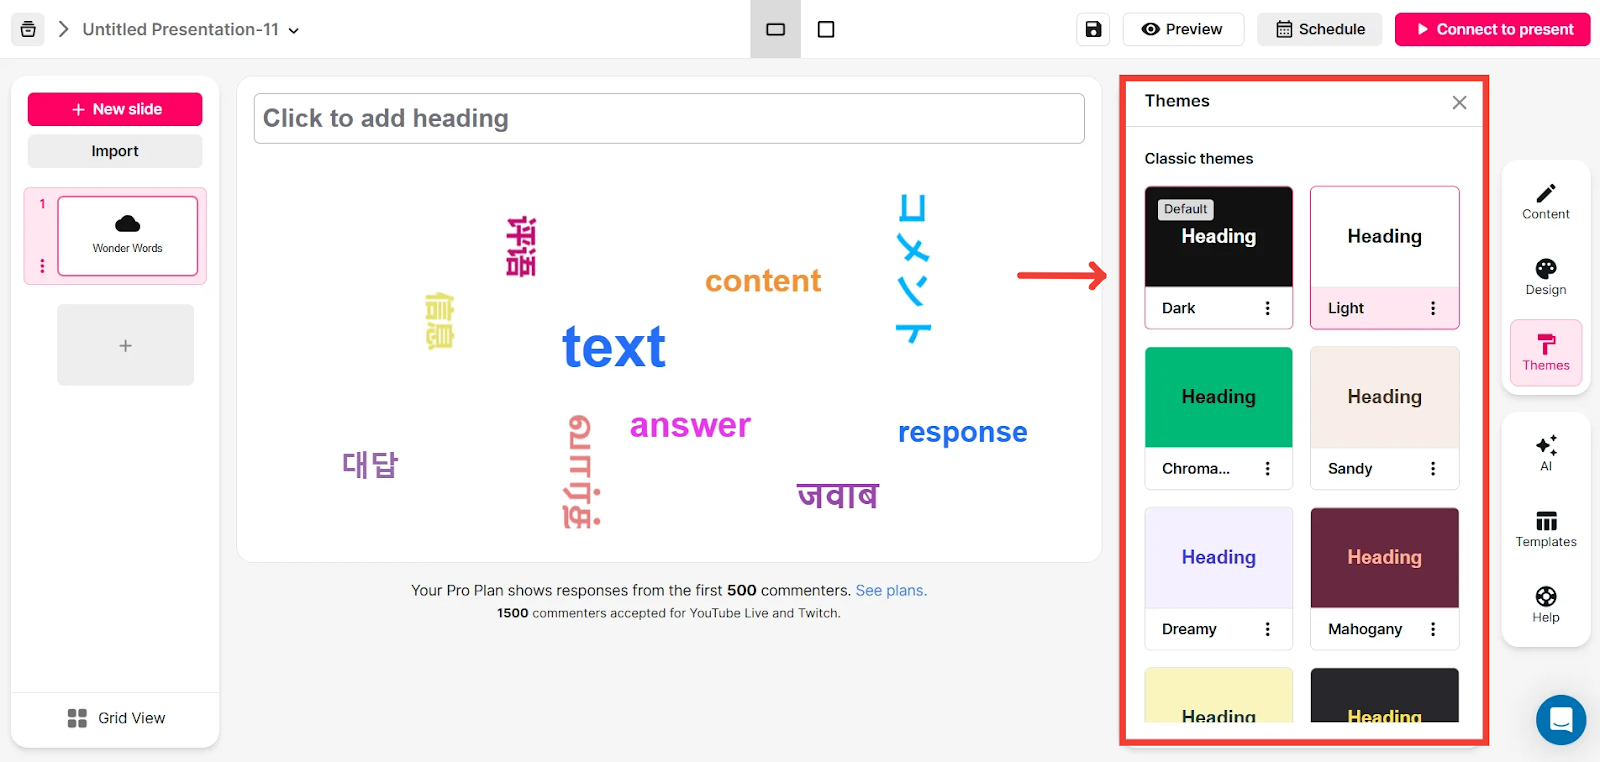
Click on “Get Ready to Present” to have a preview of your presentation or continue to connect to your session
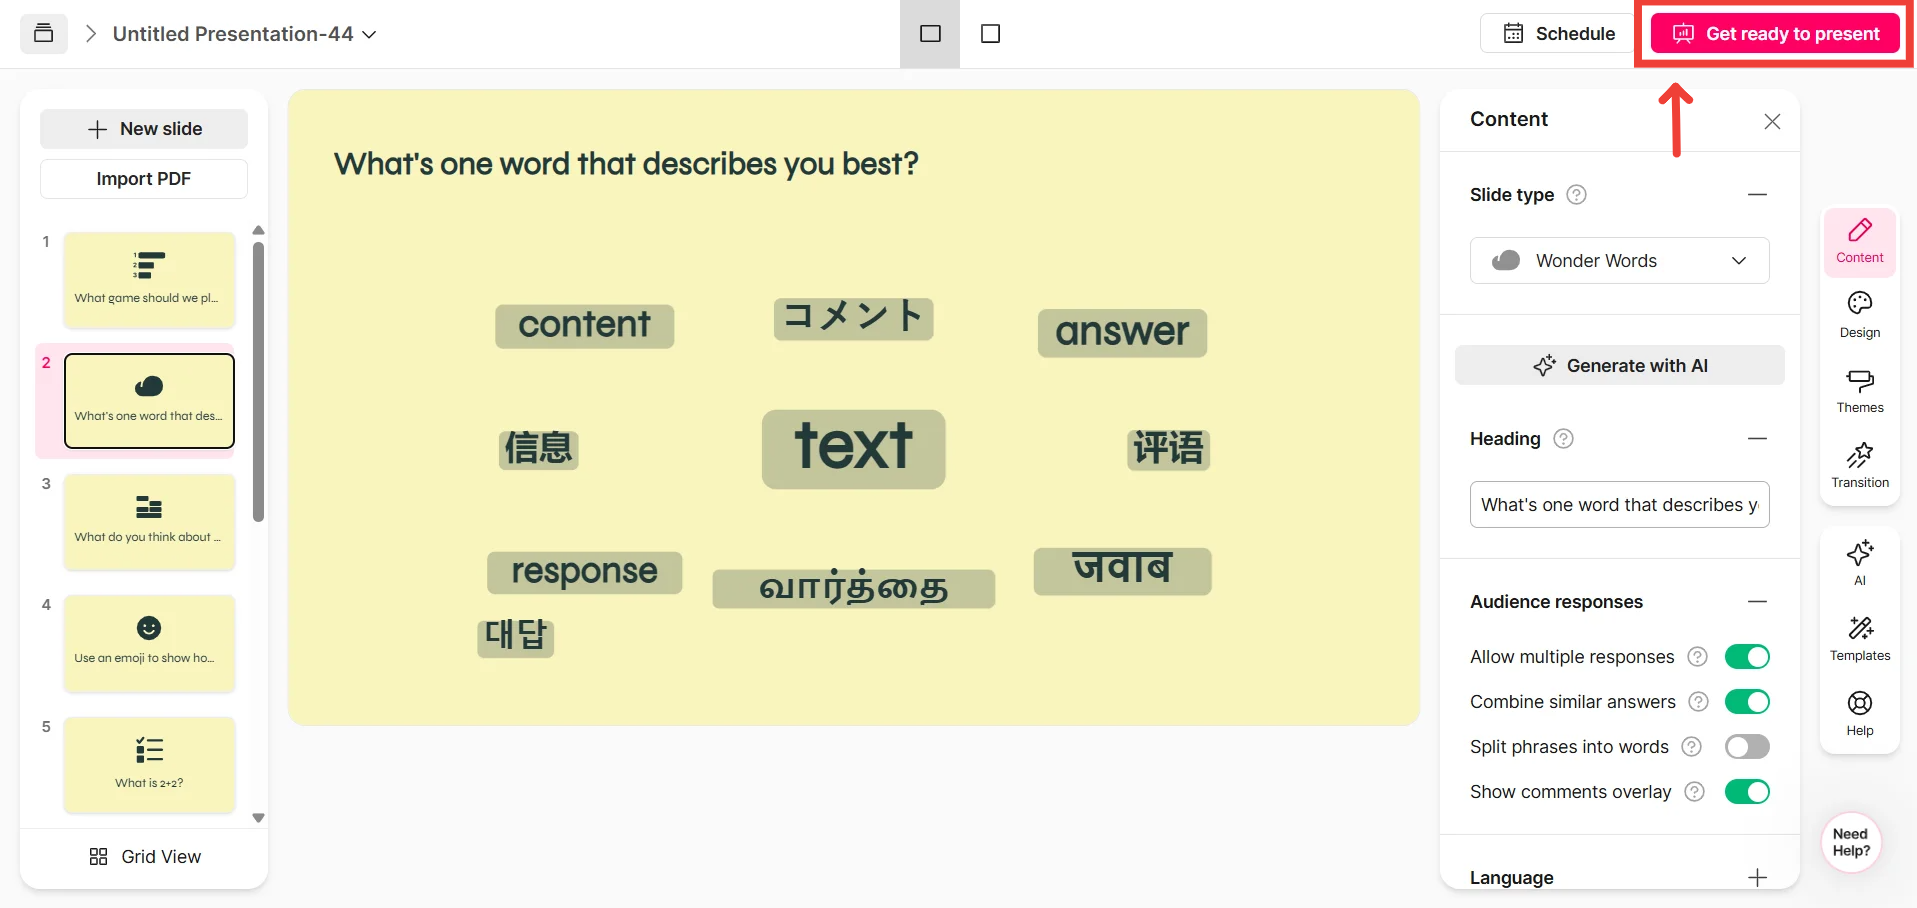
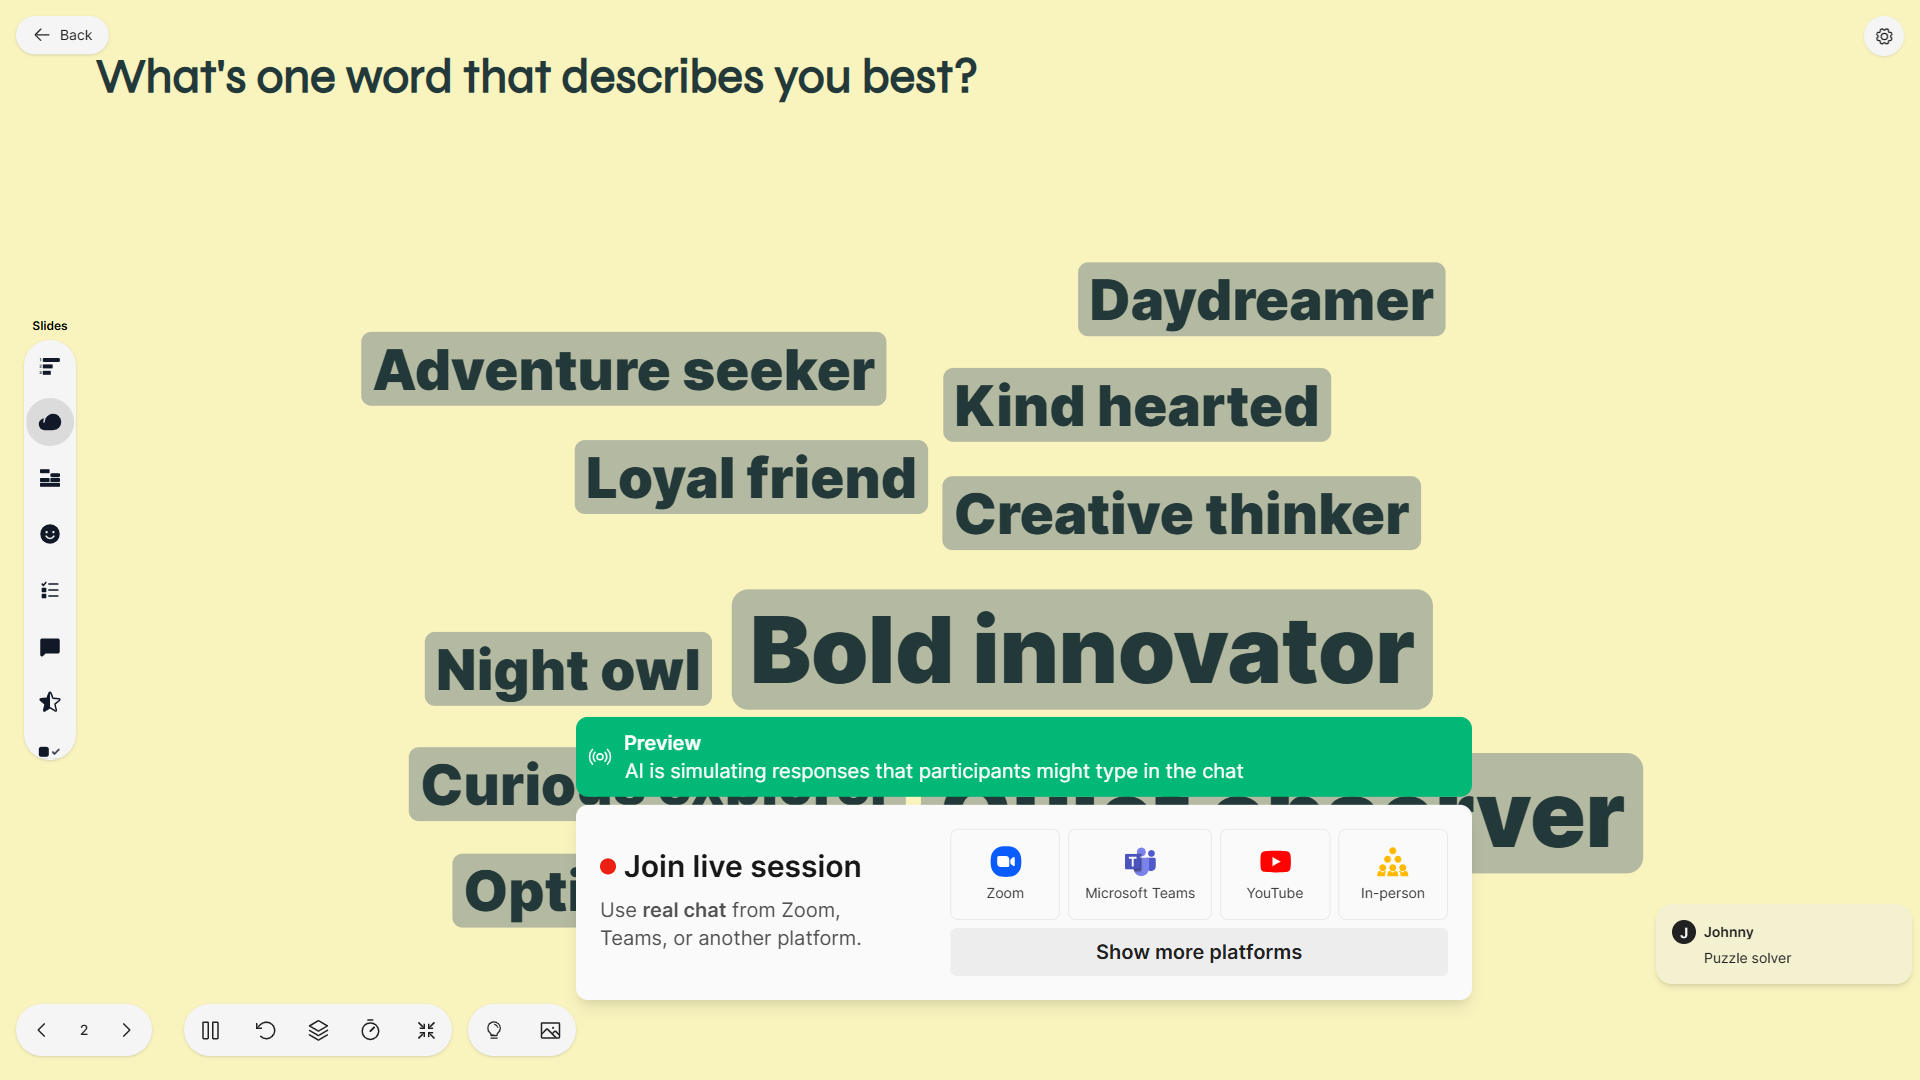
Now that your presentation is complete, you can present it immediately or schedule it with a future session
Follow the instructions on how to connect StreamAlive to your preferred meeting or streaming platform, or even use it for in-person events.
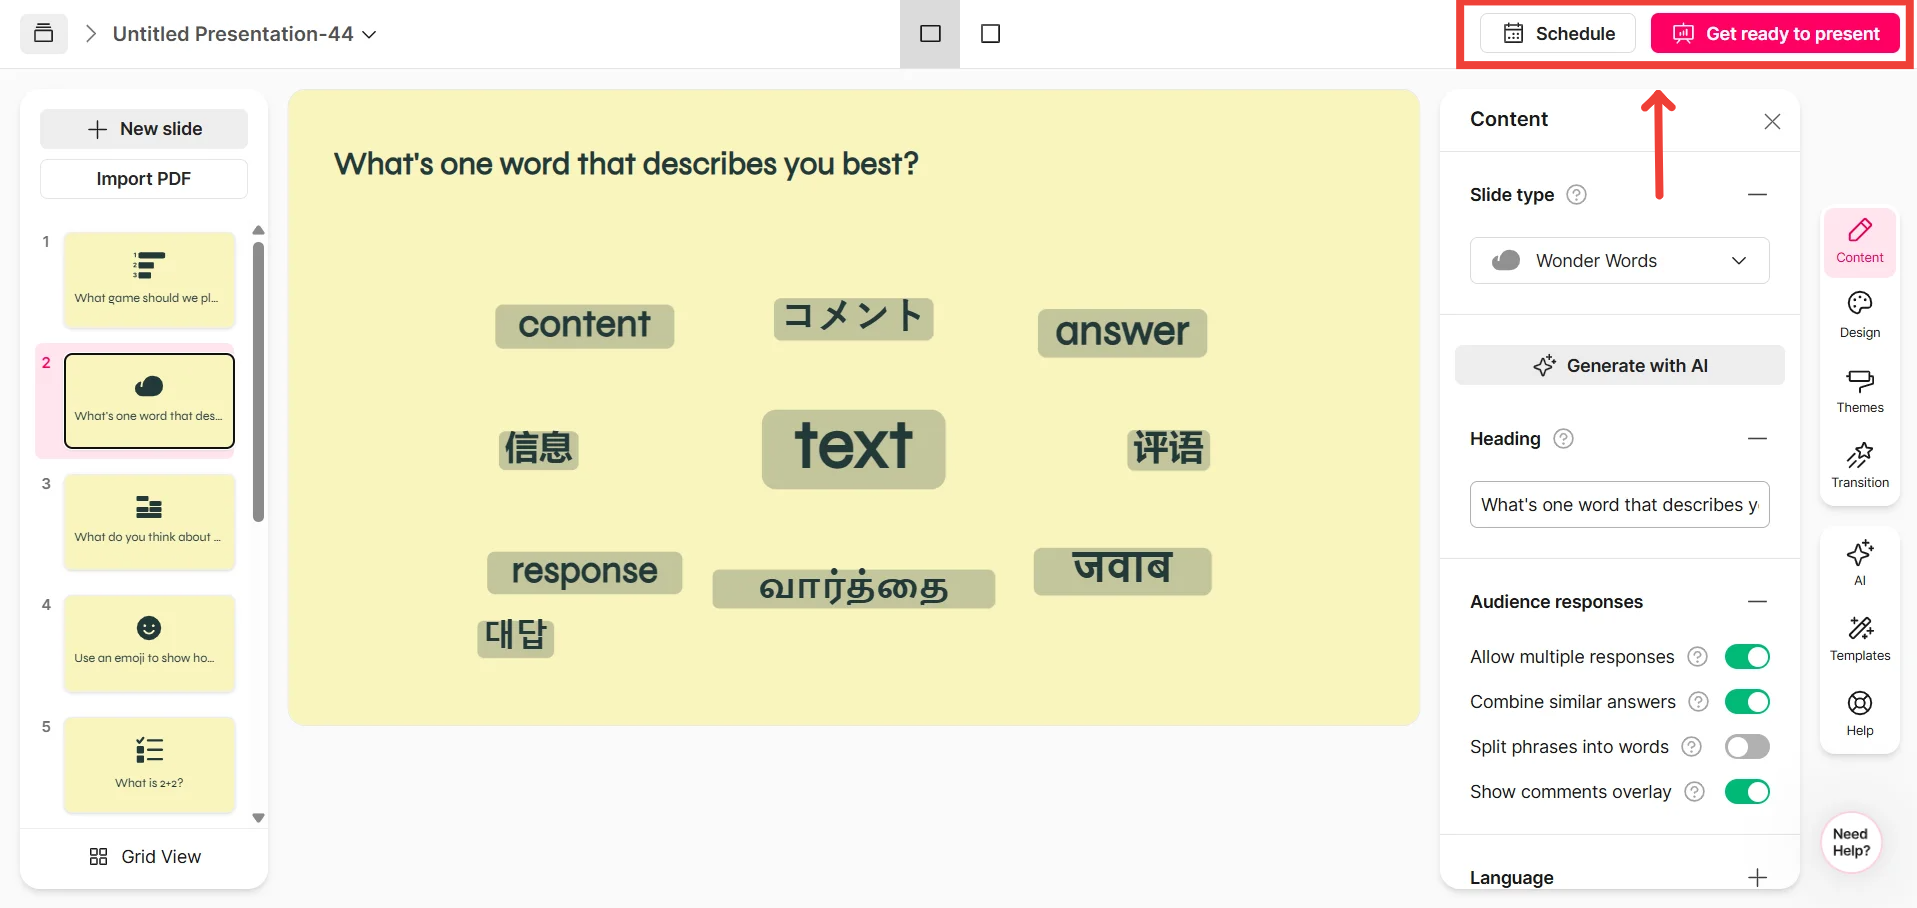
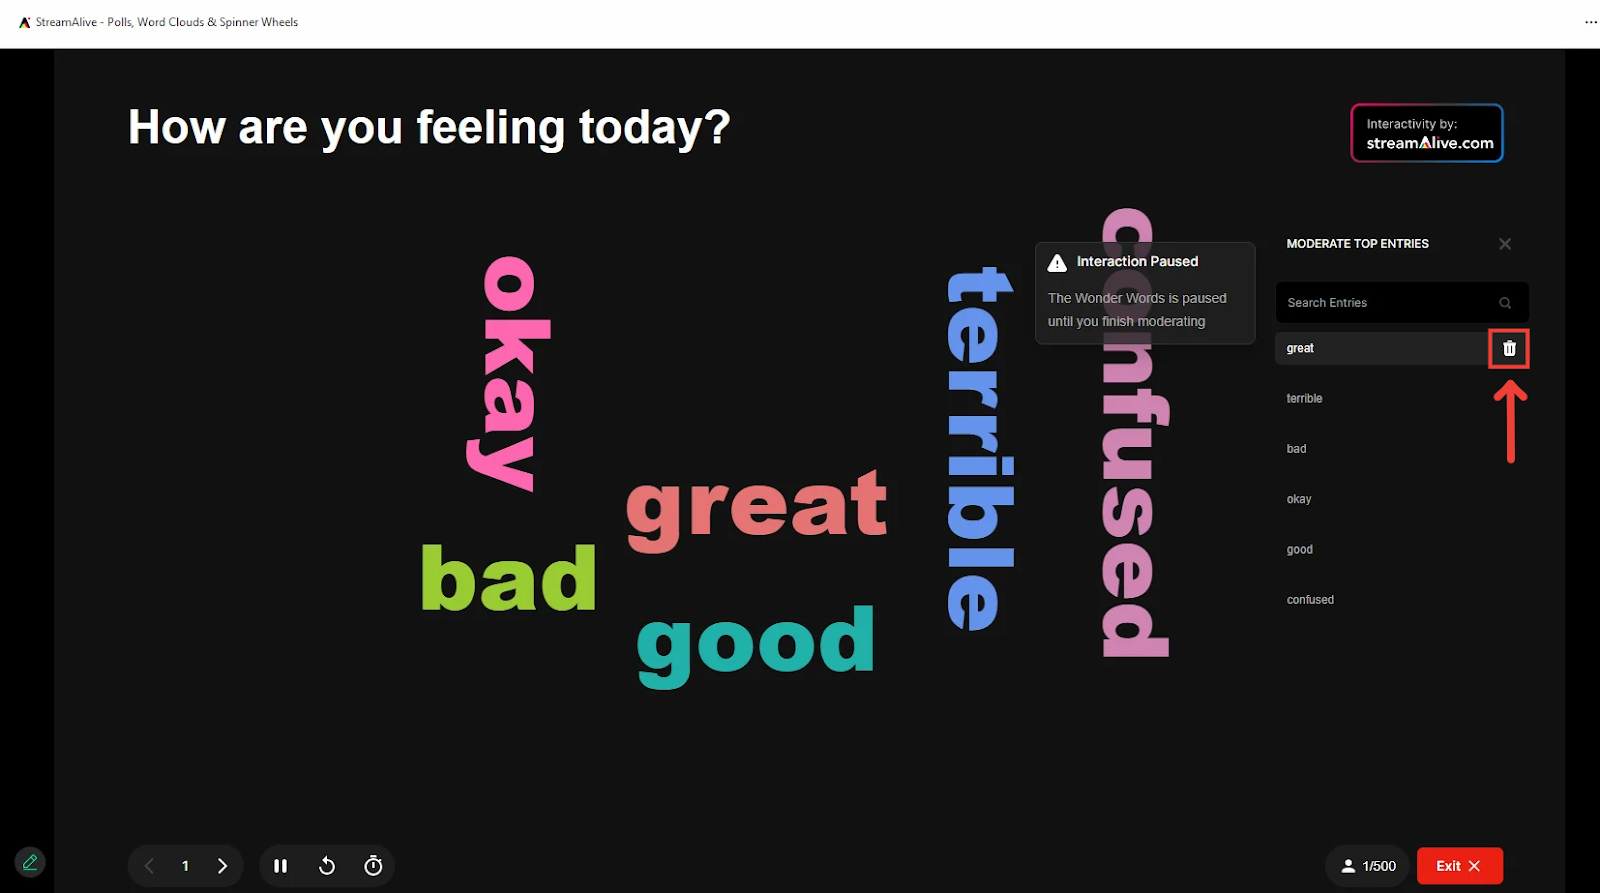
If you’d like to filter out certain words from the word cloud, you can use the moderation feature to hide those words.
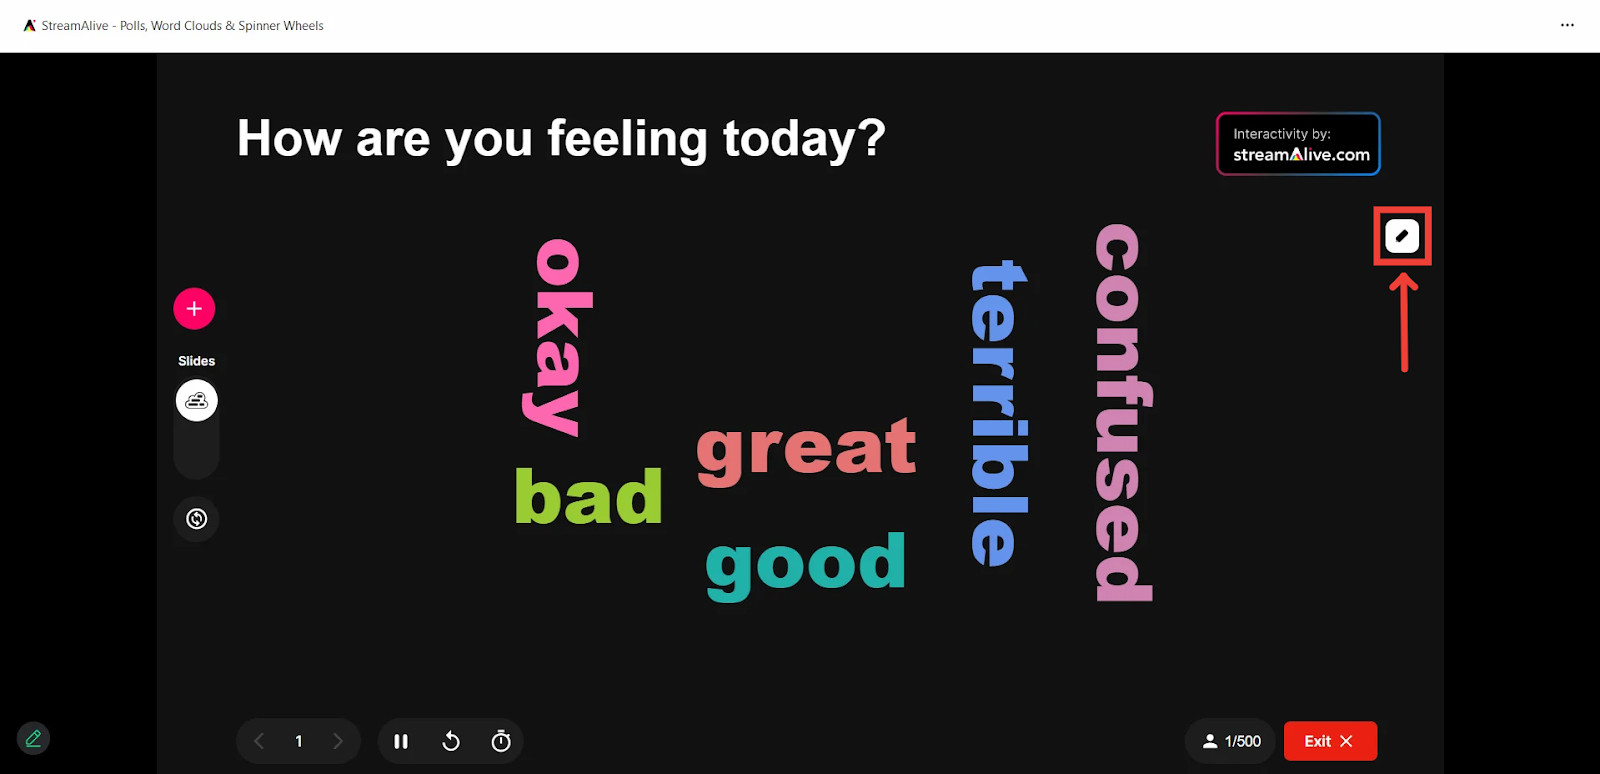
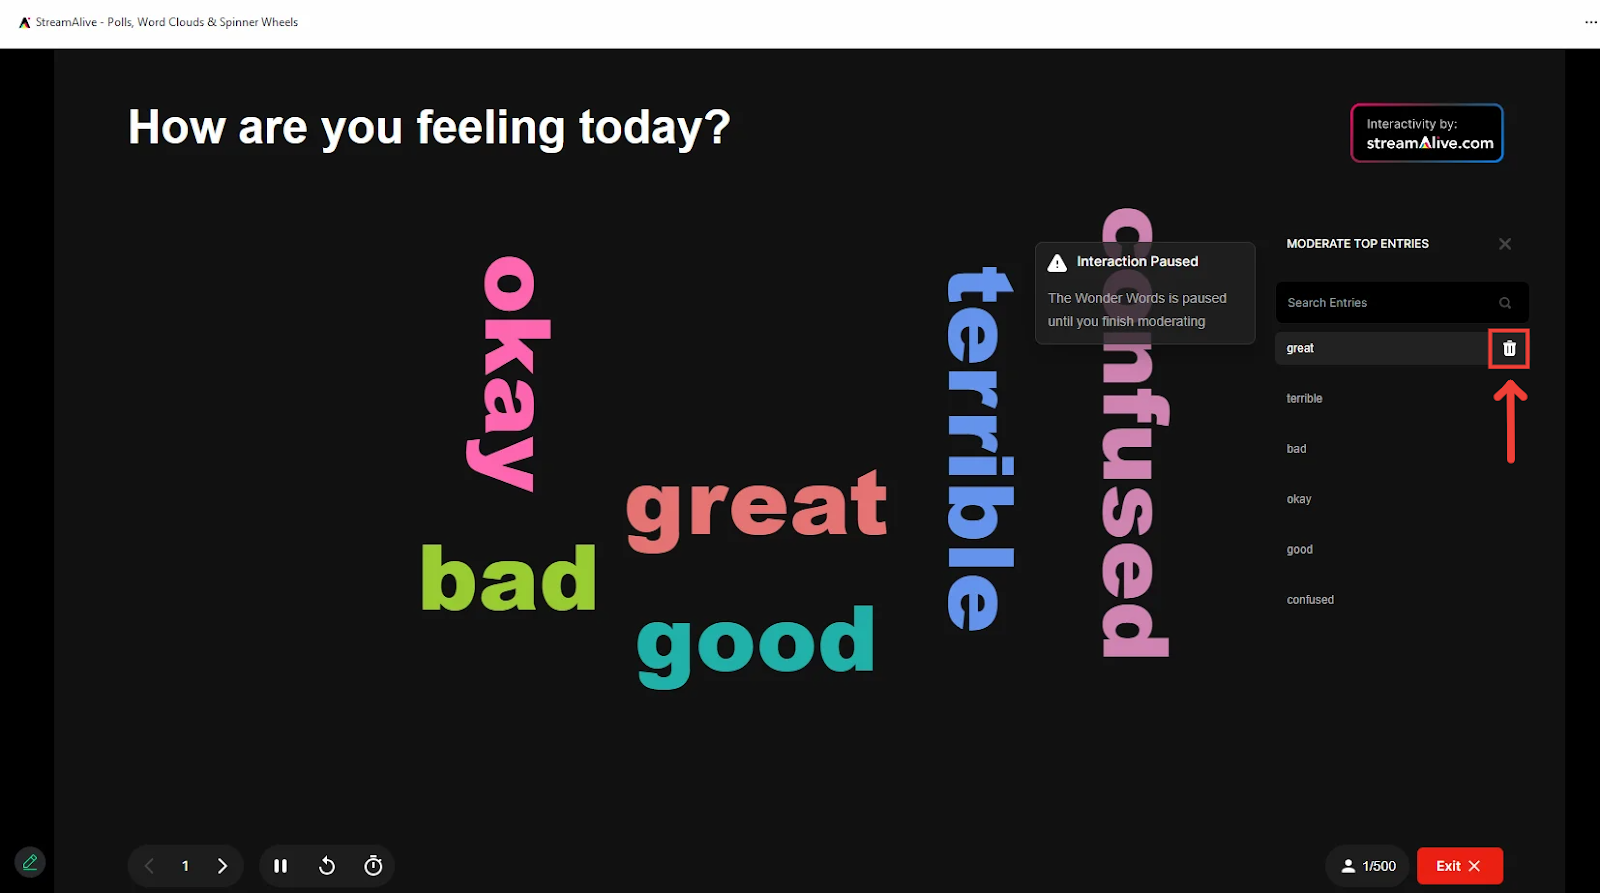
Creating an Ad-hoc Wonder Words
What’s the Purpose of Creating an Ad-Hoc Wonder Words?
An ad-hoc interaction in StreamAlive allows you to launch audience engagement features instantly during your live session, without planning them in advance. This is perfect for capturing spontaneous input and making your session feel more interactive. (If you’re new to ad-hoc interactions, check out this help article for more details.)
Why Use an Ad-Hoc Wonder Words?
While you can add Wonder Words to your presentation ahead of time, running it as an ad-hoc interaction gives you more flexibility to gather audience responses at just the right moment in your session.
For example, if you're discussing a topic and want your audience to quickly share their thoughts, key takeaways, or feelings in one word, you can trigger Wonder Words on the spot. This ensures that the word cloud is built from real-time responses rather than pulling from chat history.
By using an ad-hoc Wonder Words interaction, you can engage your audience in the moment, visualize their collective thoughts, and create a more dynamic discussion.
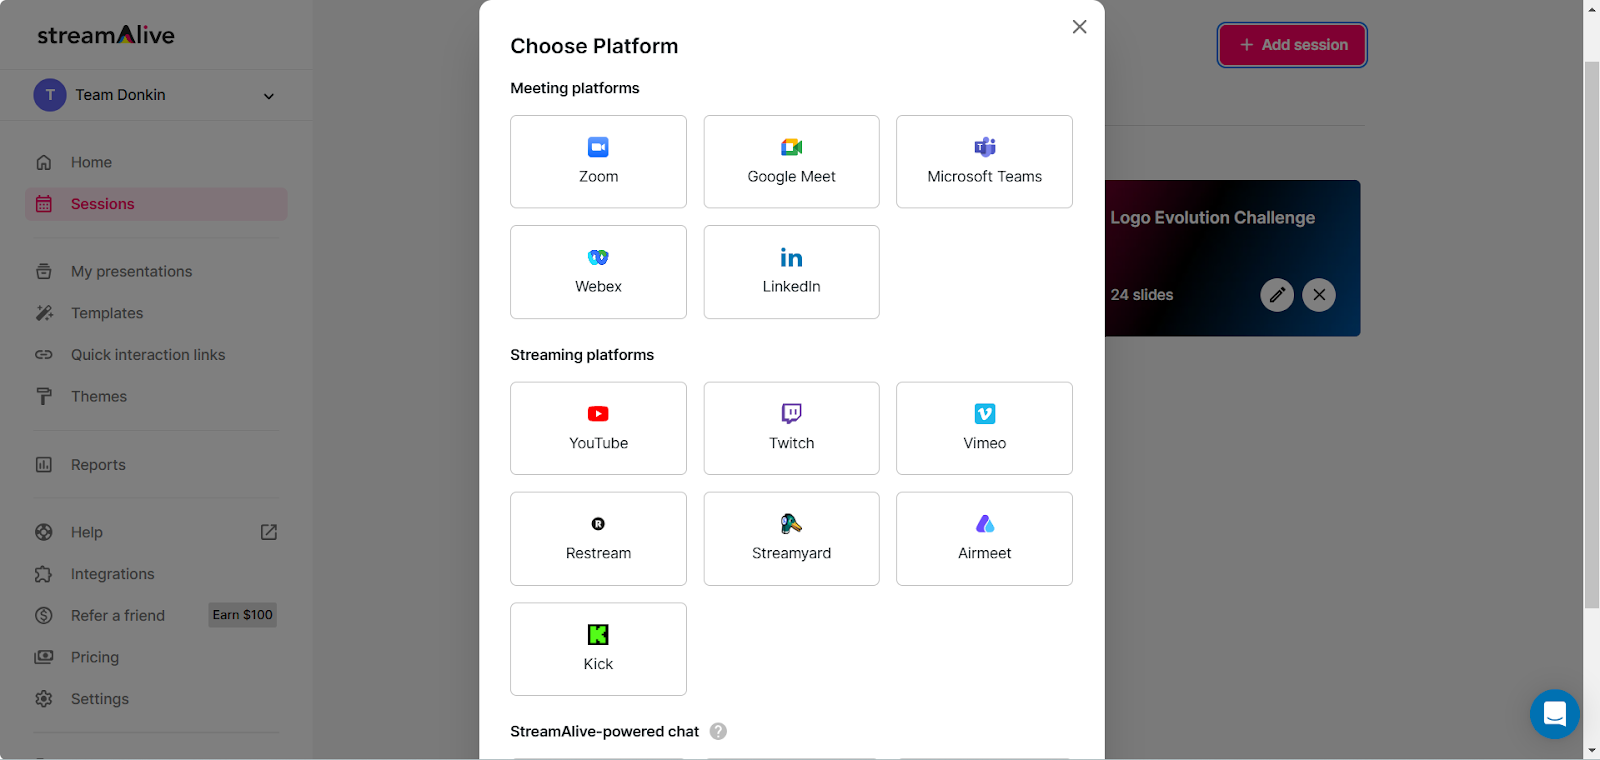
Connect StreamAlive to your session
To learn how to connect to your required platform, click here
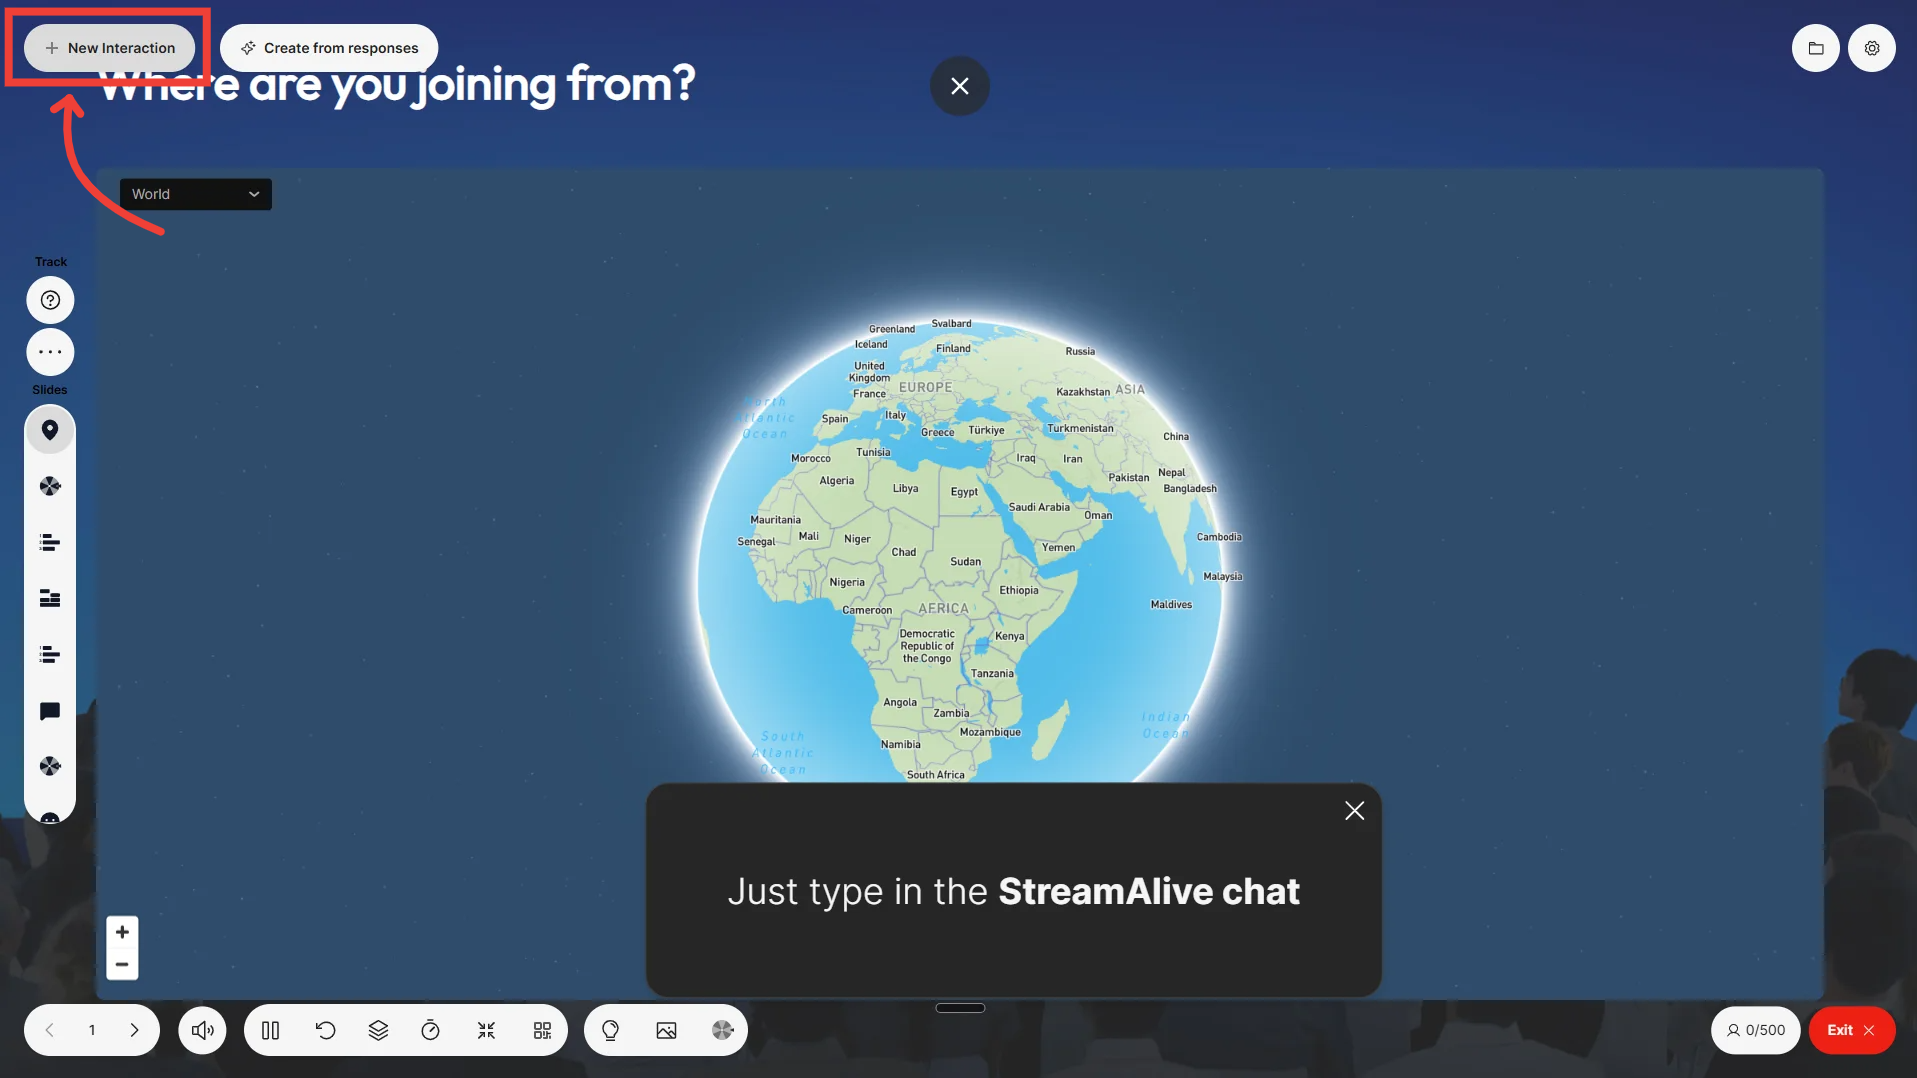
Once you’re connected and on the Presentation Live screen, click on the "+ New Interaction" button
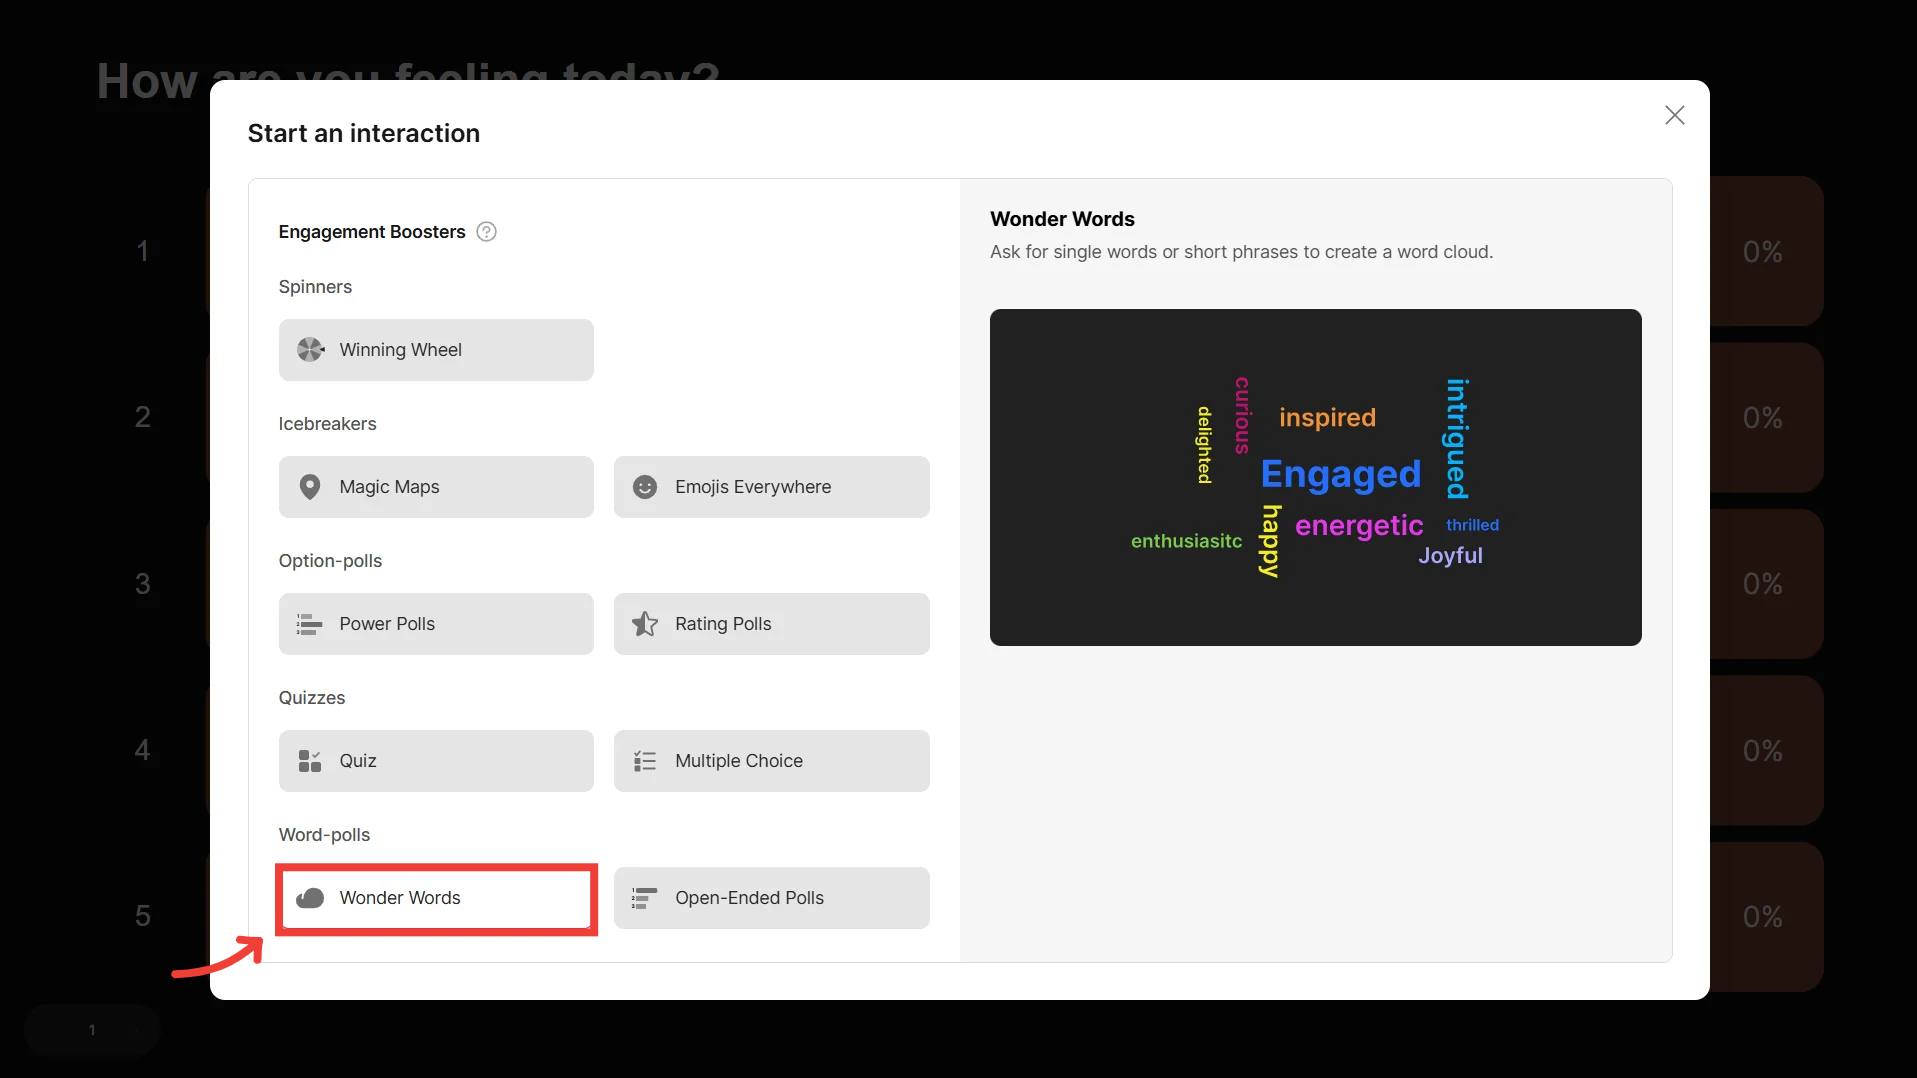
Click on the Wonder Words interaction
Customize your Wonder Words feature [Optional]
Here, edit the heading, configure the word cloud settings, choose a theme, and so on.
Click on Go when done.
Remember: Everyone can see your screen at this point, so don’t spend too long on it. Alternatively, you can plan your map in advance using the presentation builder method discussed in the section above.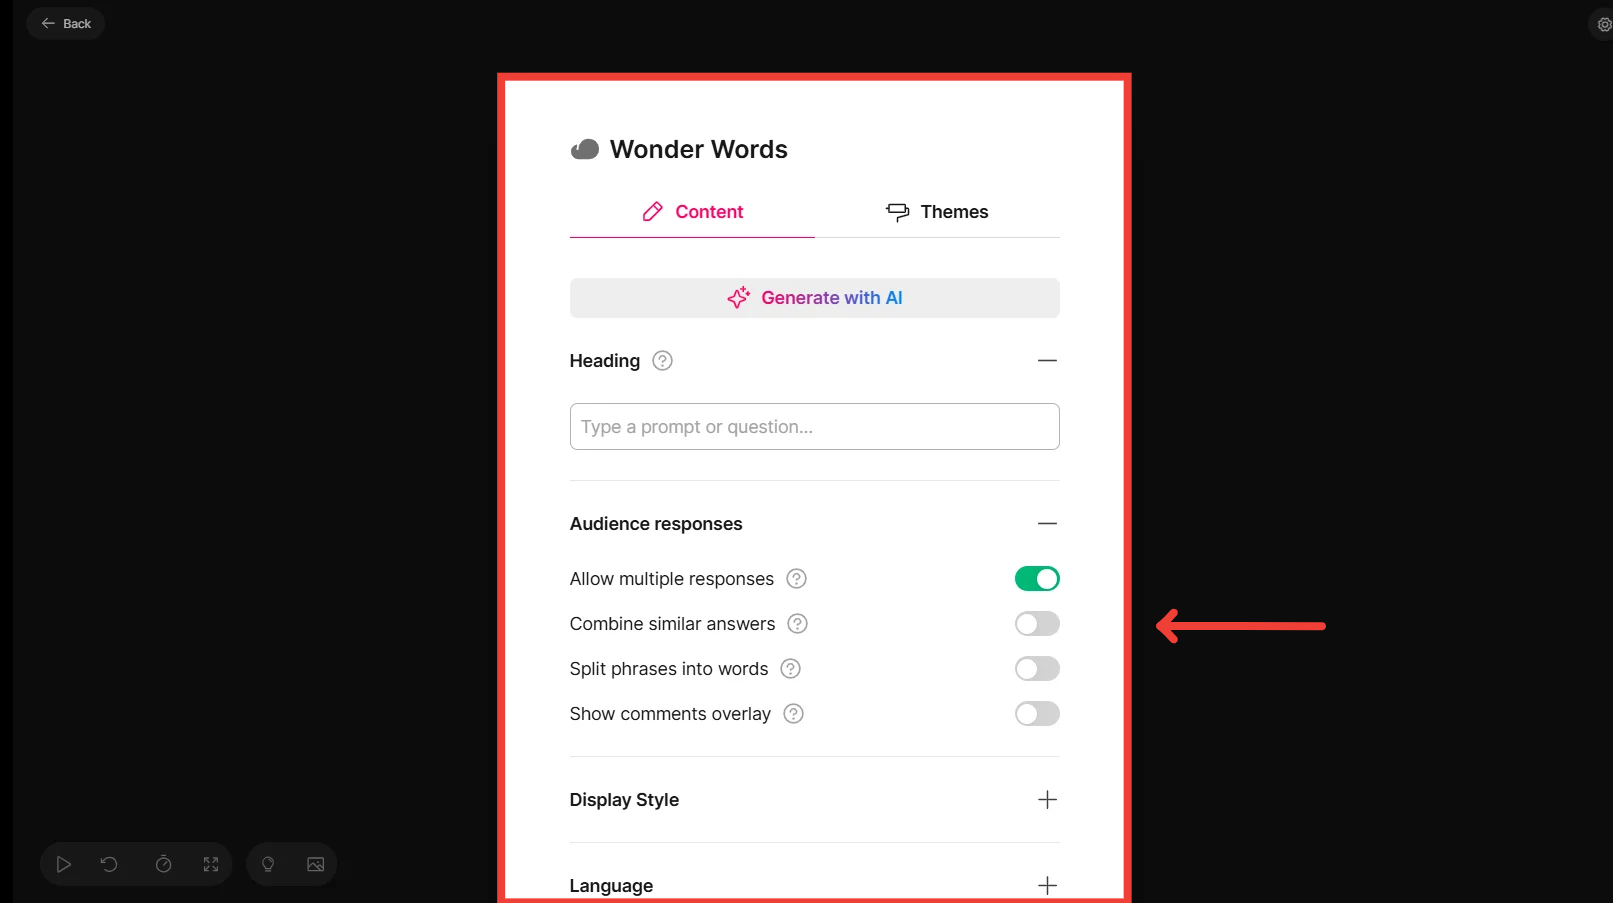
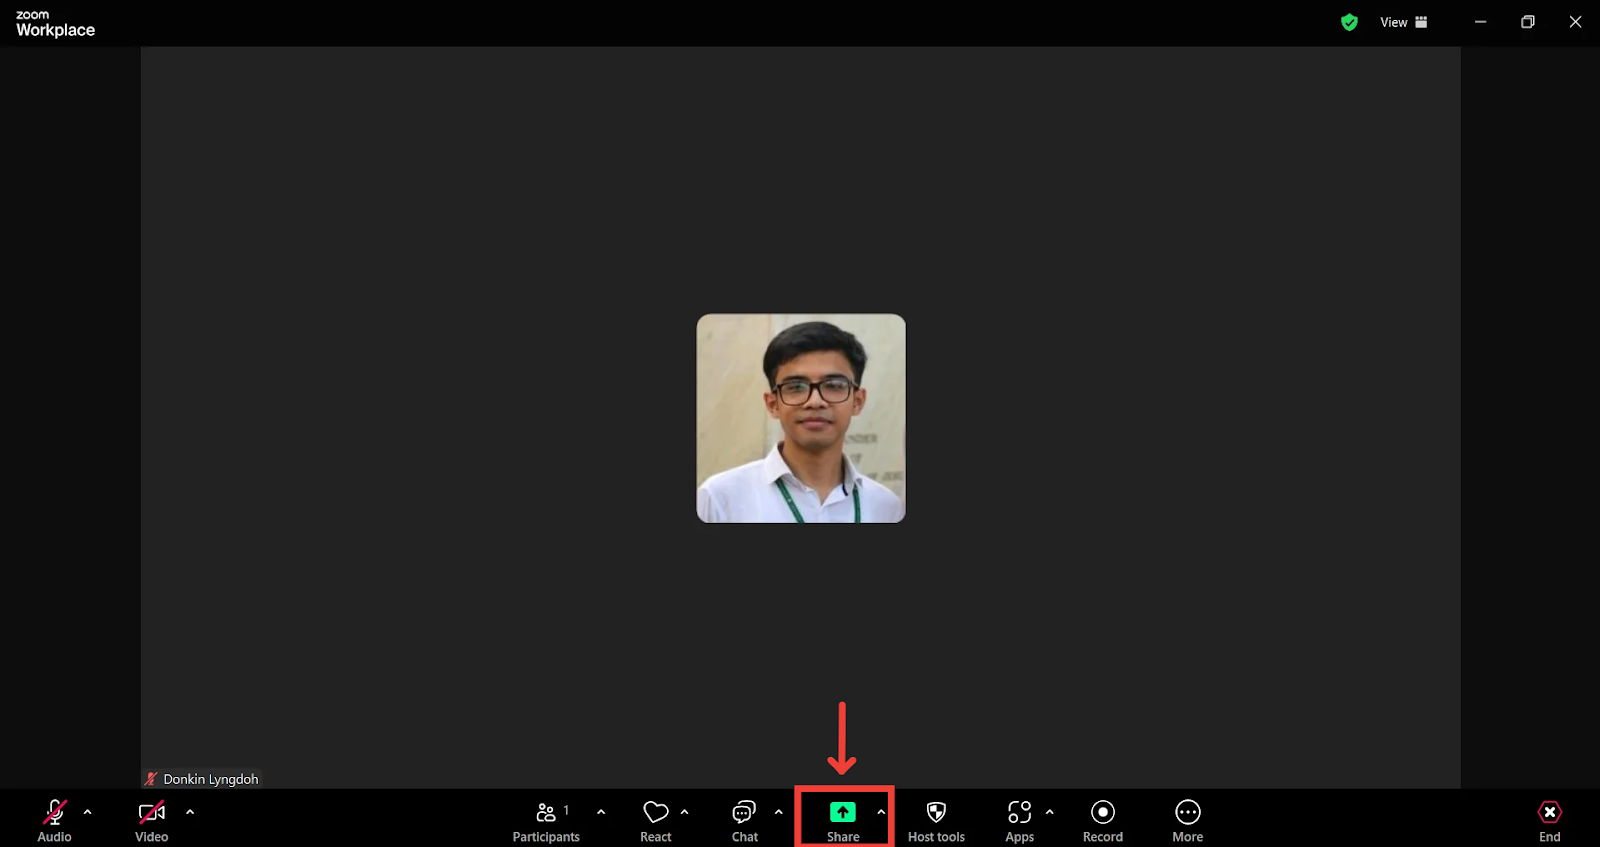
Share the StreamAlive window with your audience (if you are not already)
Ask your audience to start typing in answers in the chat
StreamAlive picks up these answers and powers the interaction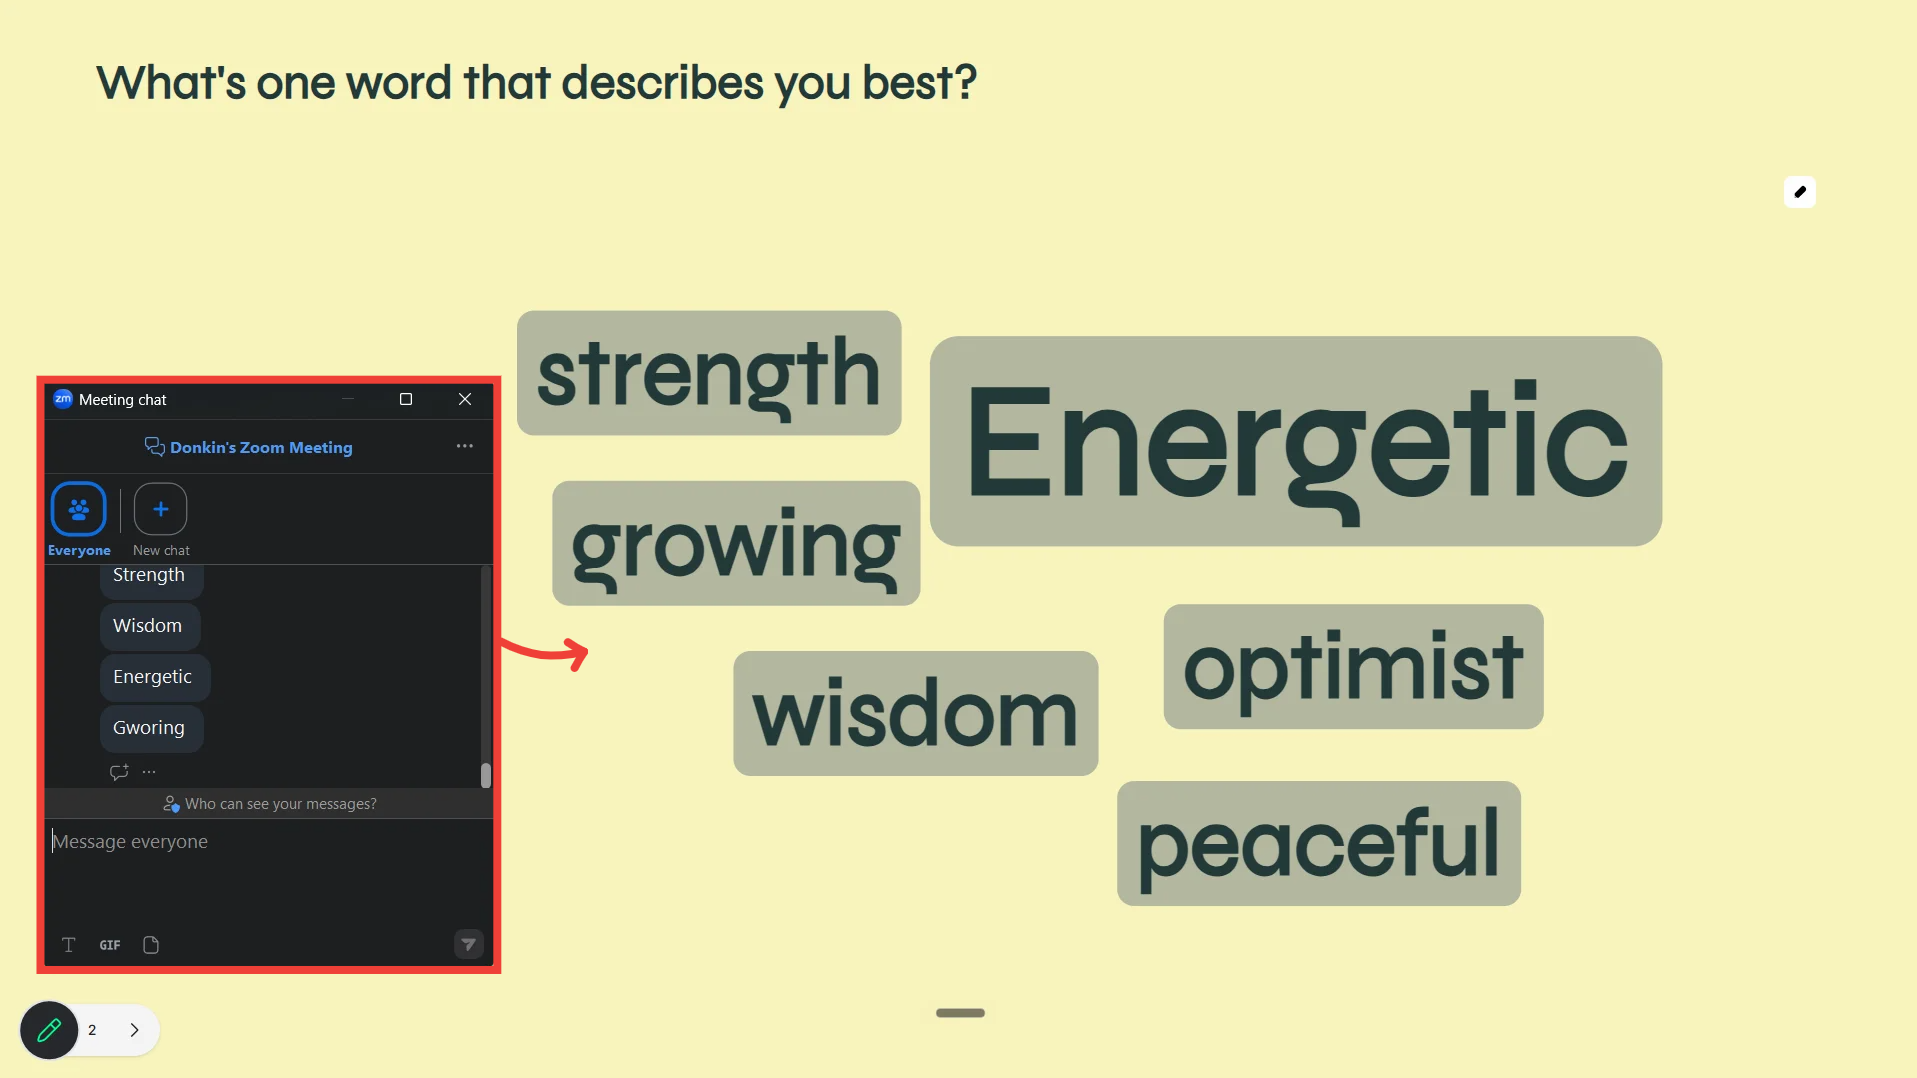
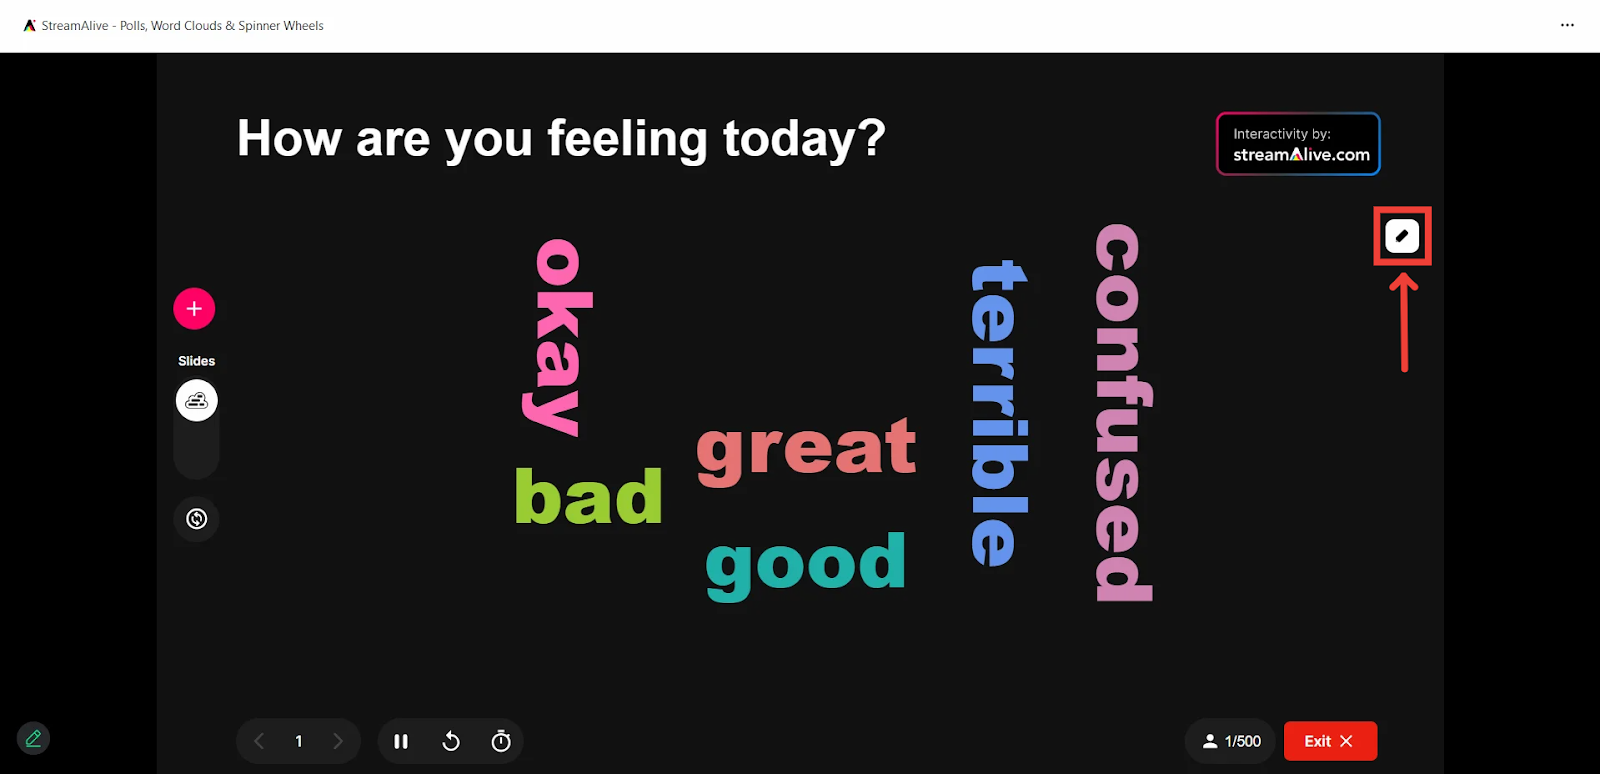
If you’d like to filter out certain words from the word cloud, you can use the moderation feature to hide those words.
Using Quick Interaction links
What’s the Purpose of Using Quick Interaction Links?
Quick Interaction Links in StreamAlive allow you to instantly launch audience engagement features without needing to pre-set them in a presentation. These links provide an easy way to trigger interactions on the fly, making them ideal for spontaneous engagement moments. (If you’re new to quick interactions, check out this help article for more details.)
Why Use Quick Interaction Links?
While you can plan interactions in advance, Quick Interaction Links offer on-the-spot flexibility, allowing you to engage your audience with a single click.
For example, if you need a quick audience check-in, you can instantly launch a poll, word cloud, or Q&A without interrupting the flow of your session.
By using Quick Interaction Links, you can seamlessly trigger interactions at the right moment, ensuring real-time engagement while keeping your session dynamic and interactive.
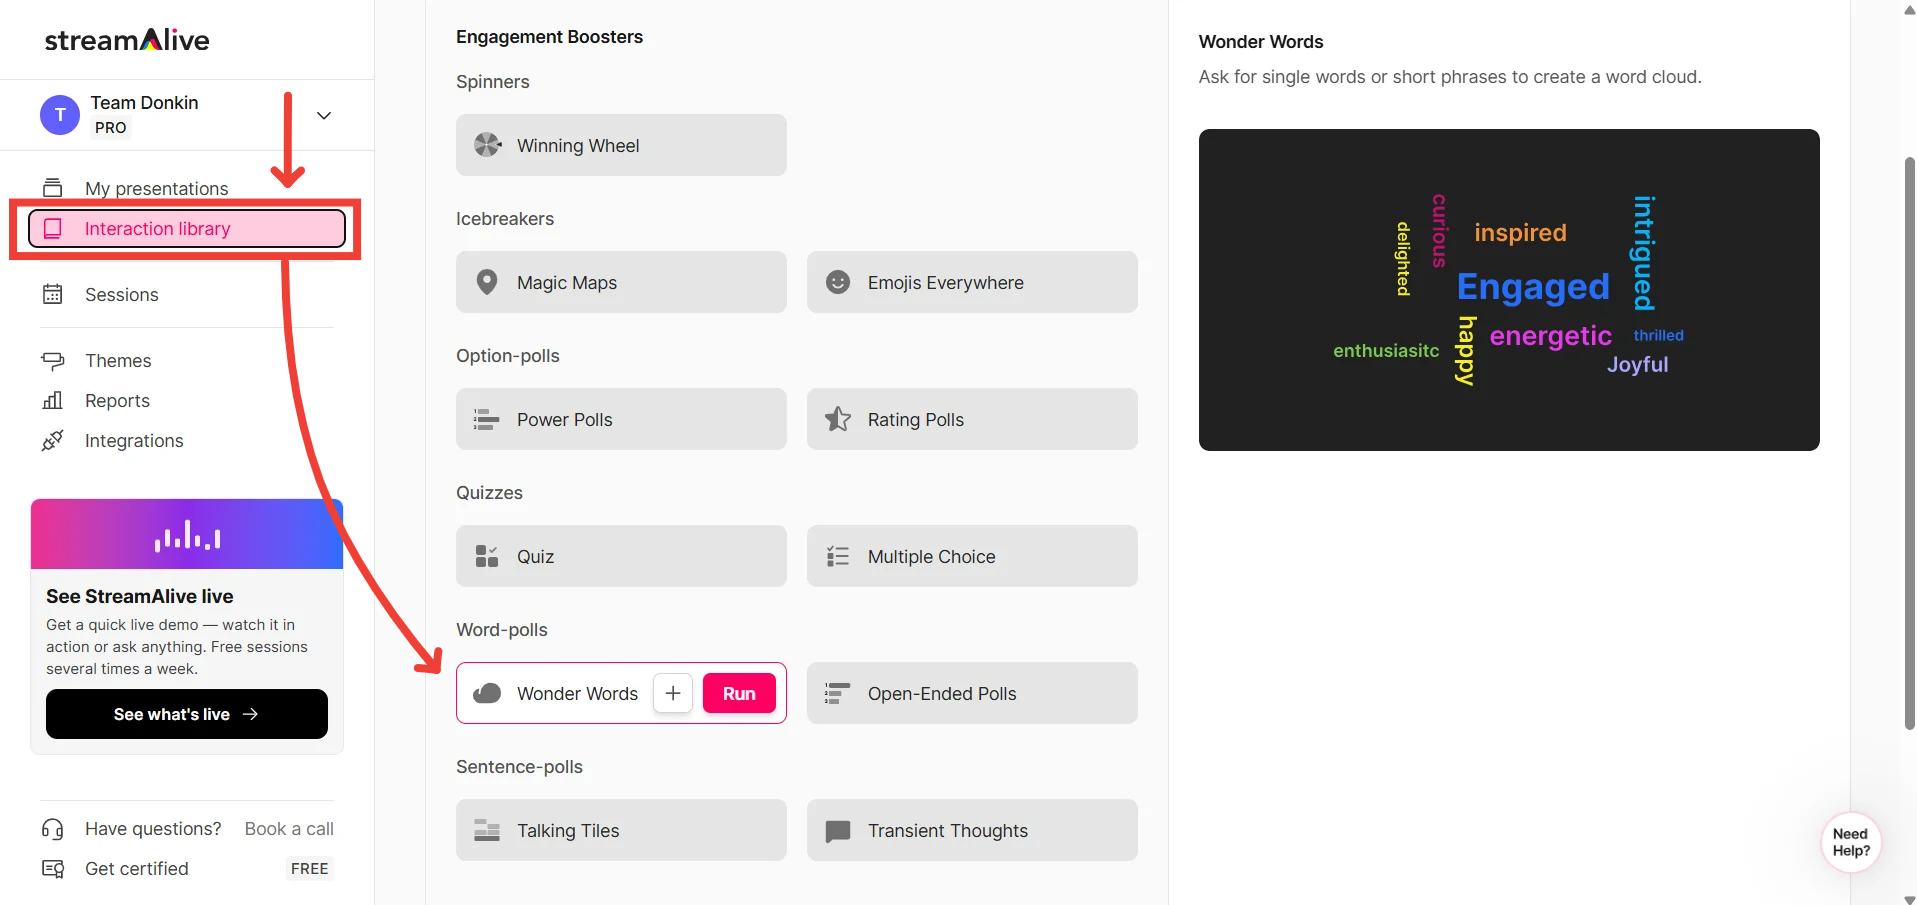
Go to the Interaction Library tab and click on "Run" next to Wonder Words
You’ll then be taken to the Presentation Live Screen where you can edit the word cloud interaction.
Here, edit the heading, configure the interaction settings, choose a theme, and so on.
Click on Go when done.
Remember: Everyone can see your screen at this point so don’t spend too long on it. Alternatively, you can plan your map in advance using the presentation builder method discussed in the section above.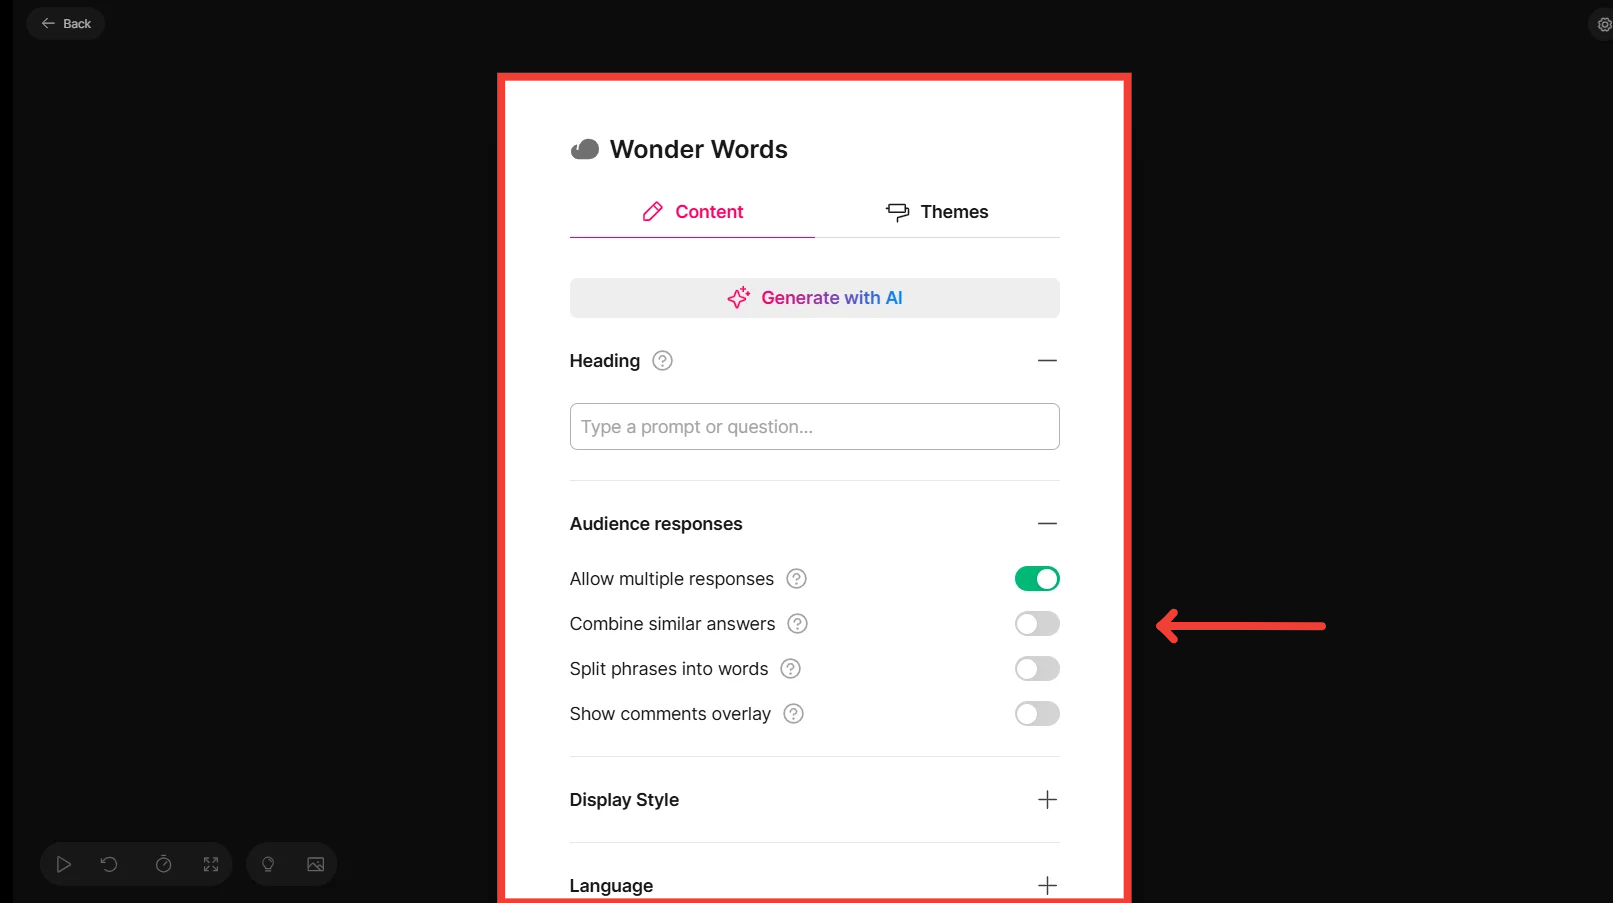
Now, connect StreamAlive to your session
To learn how to connect to your required platform, click here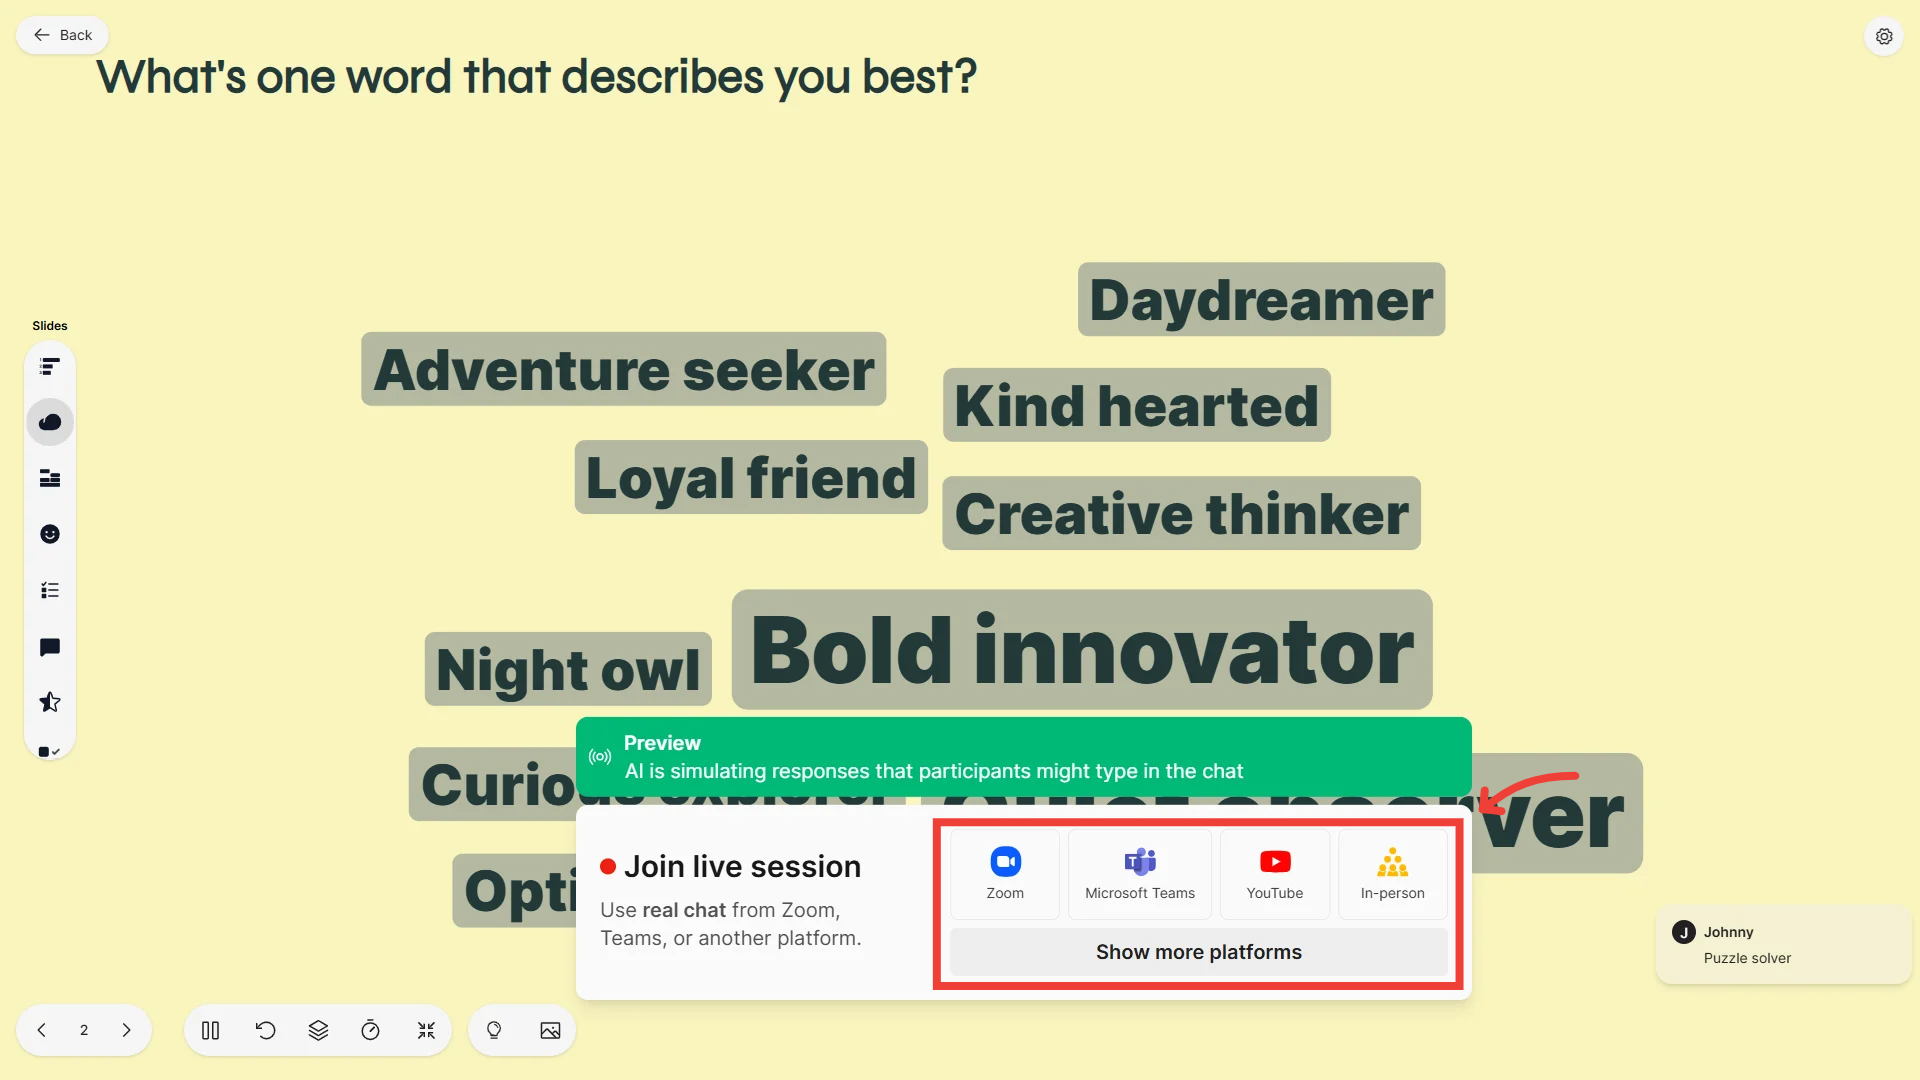
A pop-up asking you to admit the bot will appear (In cases like Zoom with the waiting room disabled, or YouTube/Twitch and similar platforms, it will join automatically)
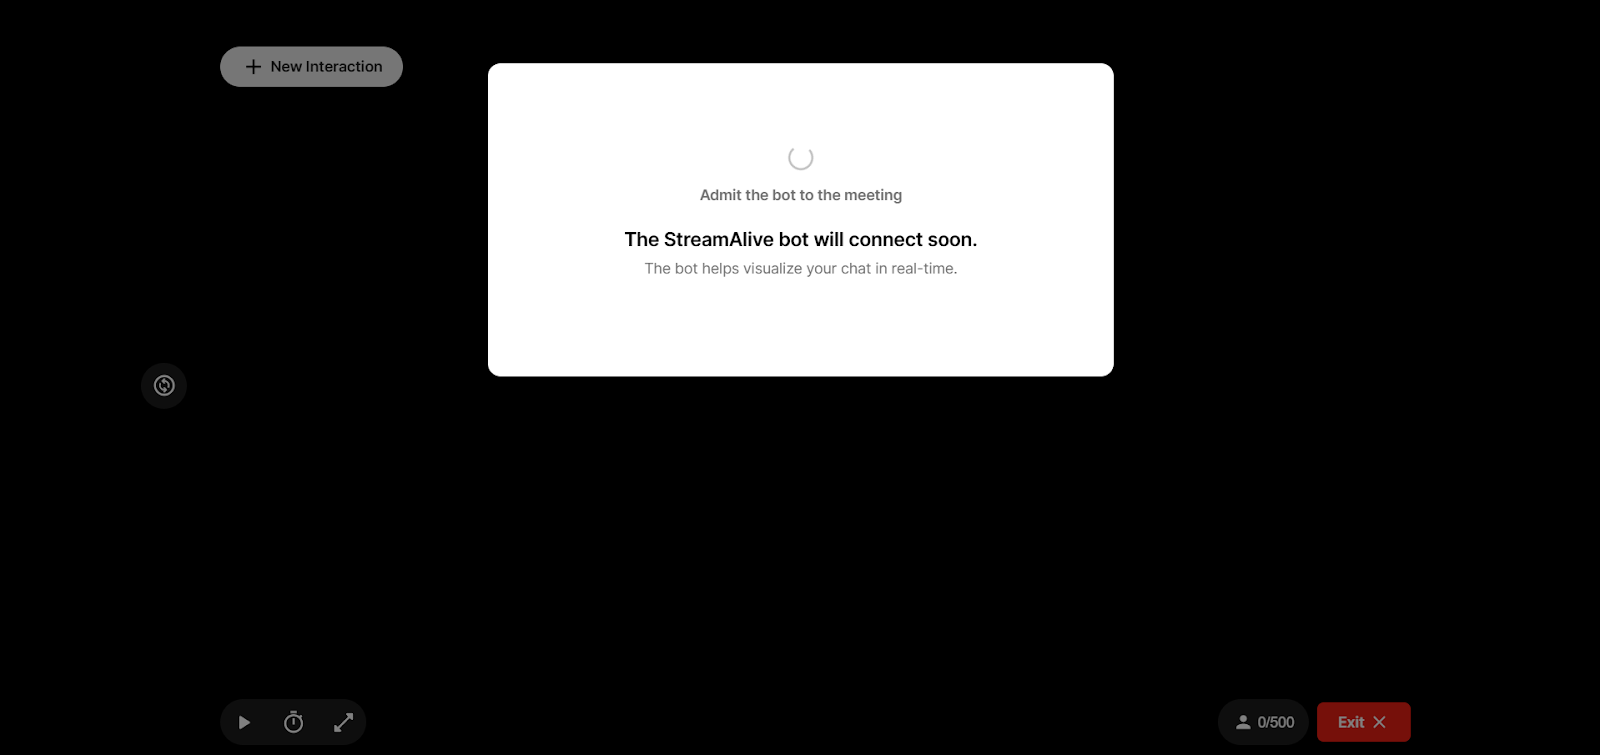
Go to your live session and admit the bot.Share the StreamAlive window to your audience (if you haven’t already done so)
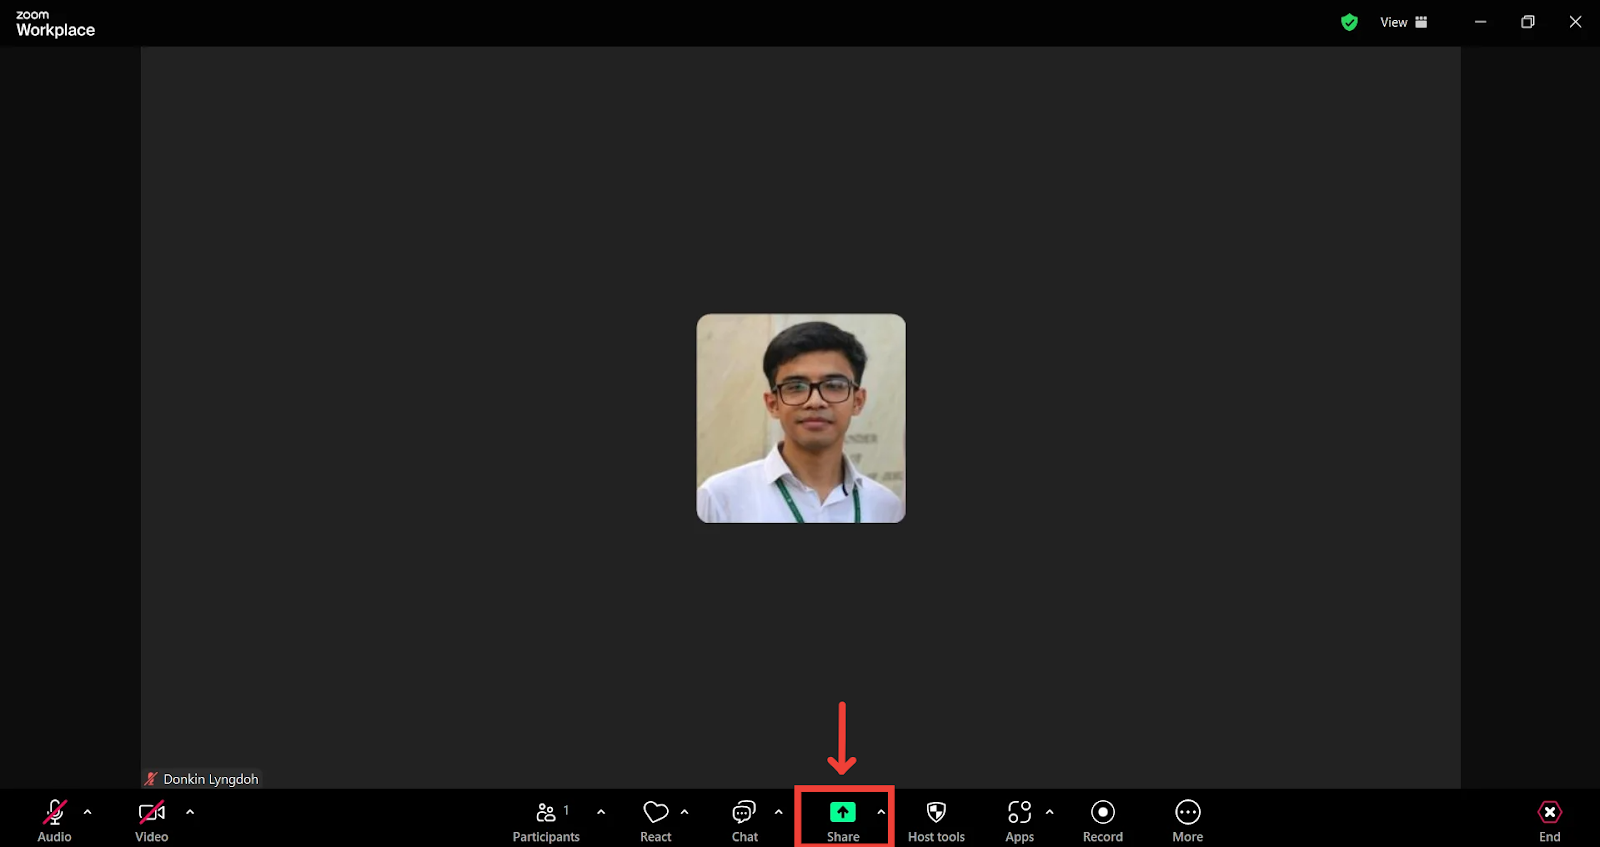
Ask your audience to start typing in answers in the chat
StreamAlive picks up these answers and powers the interaction in real time
If you’d like to filter out certain words from the word cloud, you can use the moderation feature to hide those words.
Learn how to use the Presentation Live screen to manage your interactions during your live session.
Was this helpful?
Still need help? Ask the team